Set up and manage Class Bookings
Import a weekly timetable, add classes manually, and manage member bookings and dated sessions.
Step-by-step guide
Follow these steps, then download the PDF to keep.
- 1
Open Pages
Open Pages in your app editor and select Add Page or Function.

- 2
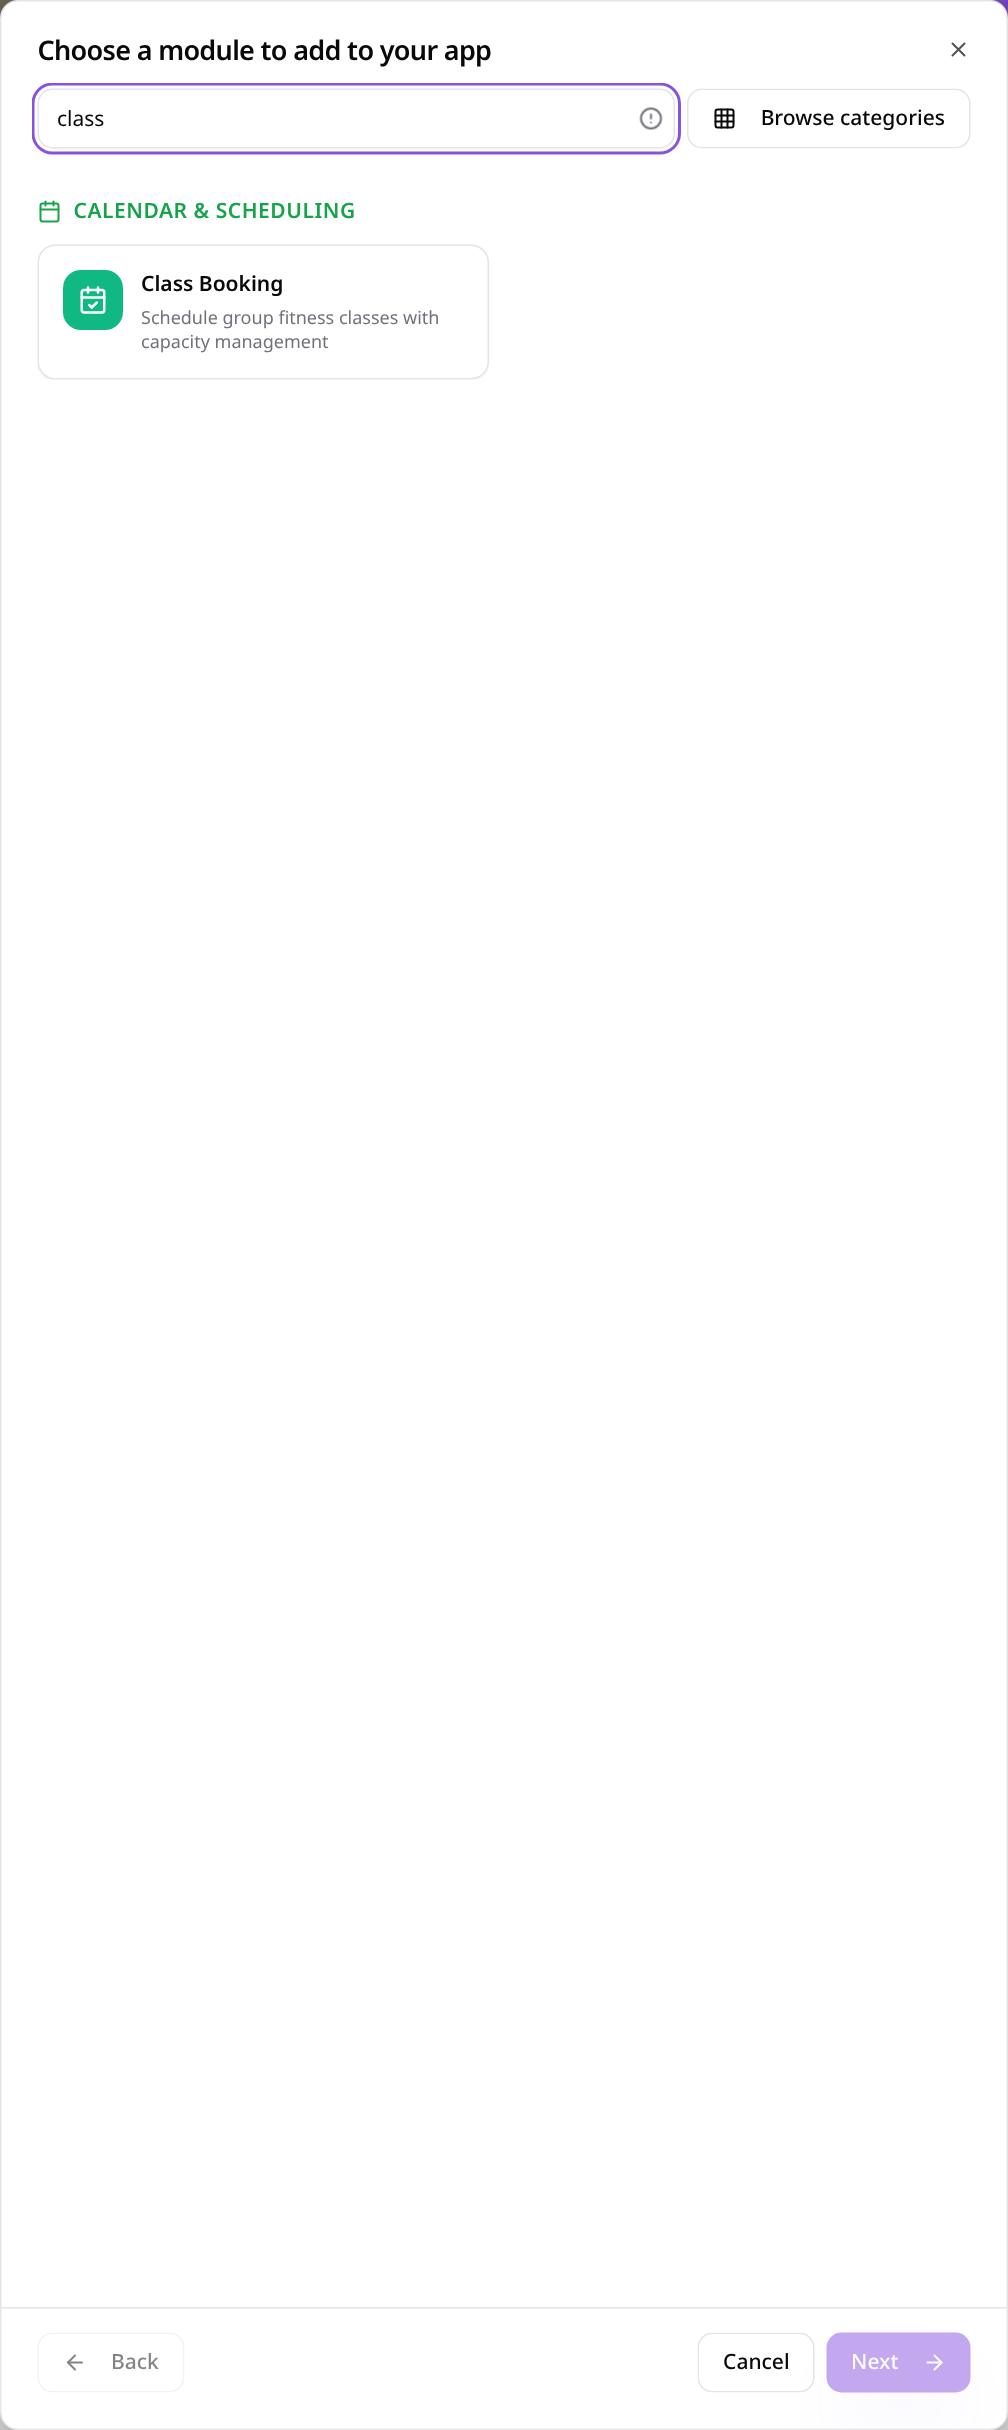
Choose Class Booking
Search for class and select Class Booking.
- 3
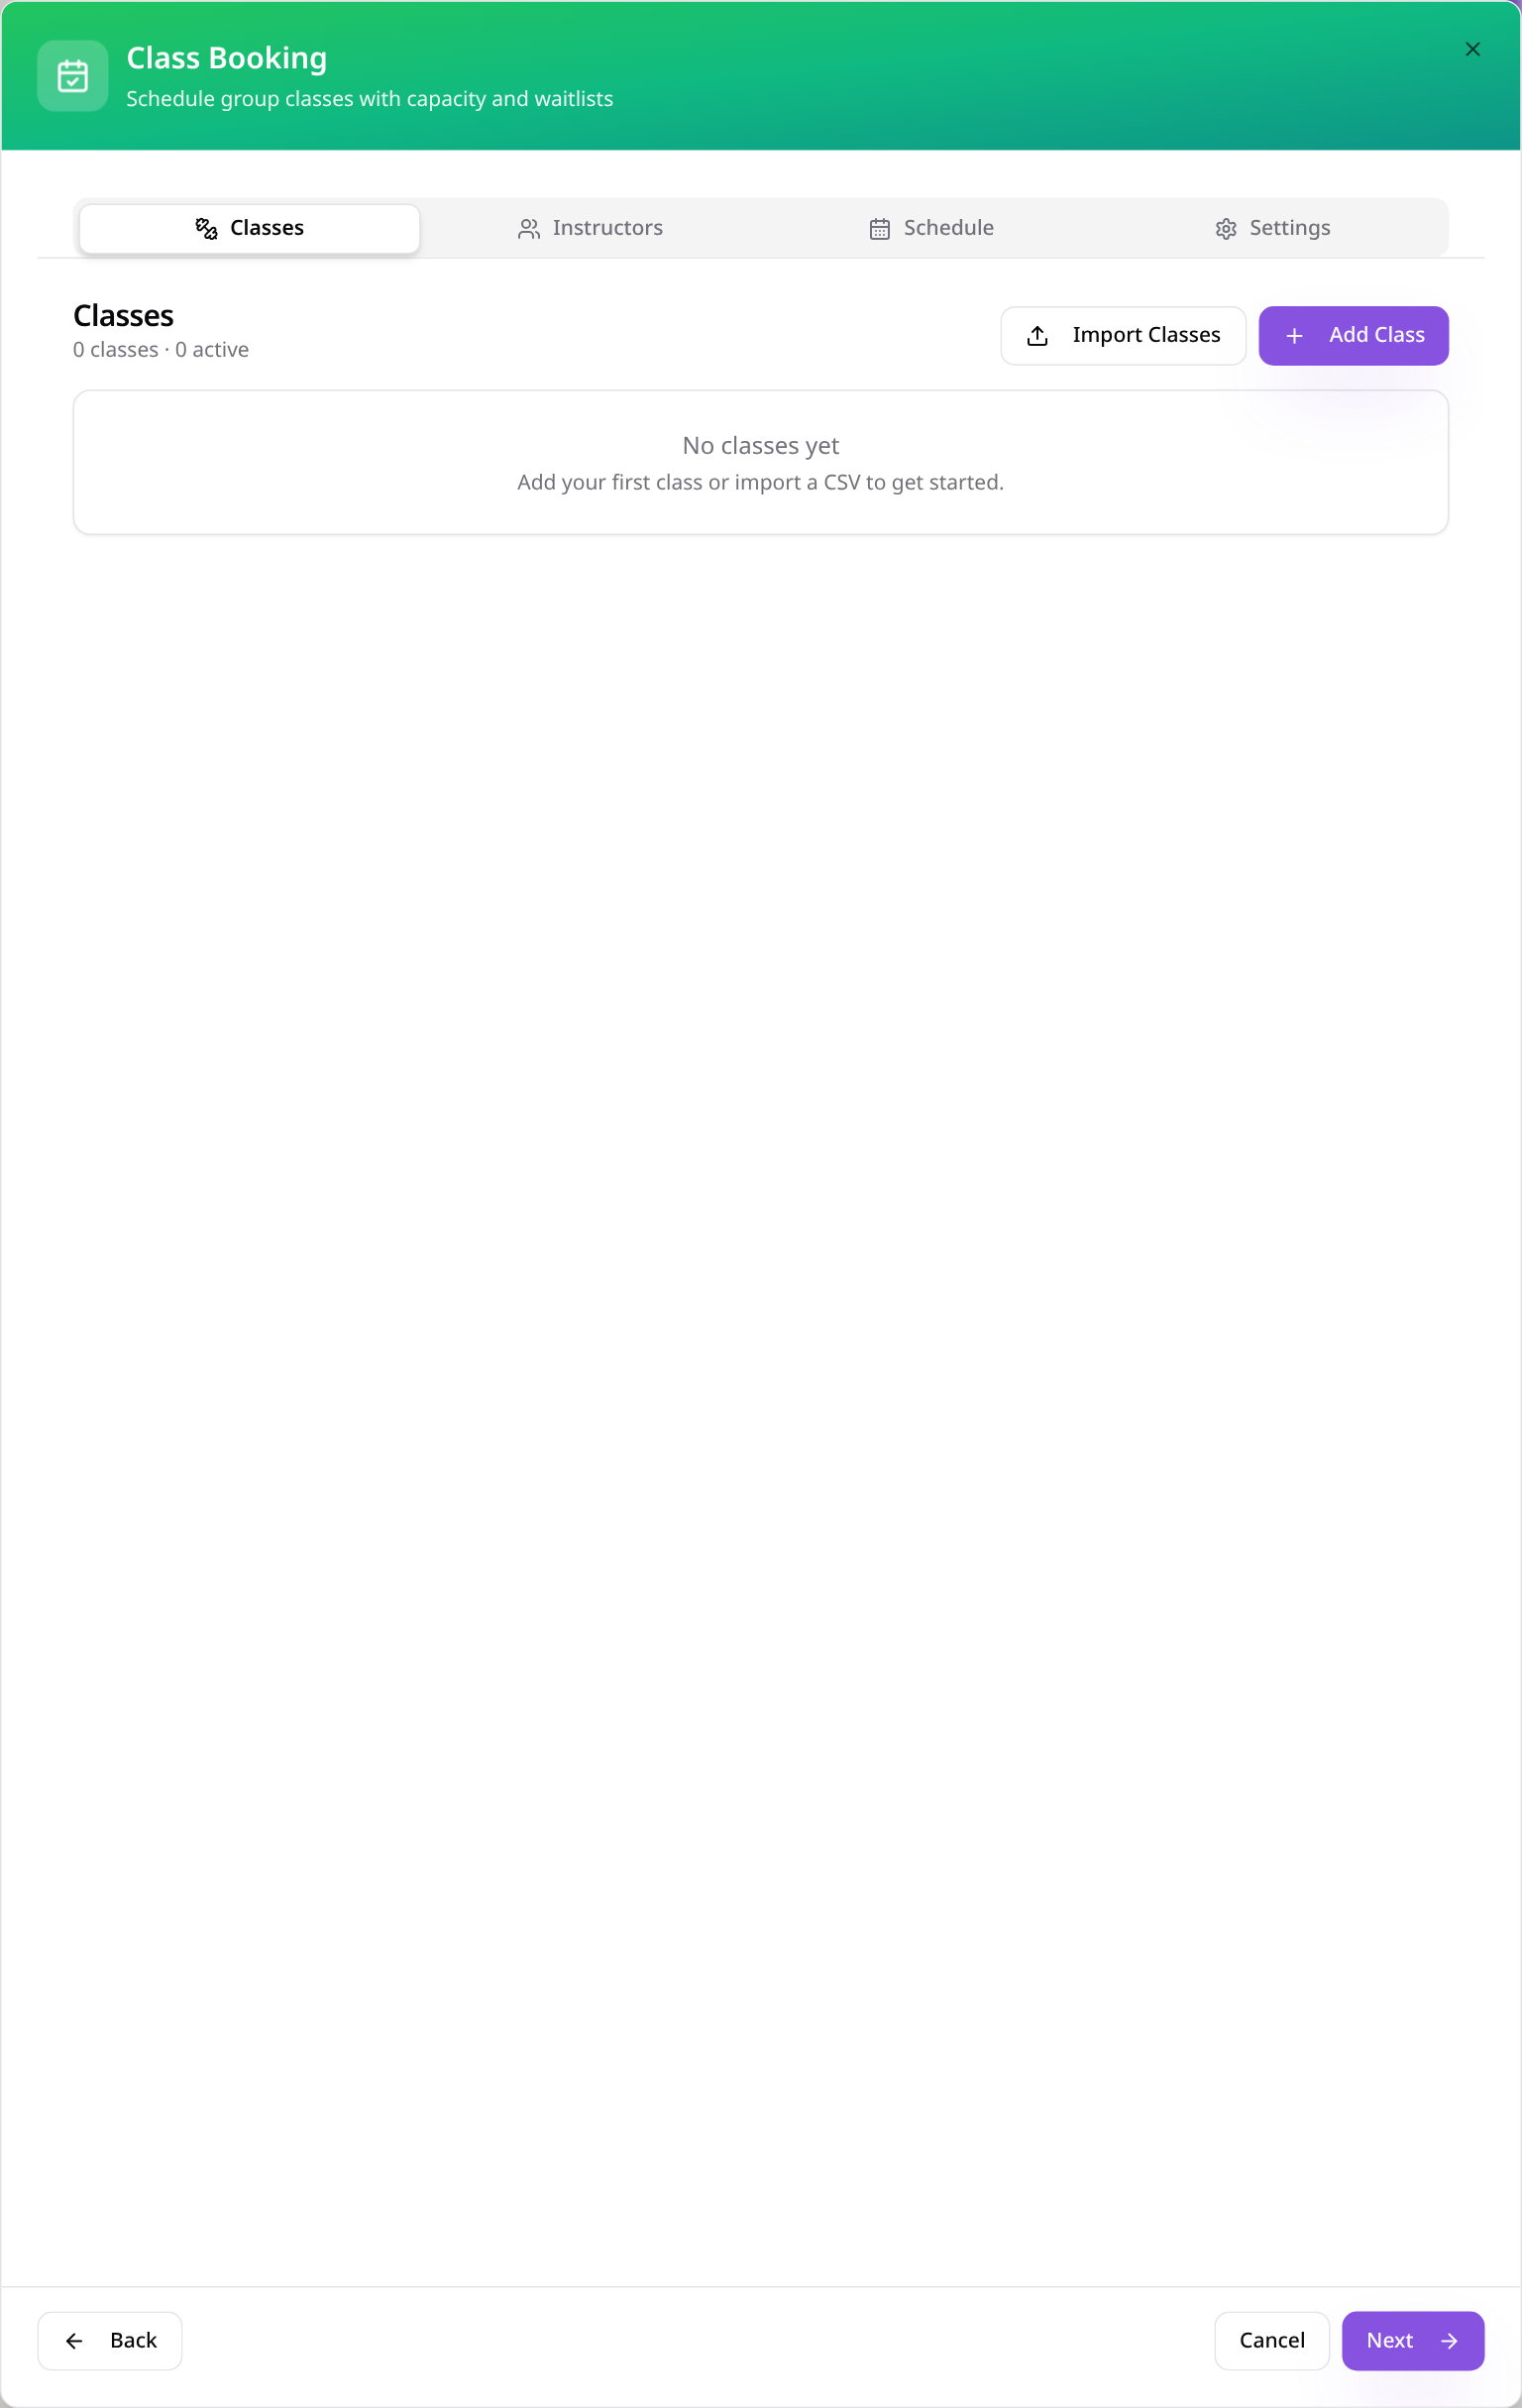
Choose import or manual entry
Start with Import Classes for a CSV, or Add Class for manual entry.
- 4
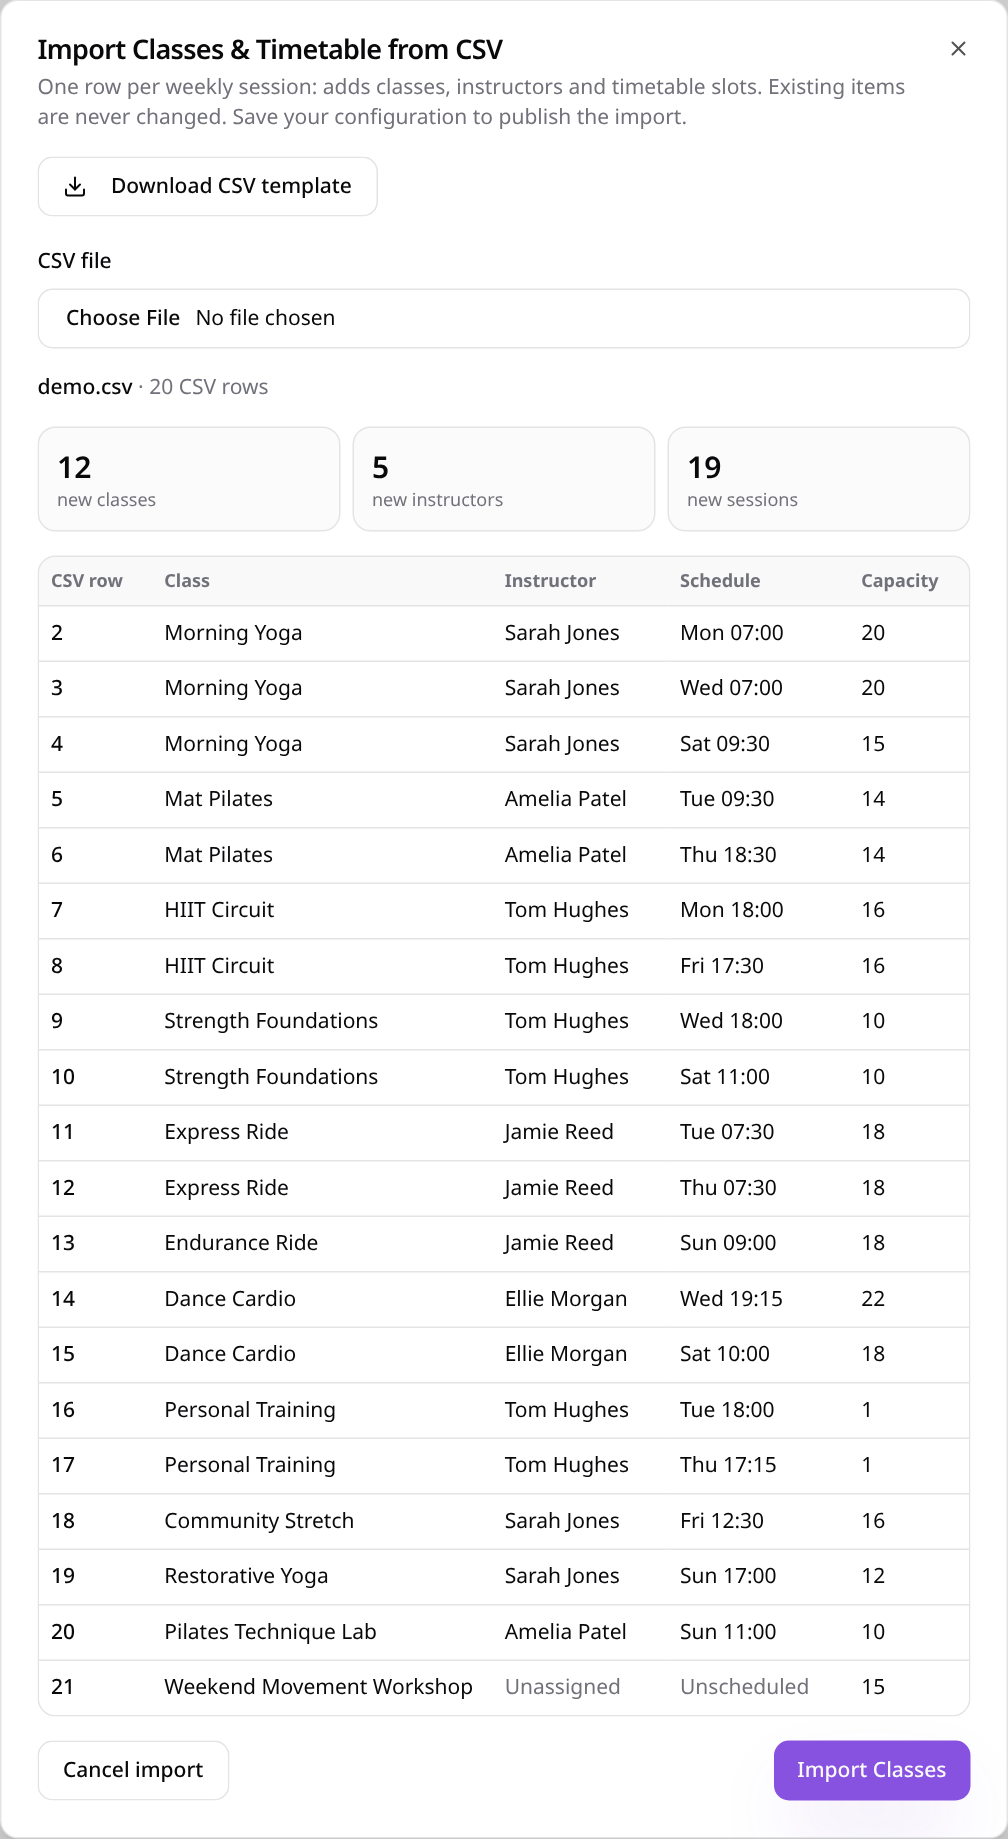
Review the CSV
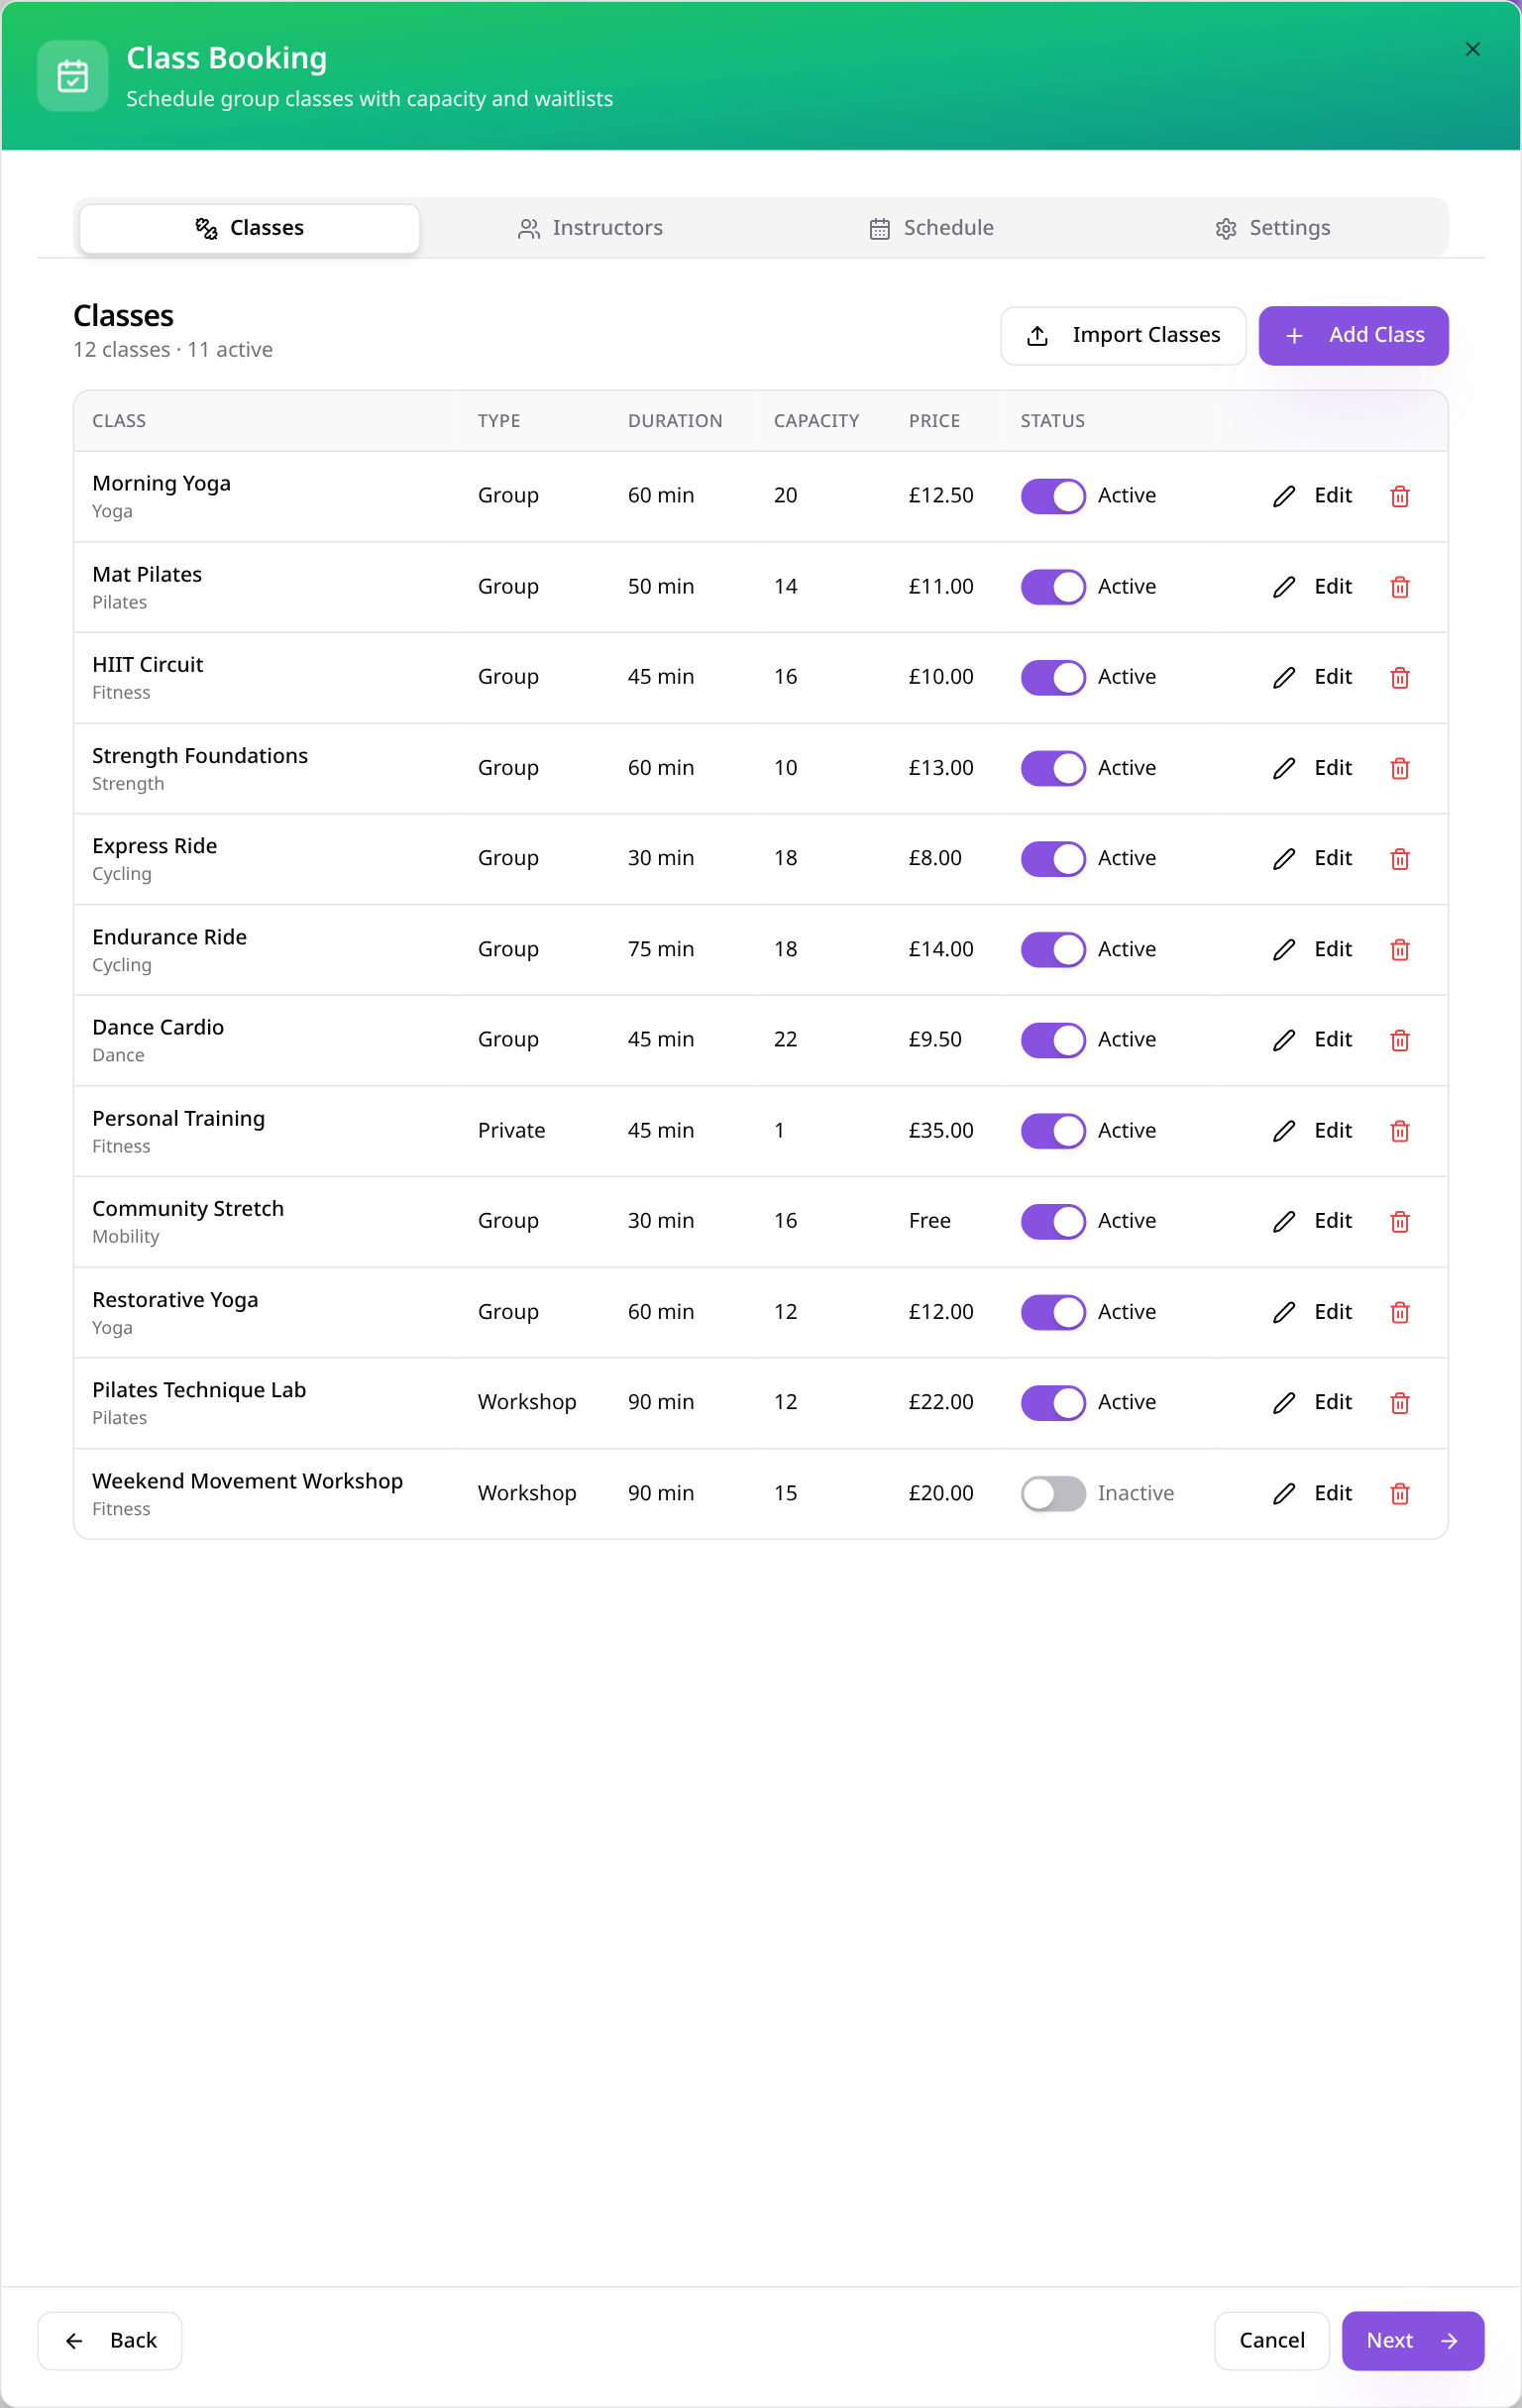
The supplied CSV adds 12 classes, 5 instructors and 19 weekly sessions; review each row before importing.
- 5
Check the imported list
Imported classes remain a draft until the configuration is saved; the future workshop stays inactive.
- 6
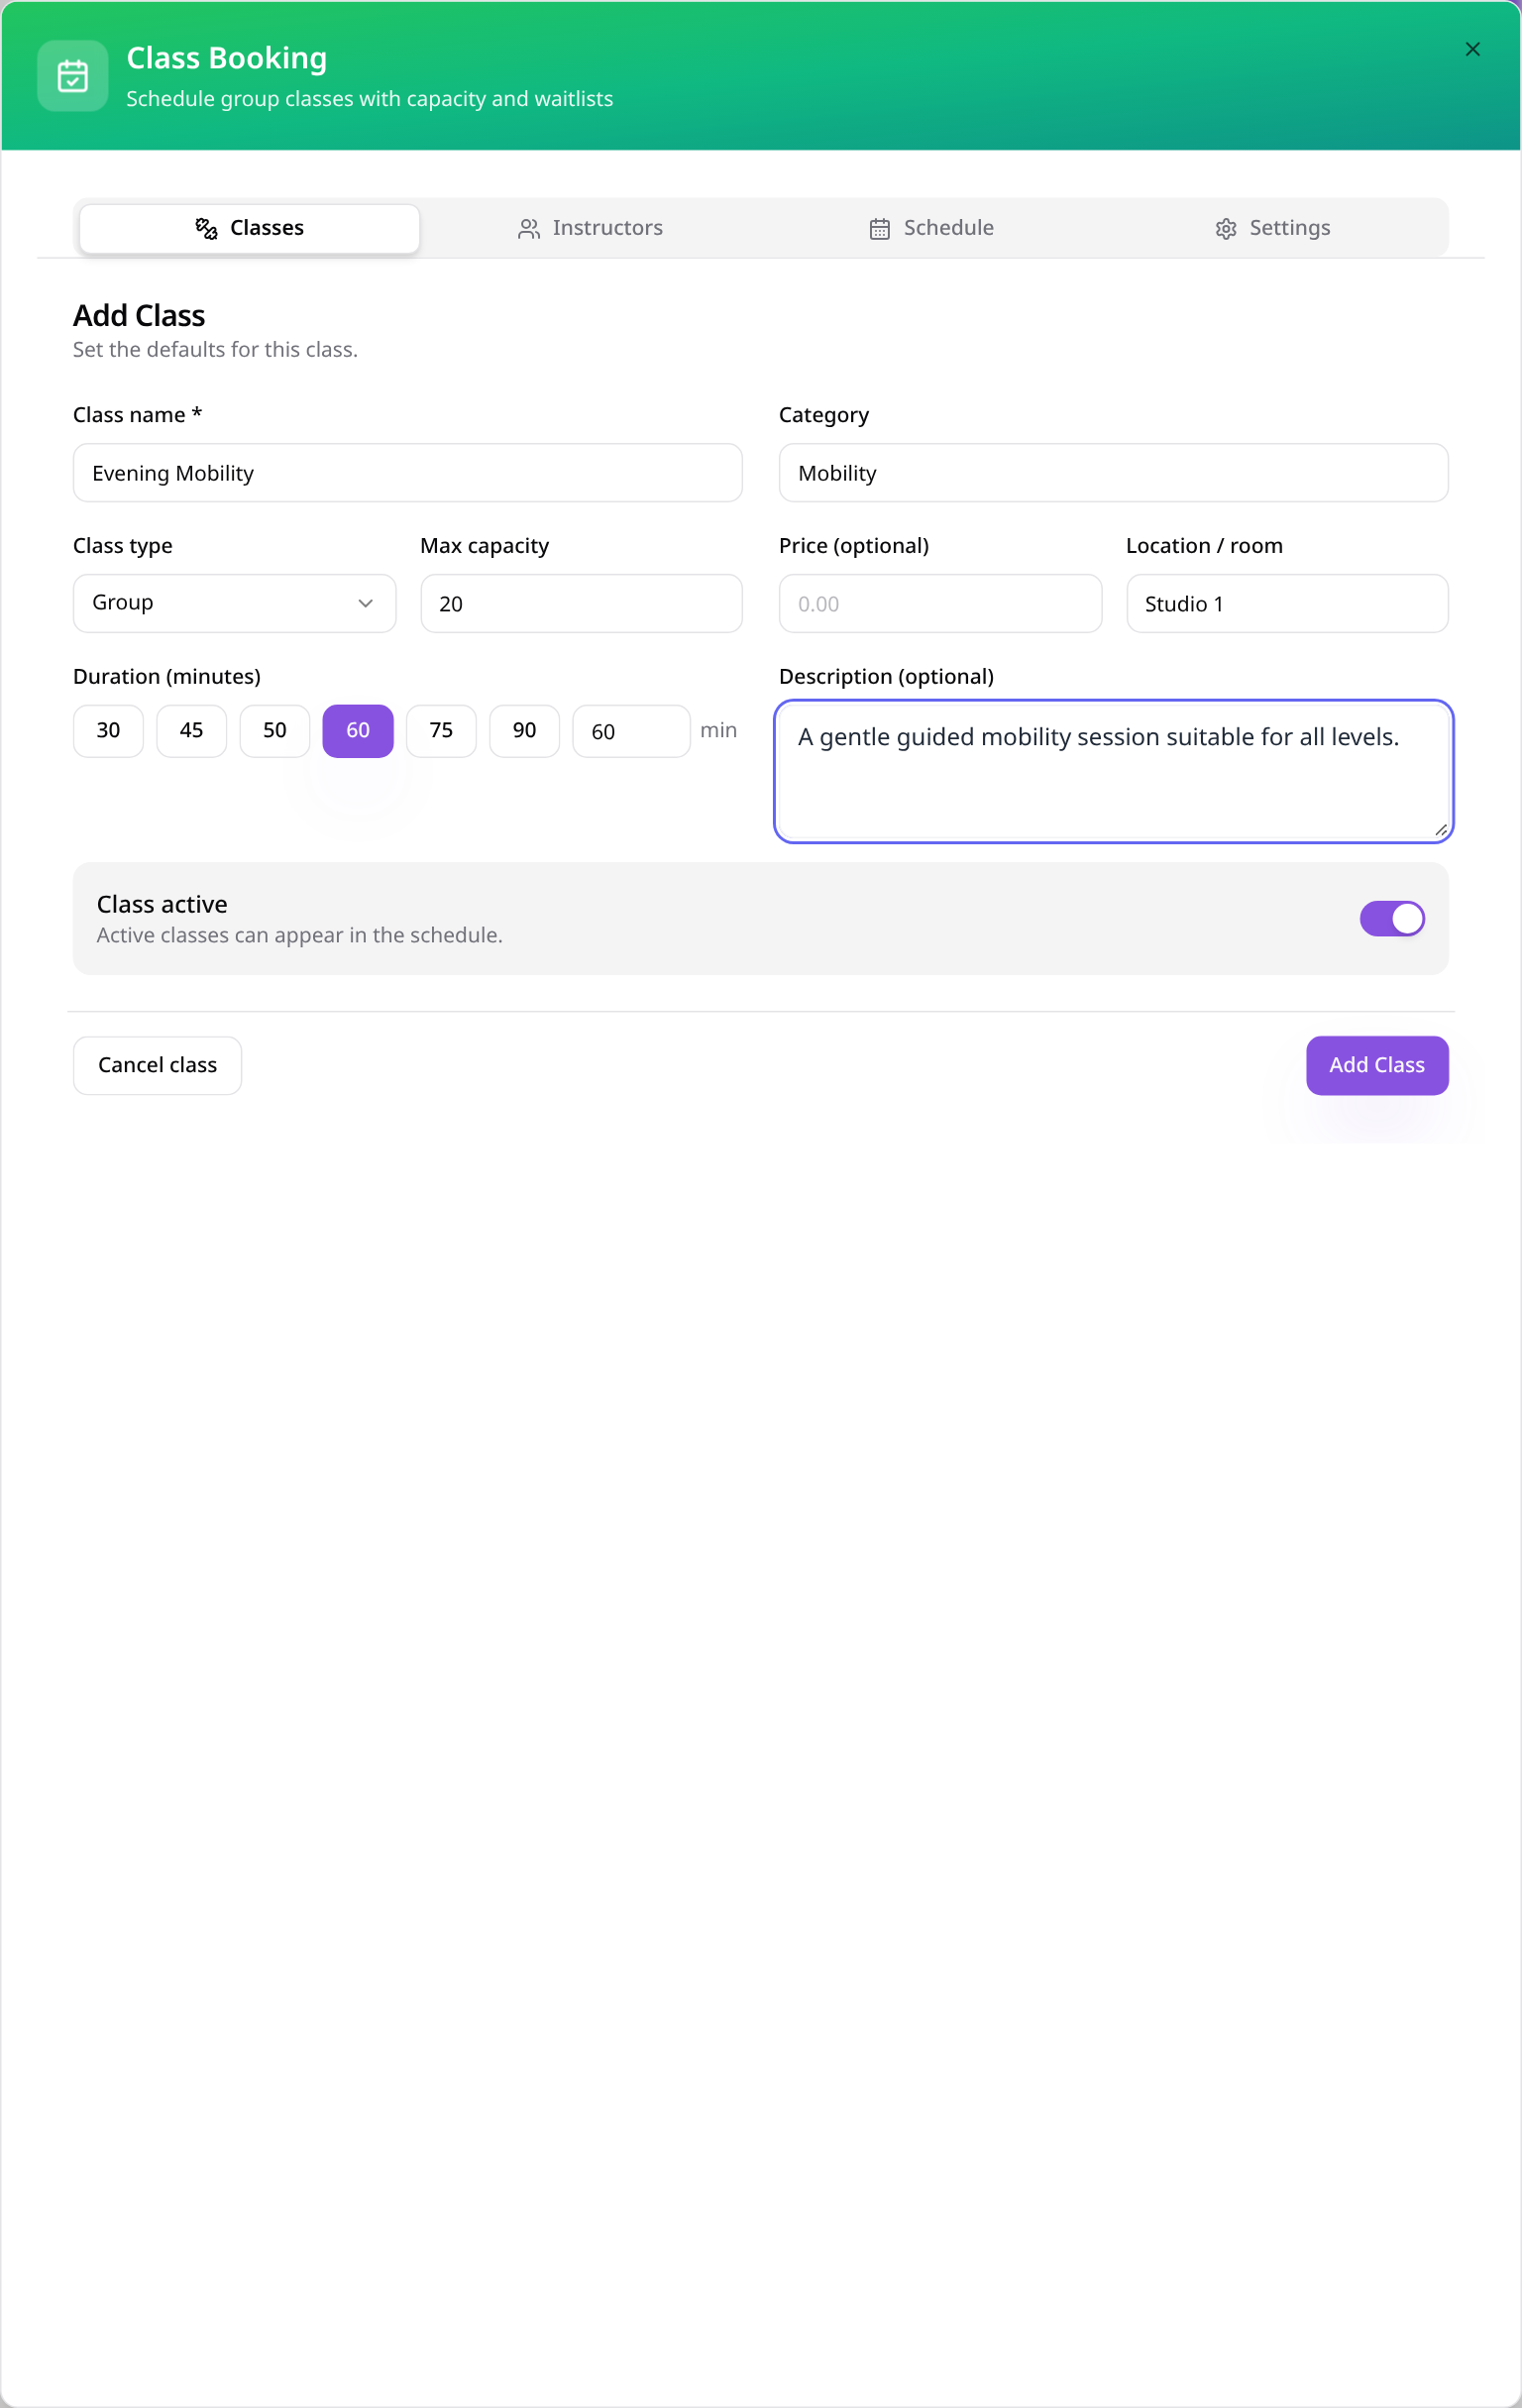
Add a class manually
Enter the class name, category, duration, capacity, location and description, then select Add Class.
- 7
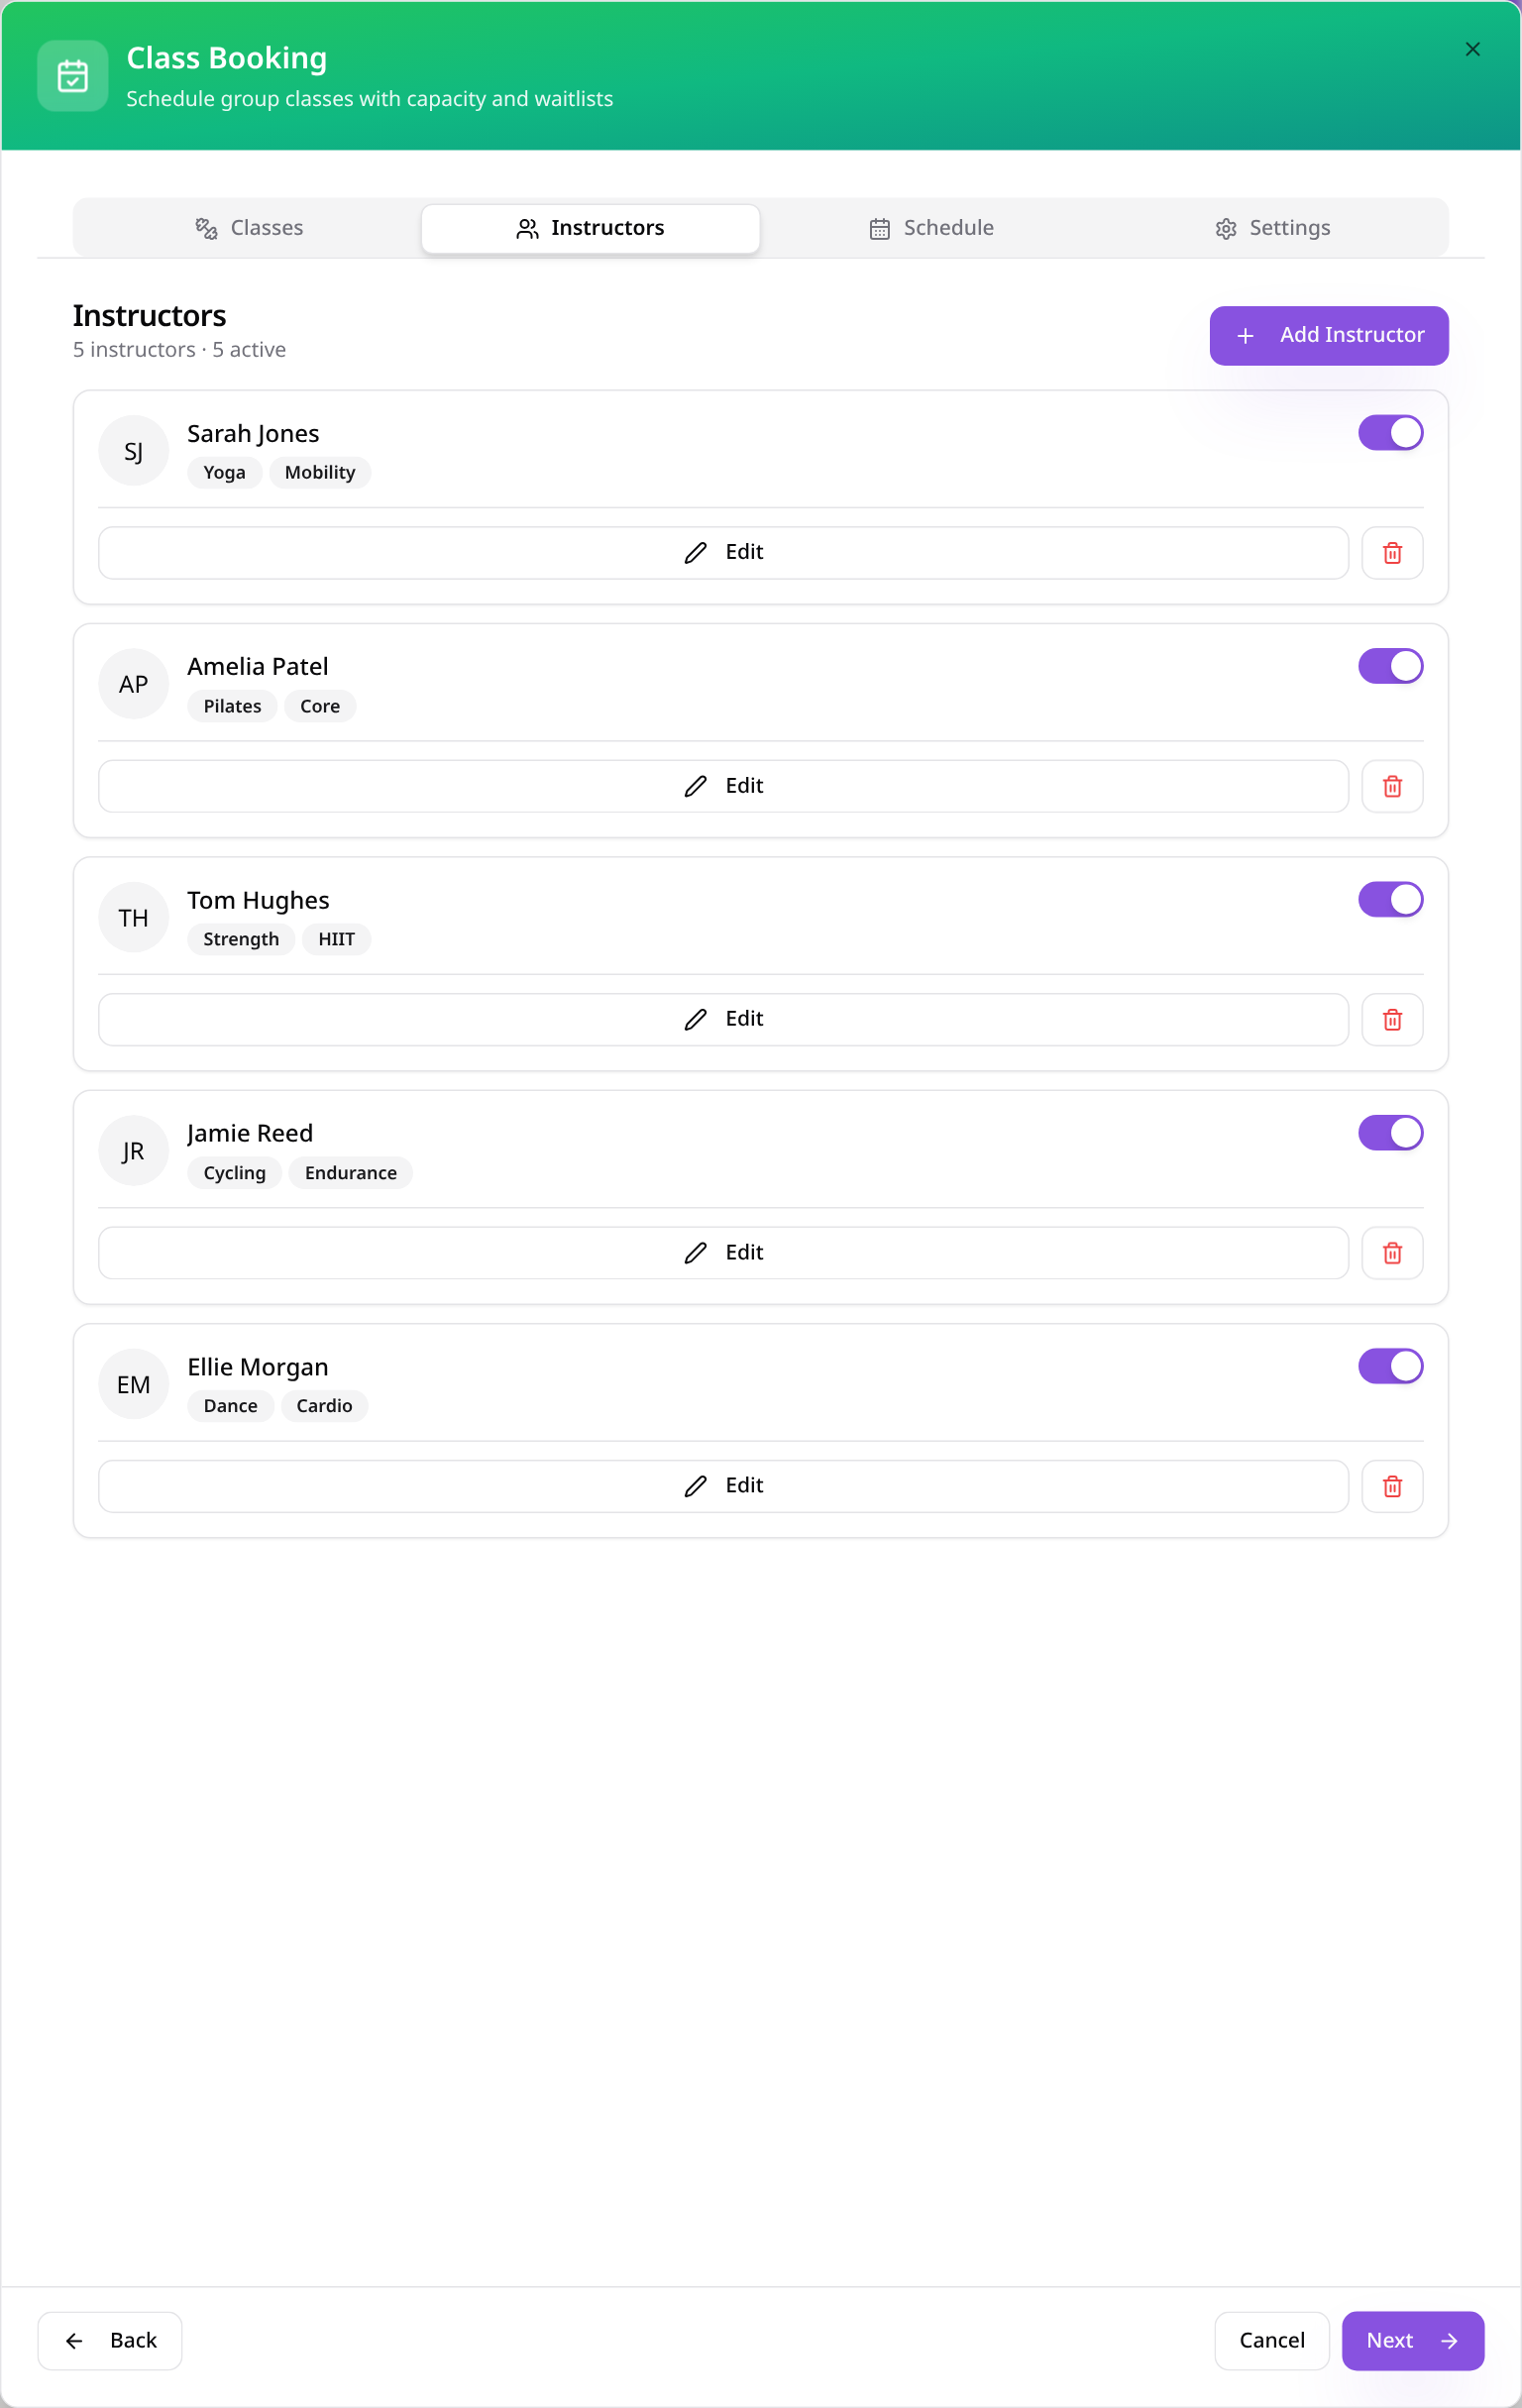
Check instructors
The CSV creates instructor profiles and reuses matching names for multiple weekly sessions.
- 8
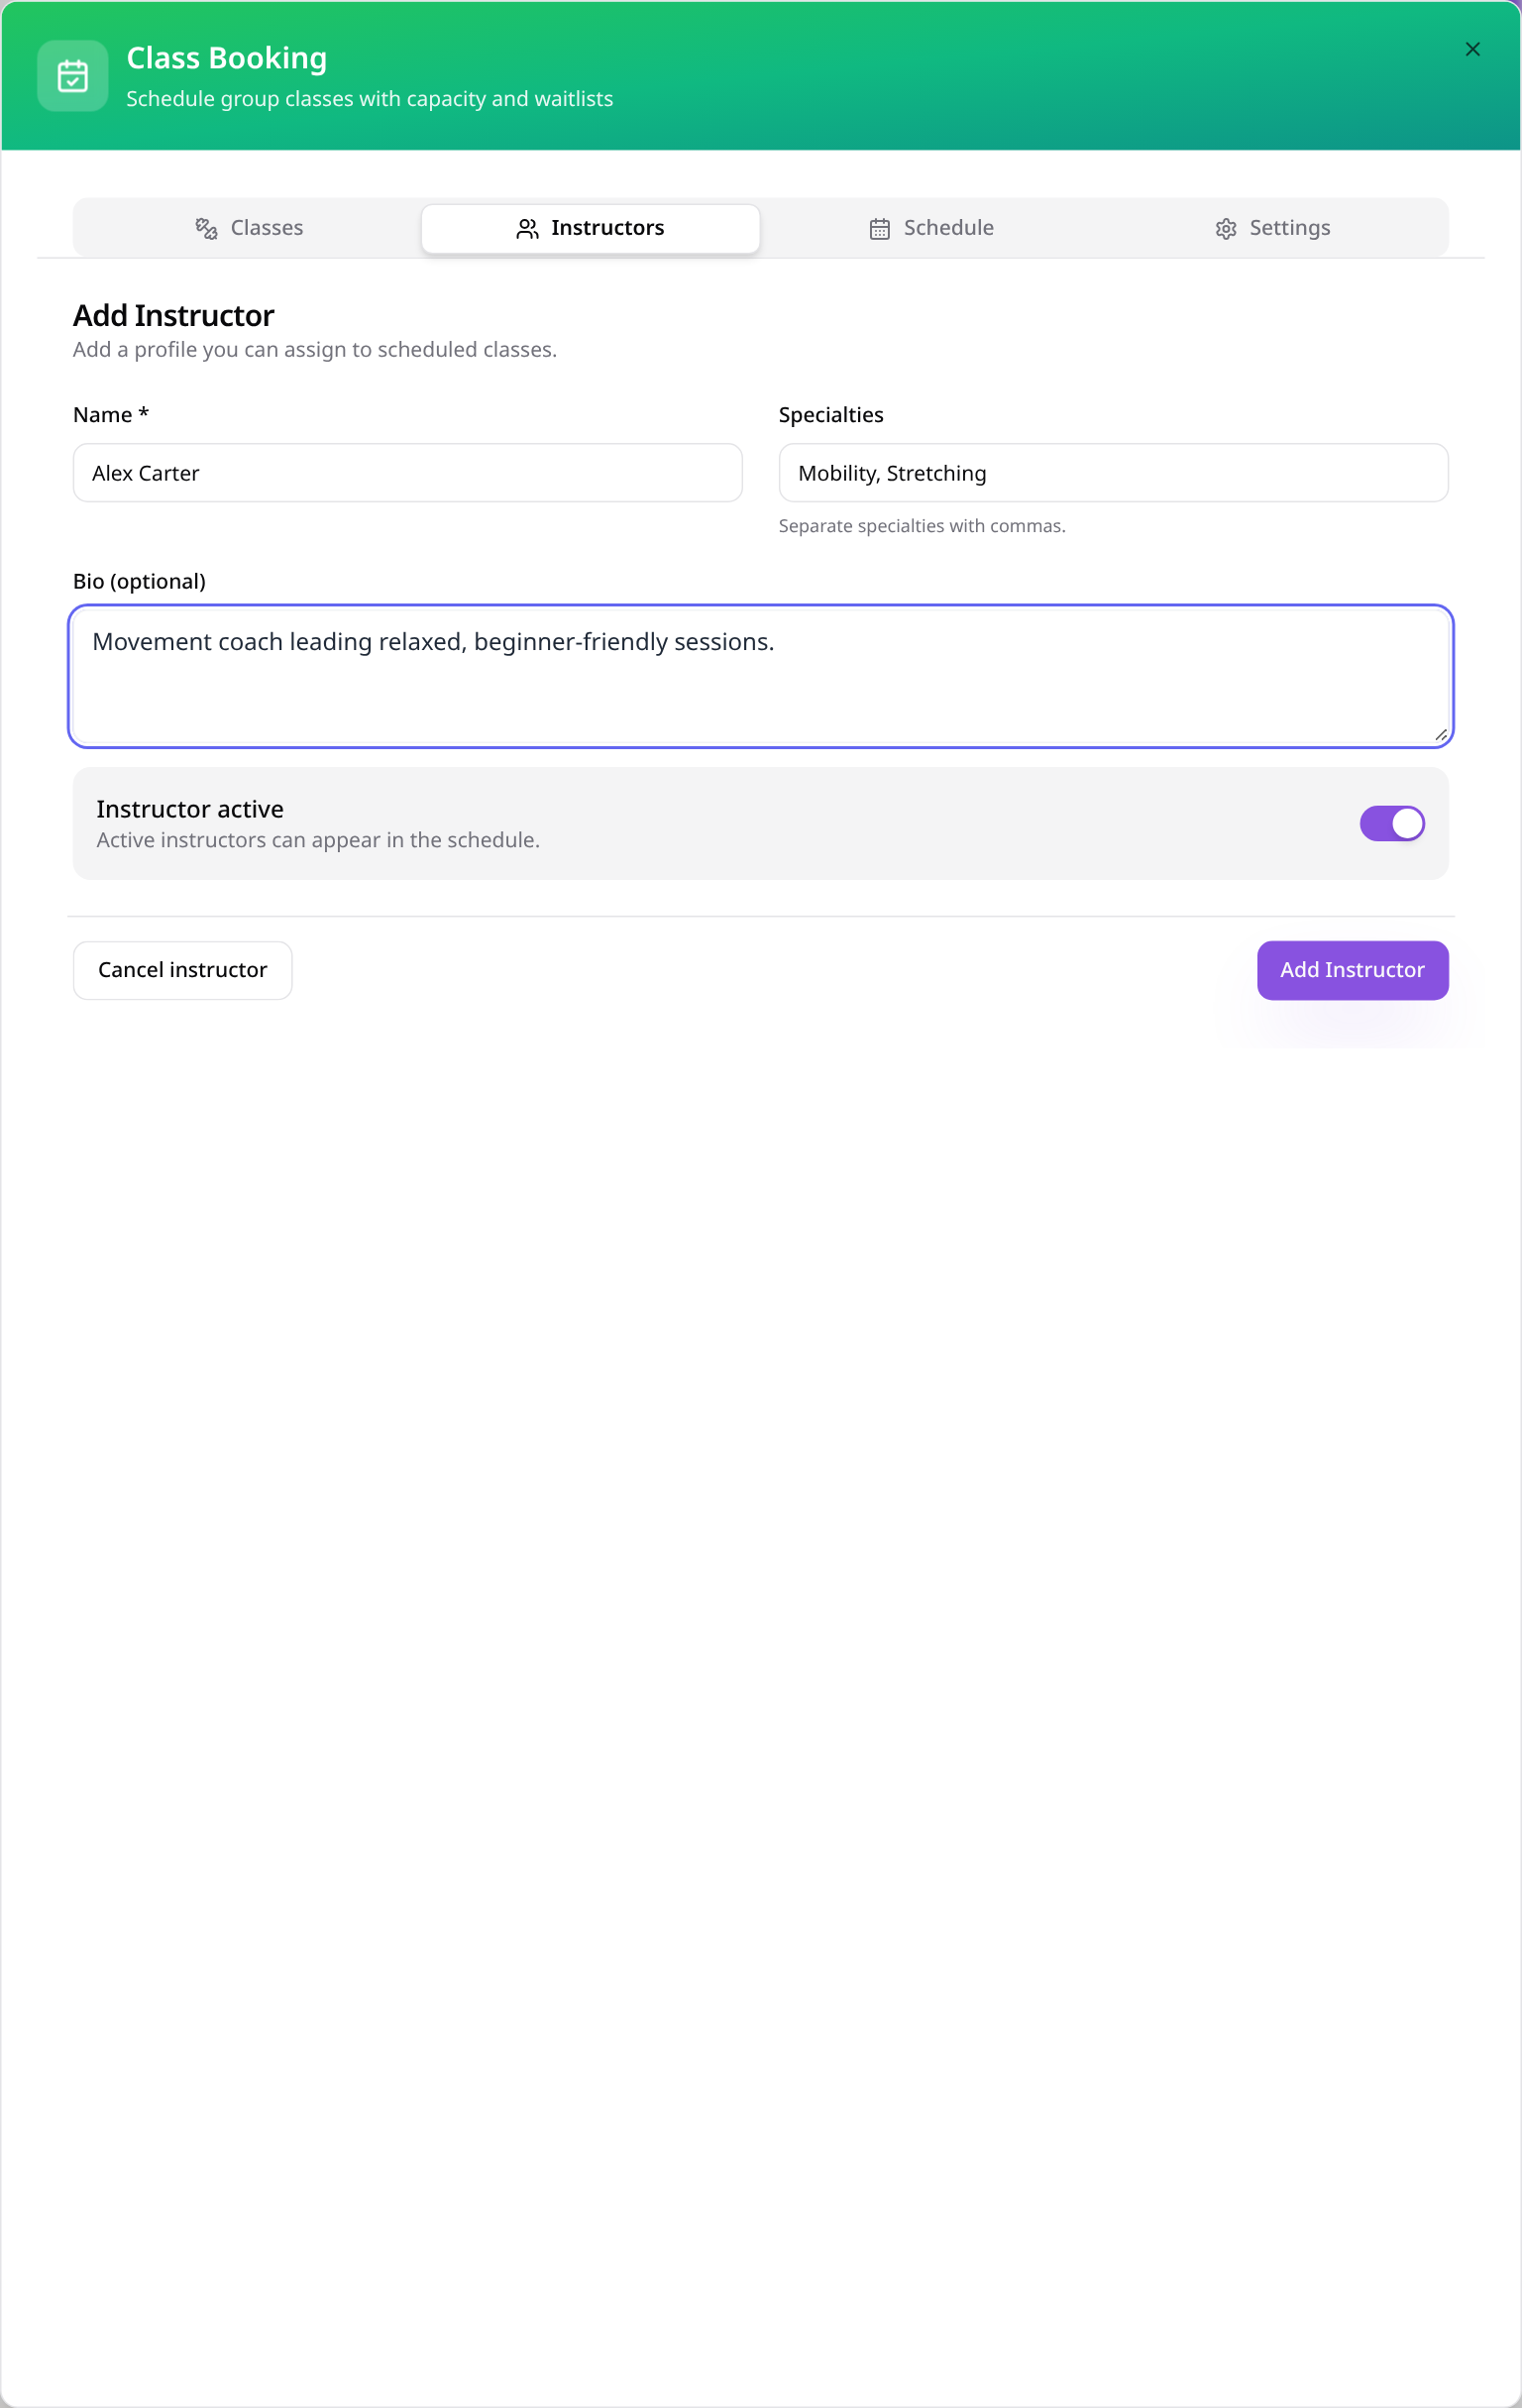
Add an instructor manually
Enter a name, specialties and biography, then select Add Instructor.
- 9
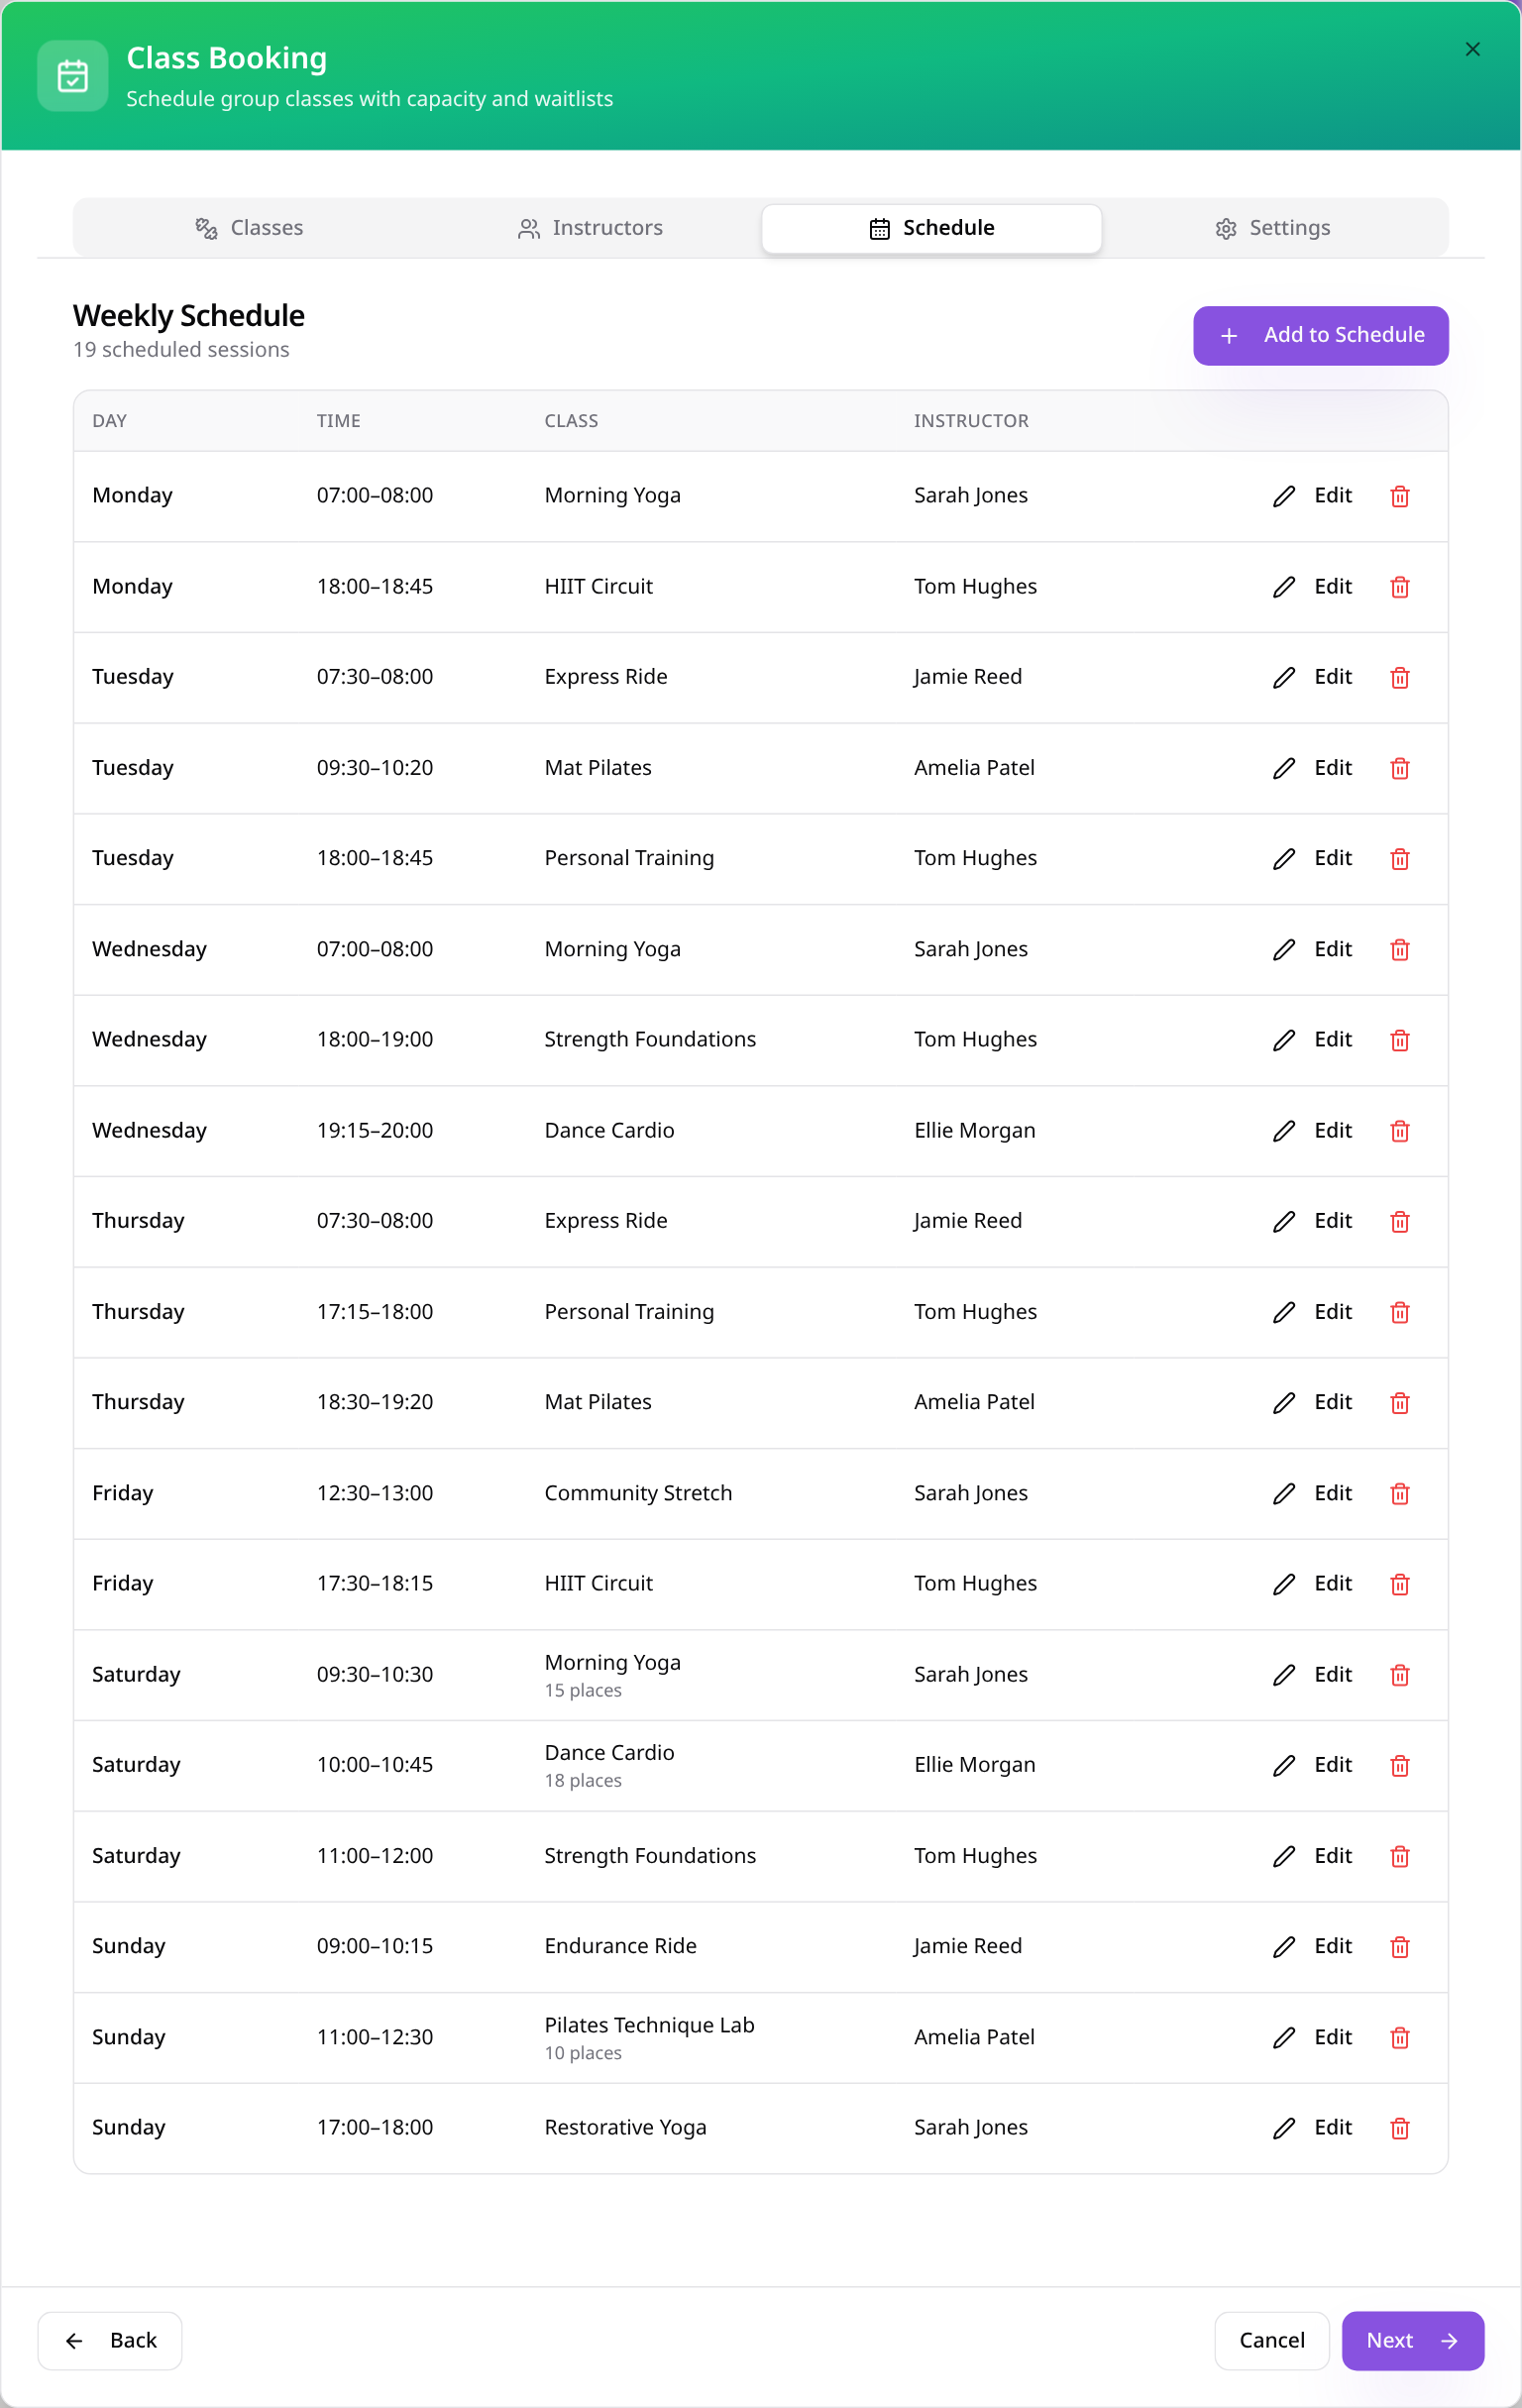
Review the weekly timetable
Check each class, day, time and assigned instructor; an override changes capacity for that weekly slot.
- 10
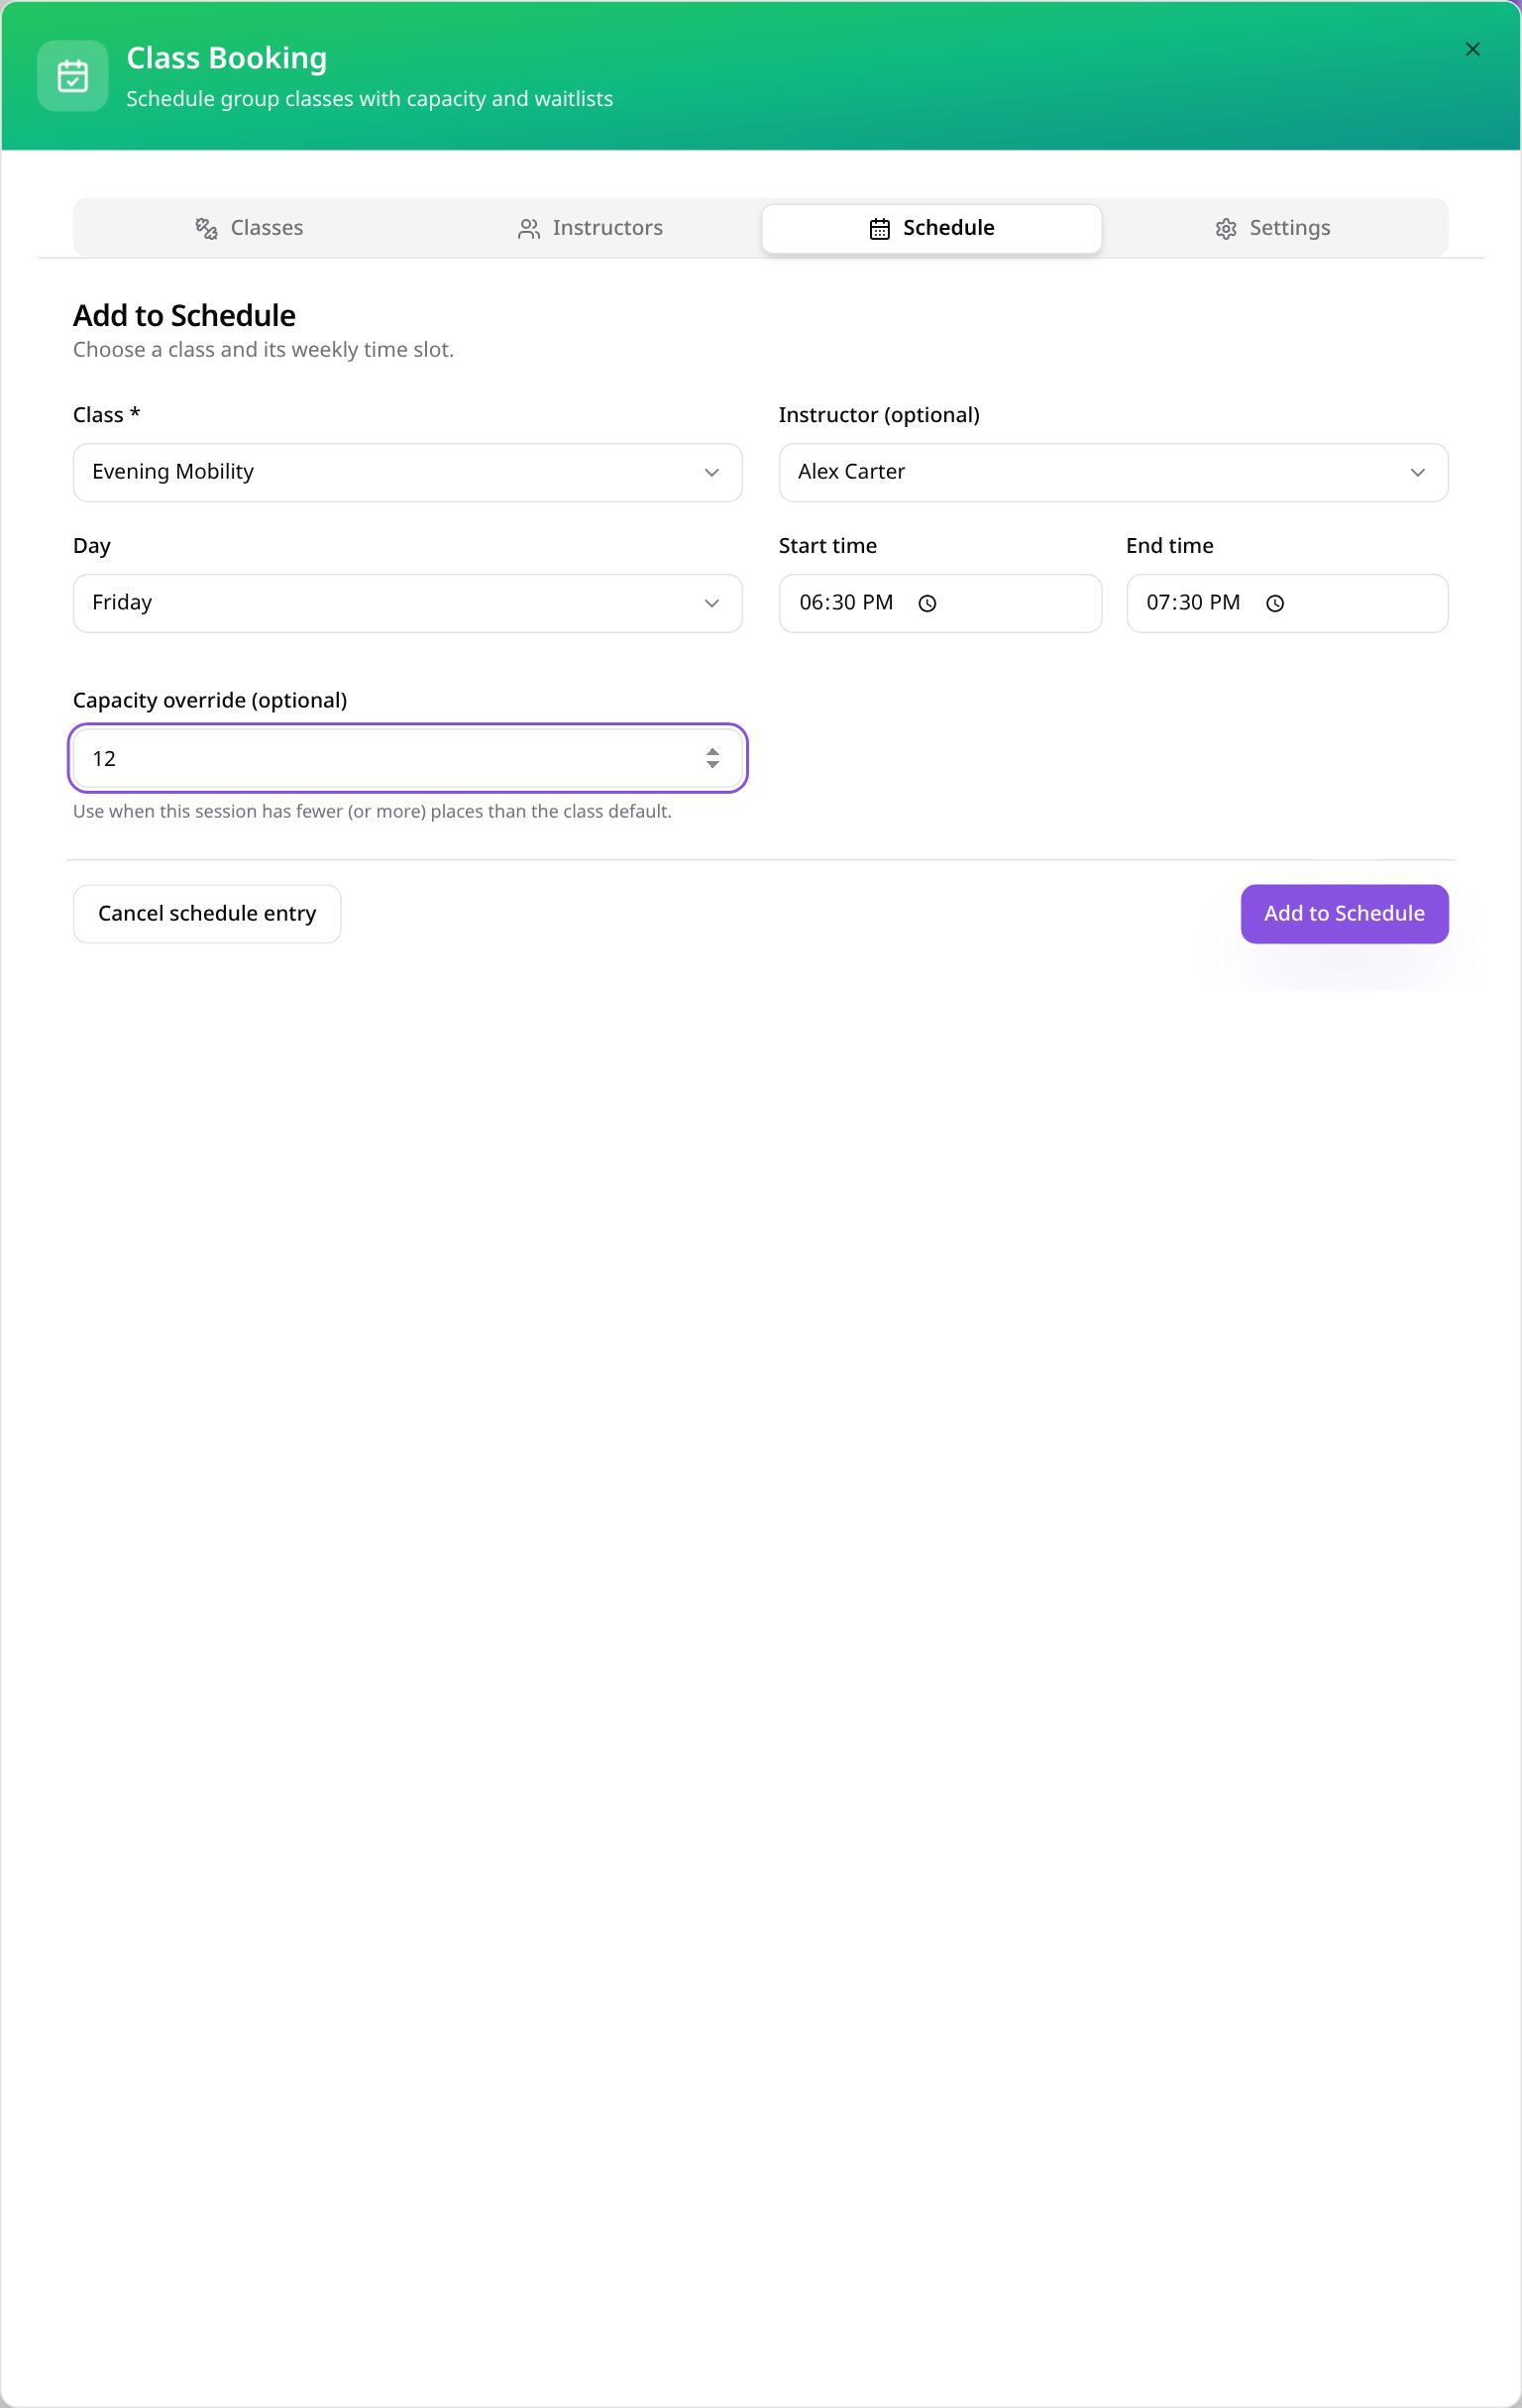
Add a weekly session
Choose the class, instructor, day and times; optionally override the default class capacity.
- 11
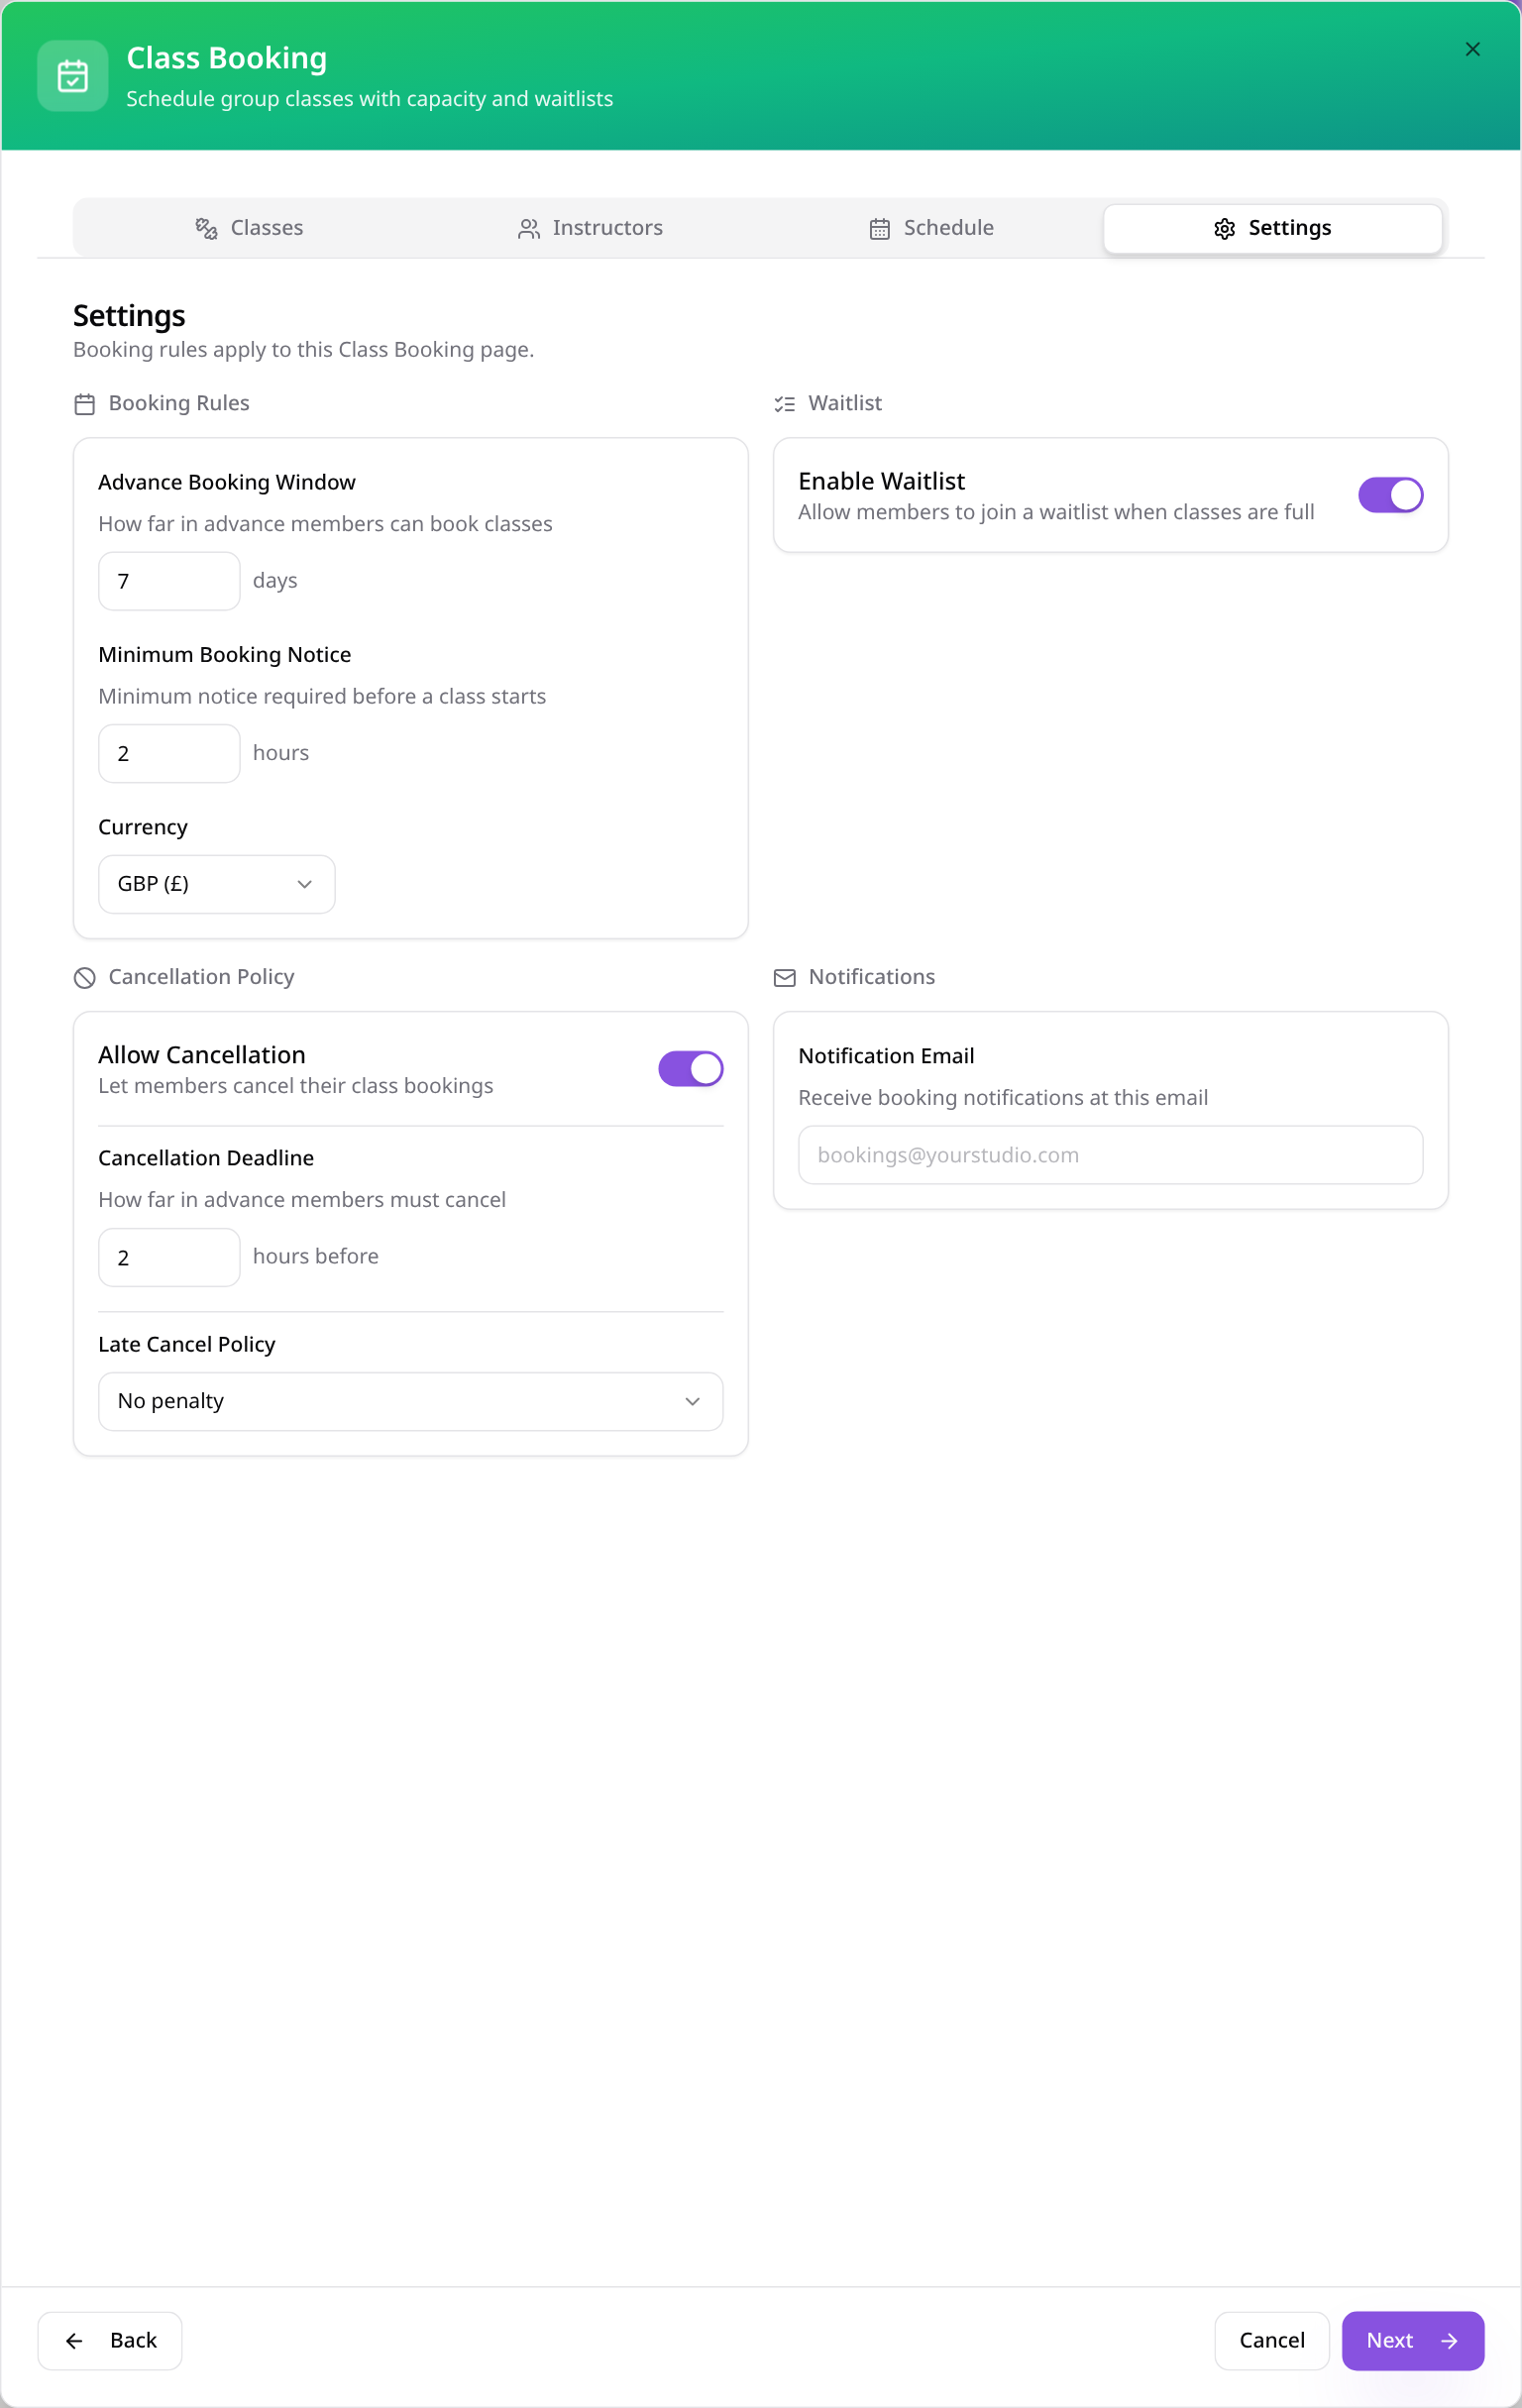
Review booking rules
Set the advance window, minimum notice, waitlist and cancellation policy; save all four tabs together when finishing setup.
- 12
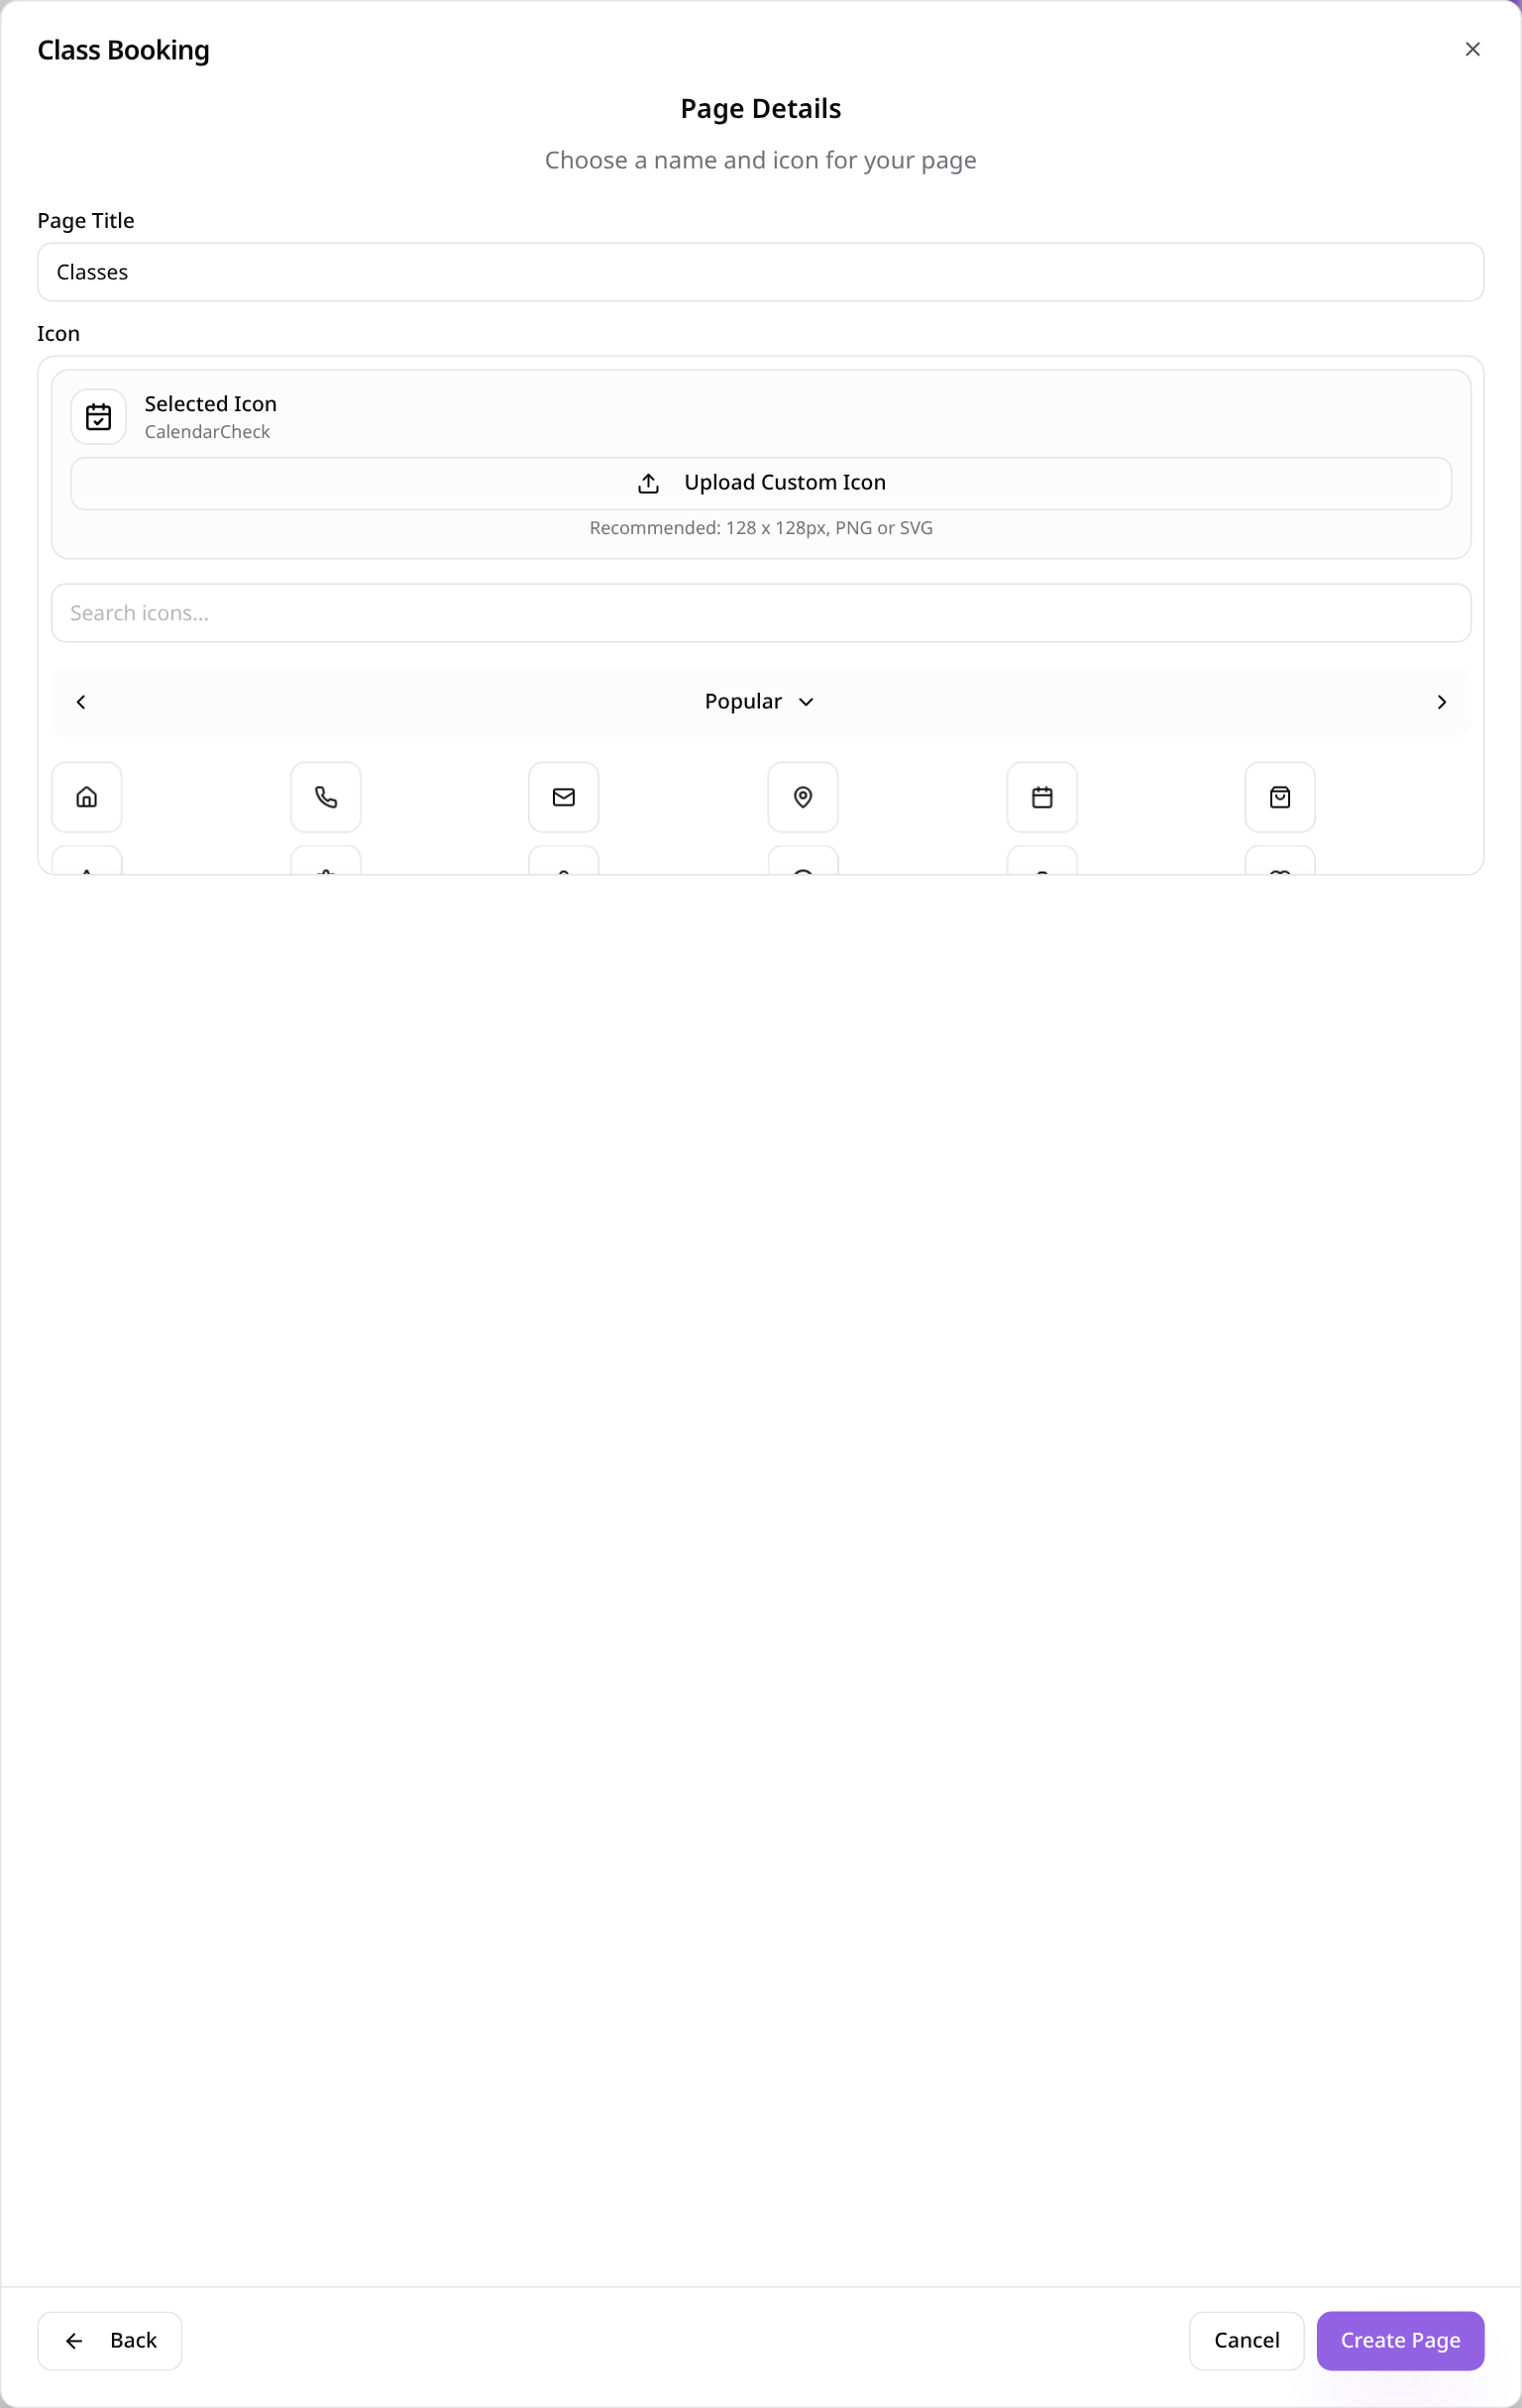
Name the page
Choose a short page name and icon before creating the page.
- 13
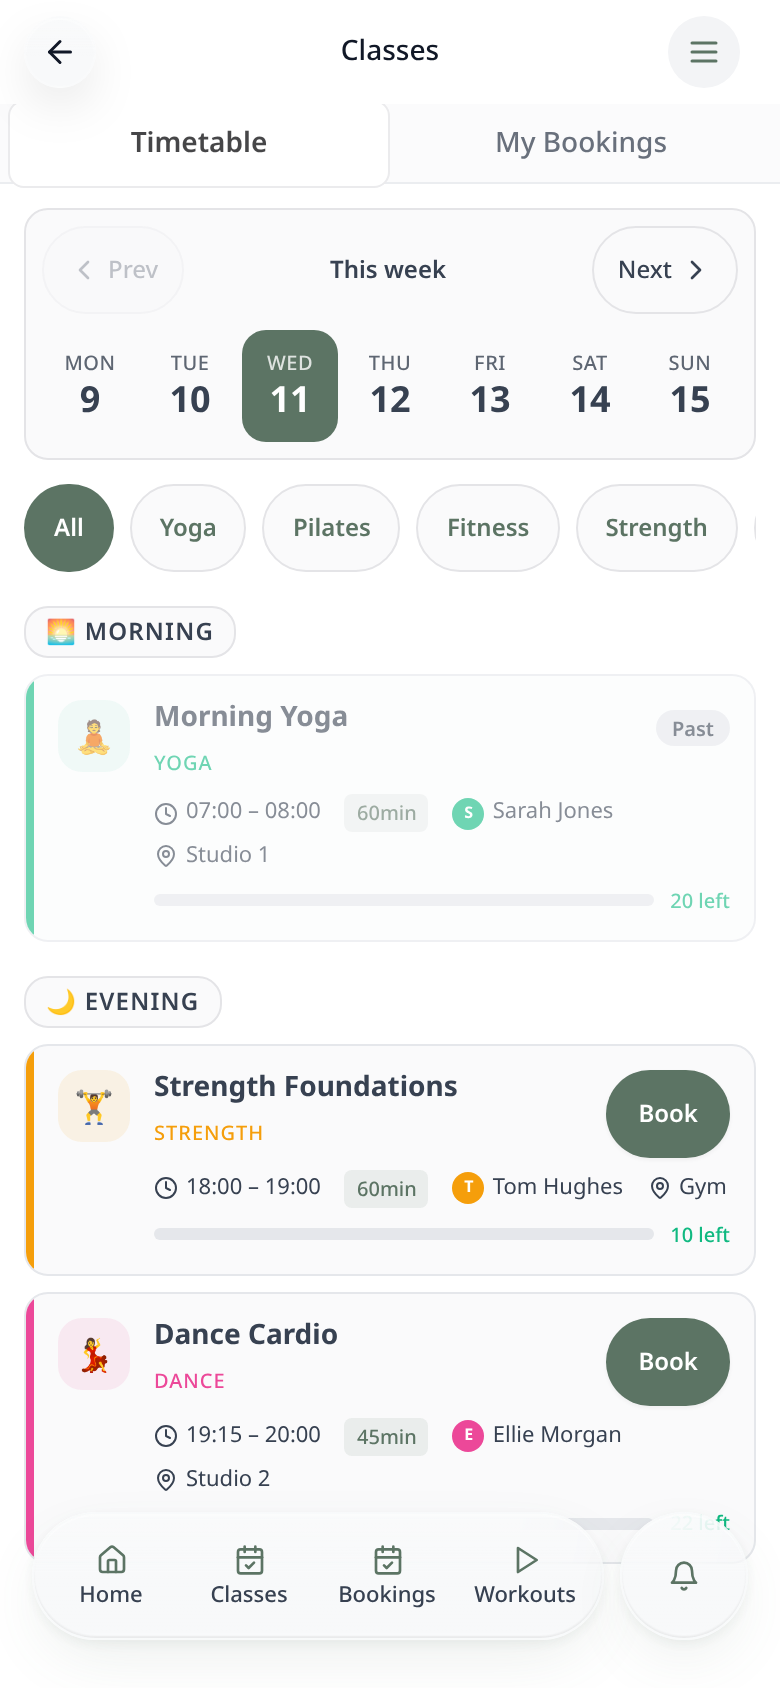
Browse the saved timetable
Members choose a day and category to see available places; past classes cannot be booked.
- 14
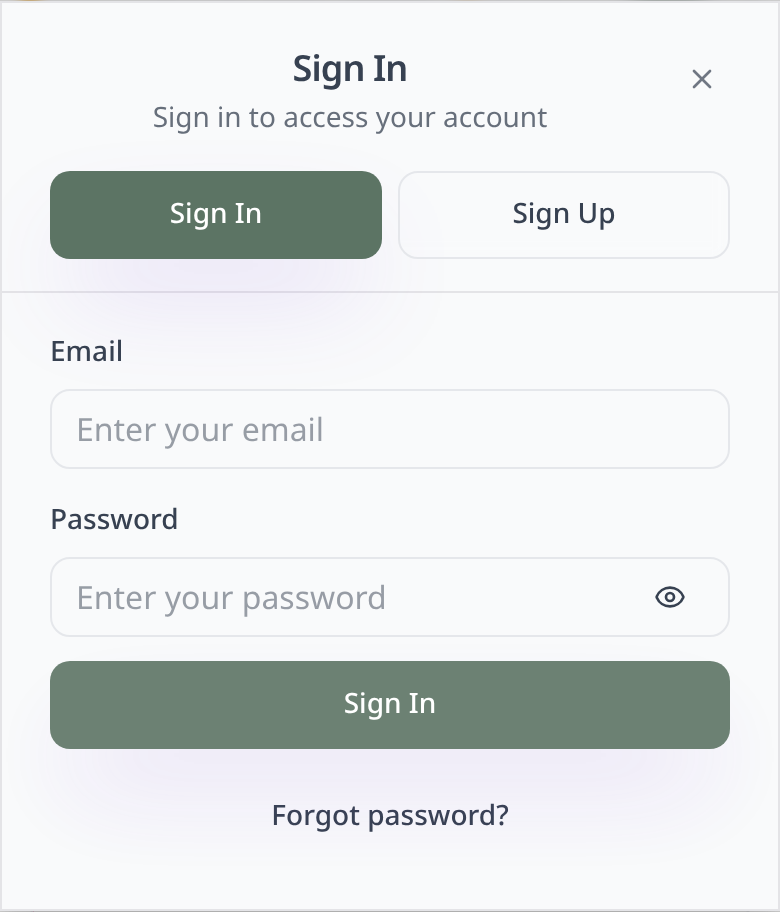
Sign in before booking
Members must sign in or create an account before confirming a place.
- 15
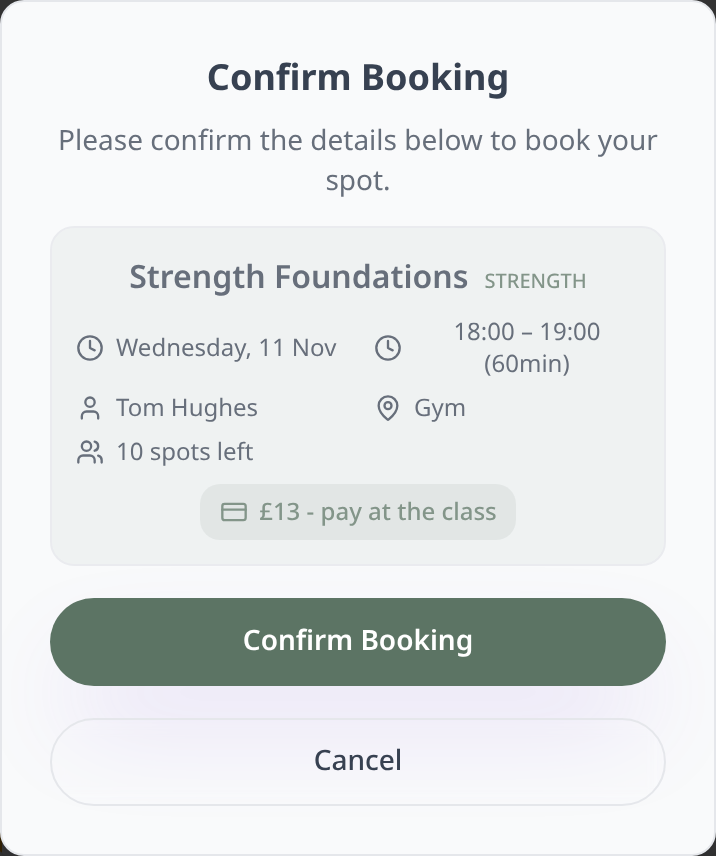
Confirm a member booking
Choose Book, check the date, time, instructor and payment shown, then select Confirm Booking.
- 16
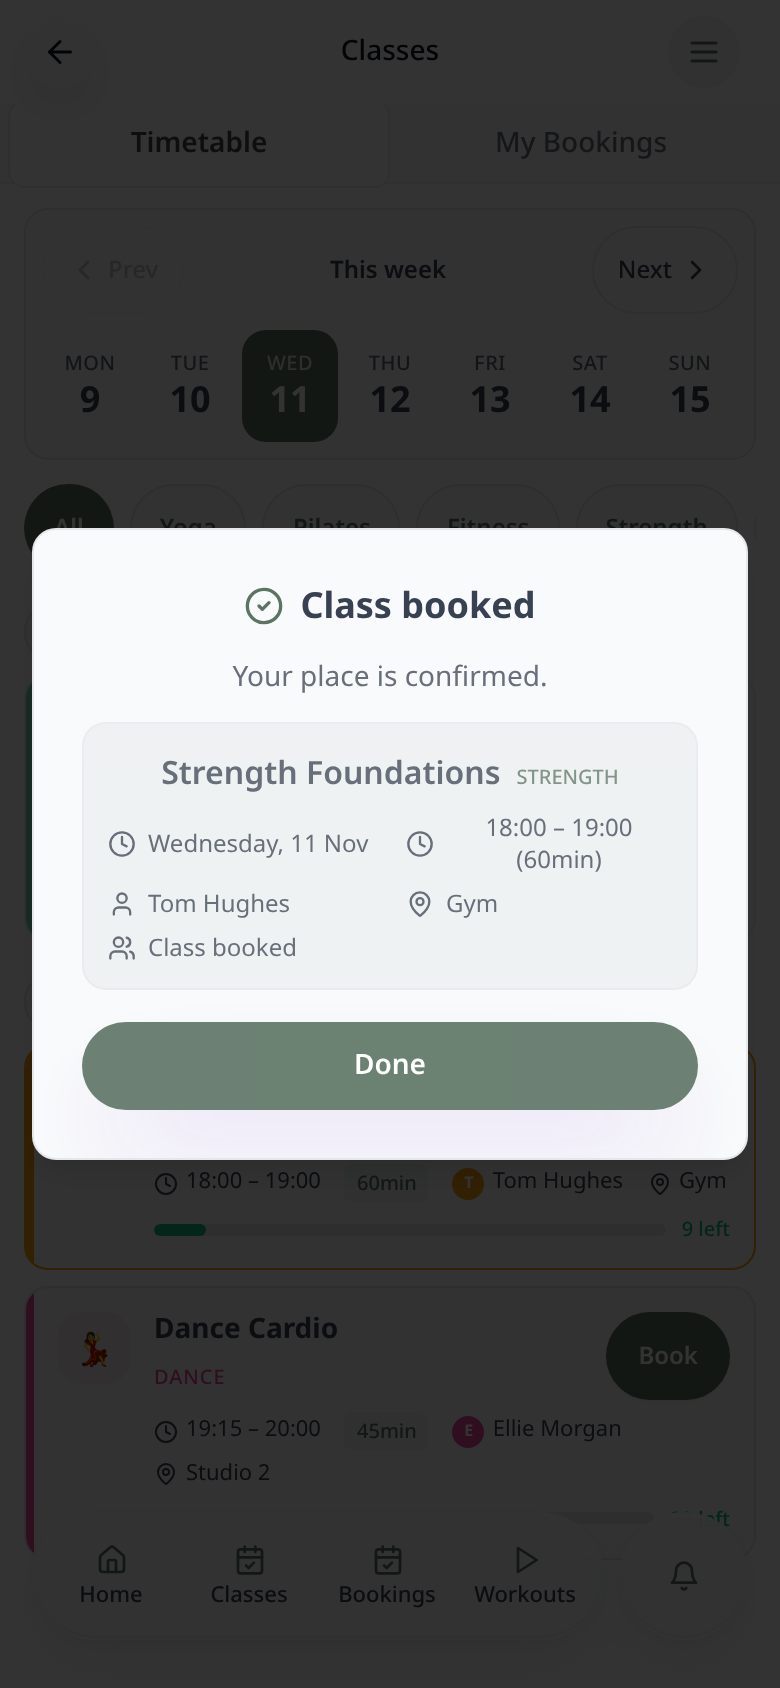
Read the booking confirmation
The success stays inside the confirmation pop-up until Done; a successful booking is also saved in My Bookings.
- 17
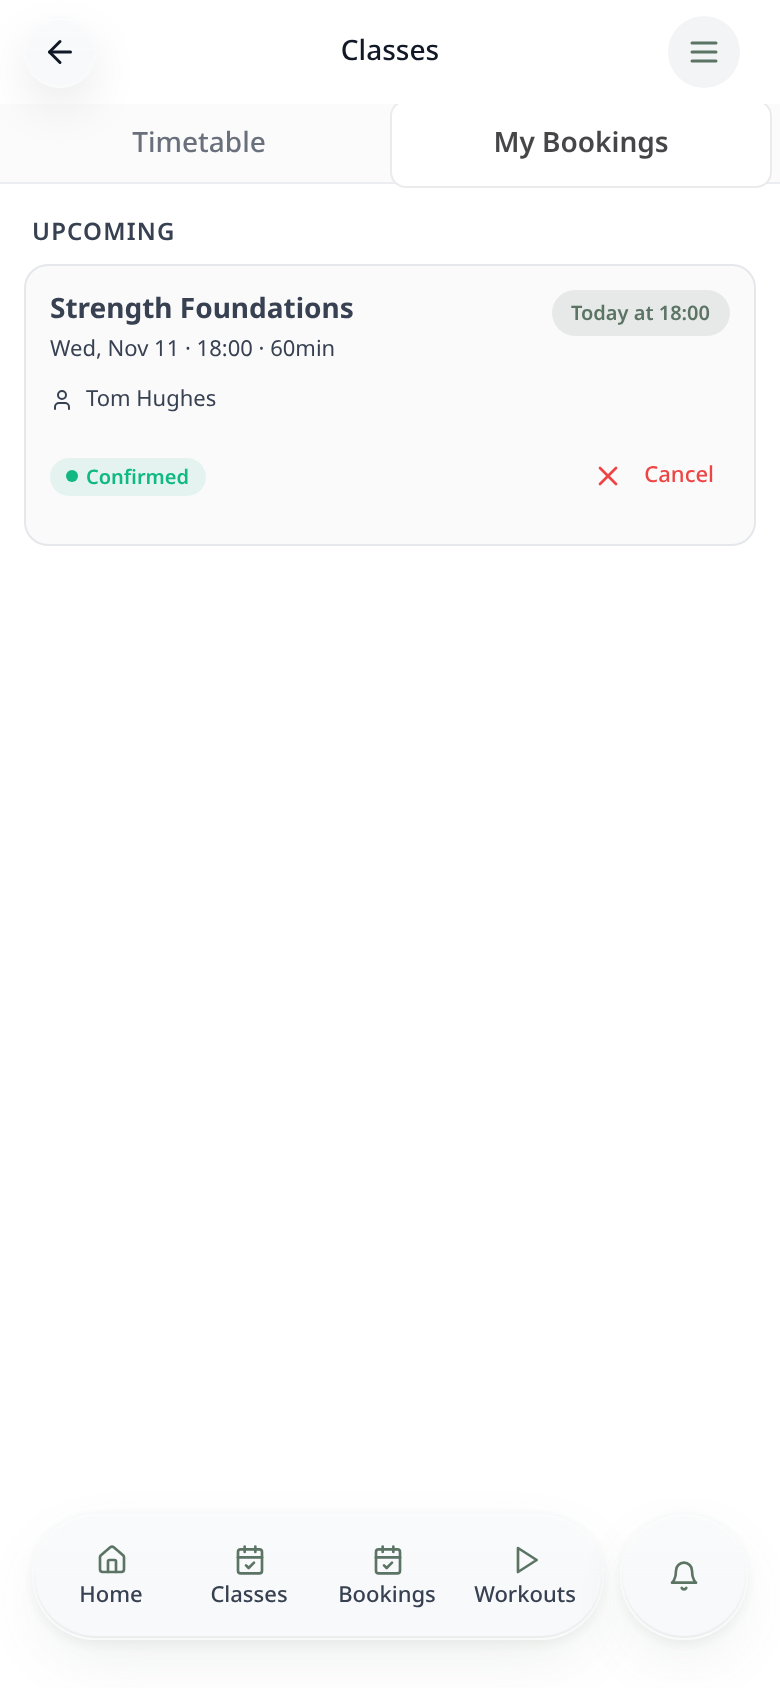
Find your booked classes
Open My Bookings to view upcoming classes, times, instructors and booking status.
- 18
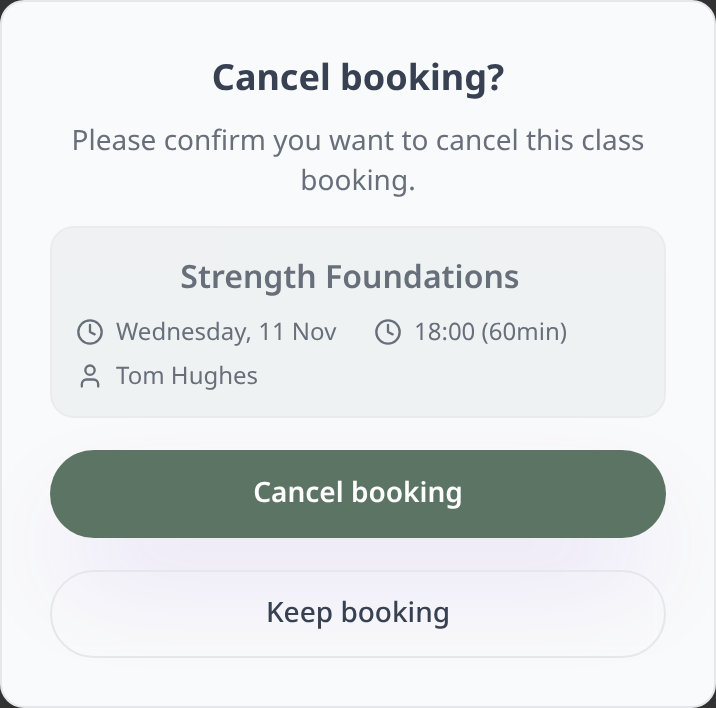
Cancel your own booking
Select Cancel beside the booking, read any cancellation notice and confirm Cancel booking; Keep booking leaves it unchanged.
- 19
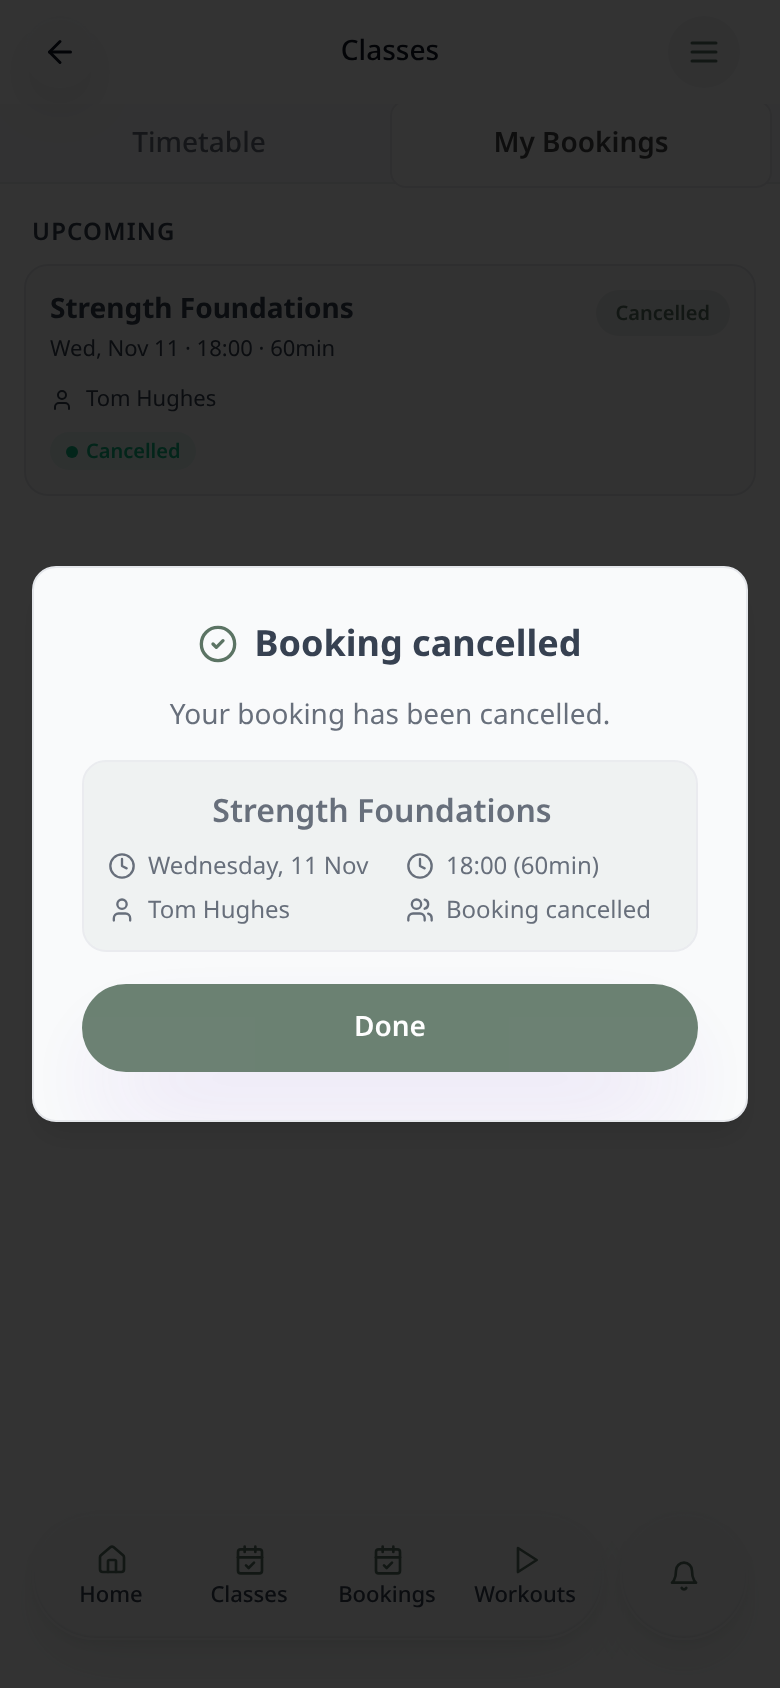
Check cancellation succeeded
The pop-up confirms cancellation and shows any credit or fee outcome; select Done to return to your bookings.
- 20
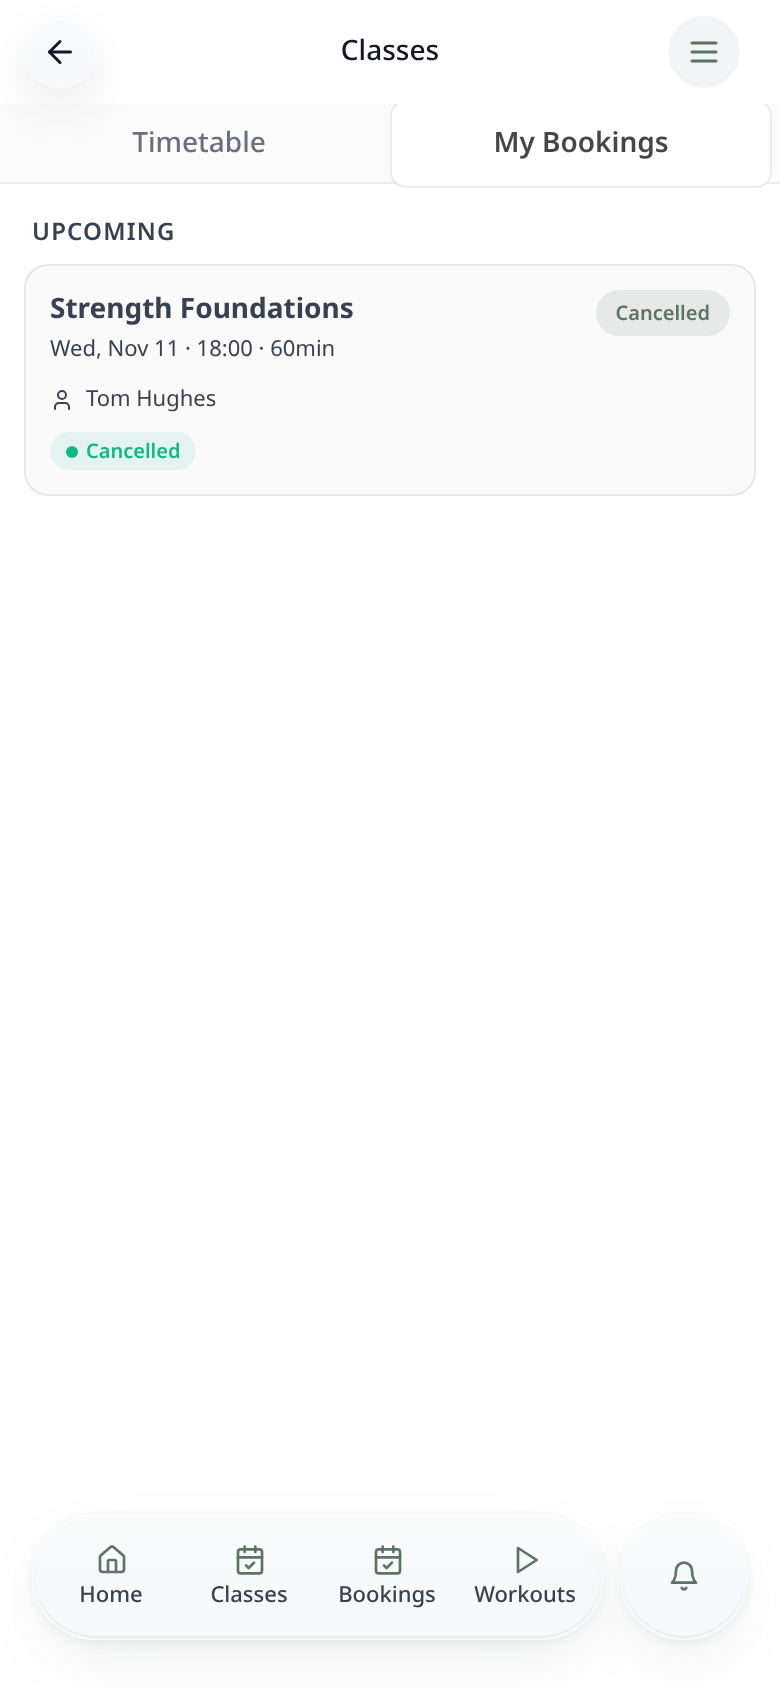
Review the cancelled status
The cancelled booking remains visible with its status; routine booking and individual-cancellation emails are not currently sent.
- 21
Open the staff session roster
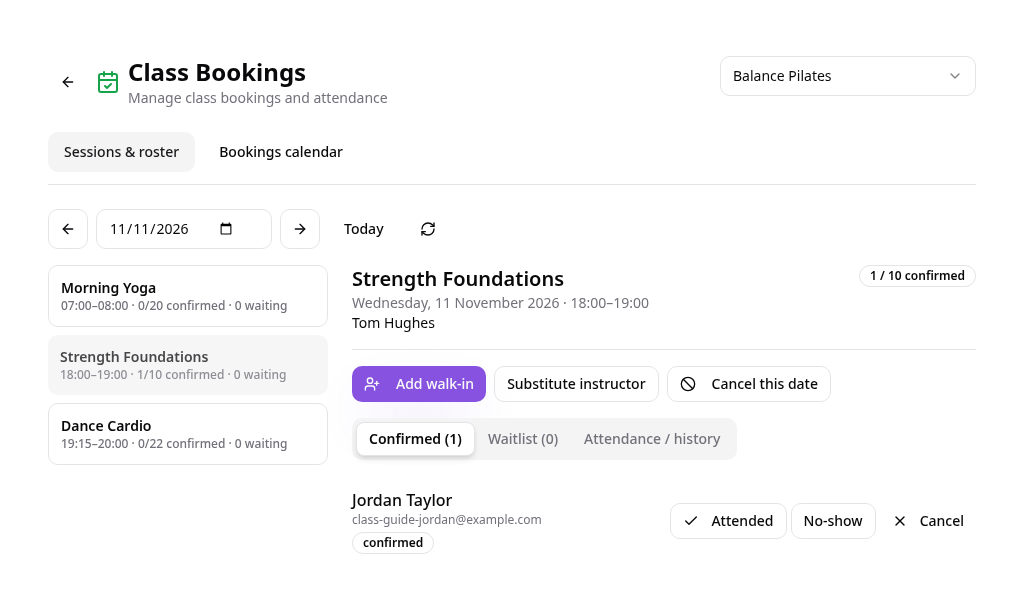
In Data Manager choose Class Bookings, select your app, then select the session date and class to view confirmed members.
- 22
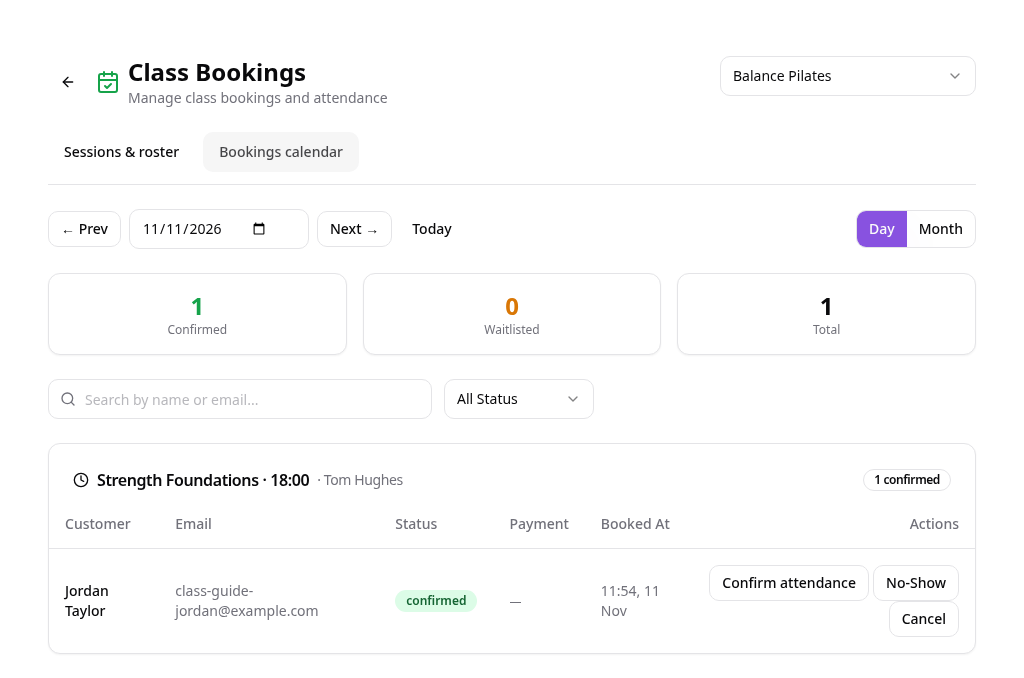
View all bookings for a day
Choose Bookings calendar and Day; use the date, search and status controls to find bookings and review payment status.
- 23
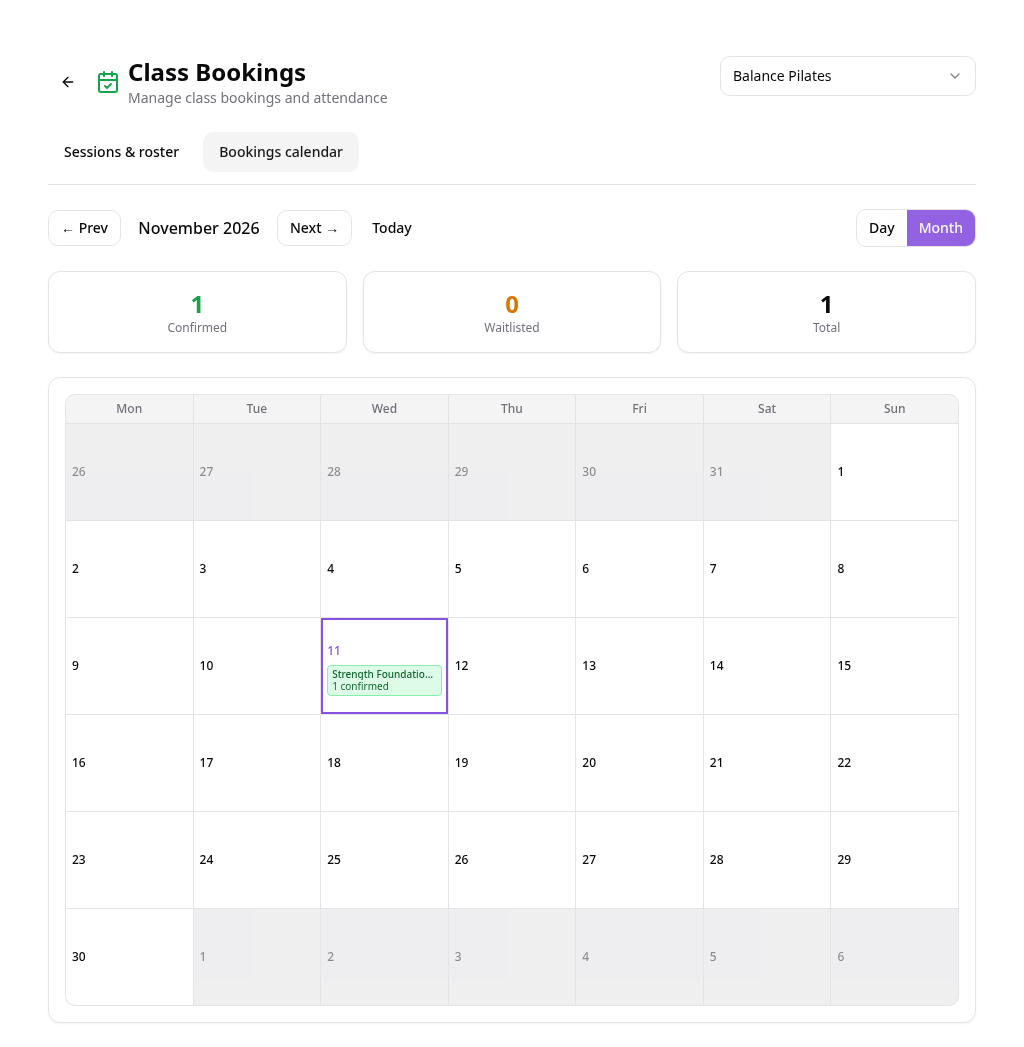
Browse the month calendar
Choose Month to see booked classes across the calendar and switch back to Day for individual booking details.
- 24
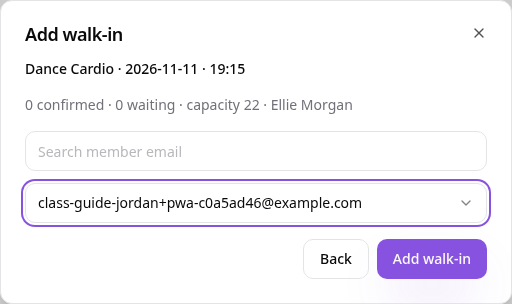
Add a walk-in member
In Sessions & roster select Add walk-in, choose an existing member and confirm; the saved session capacity still applies.
- 25
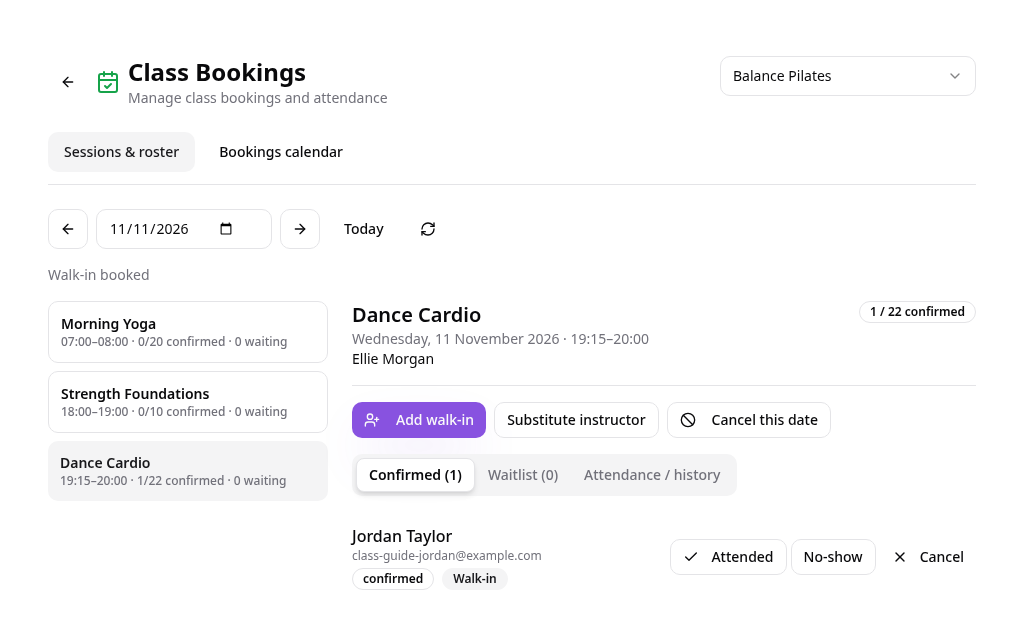
Check the walk-in was saved
The member appears in the confirmed roster with a Walk-in label and the session count increases.
- 26
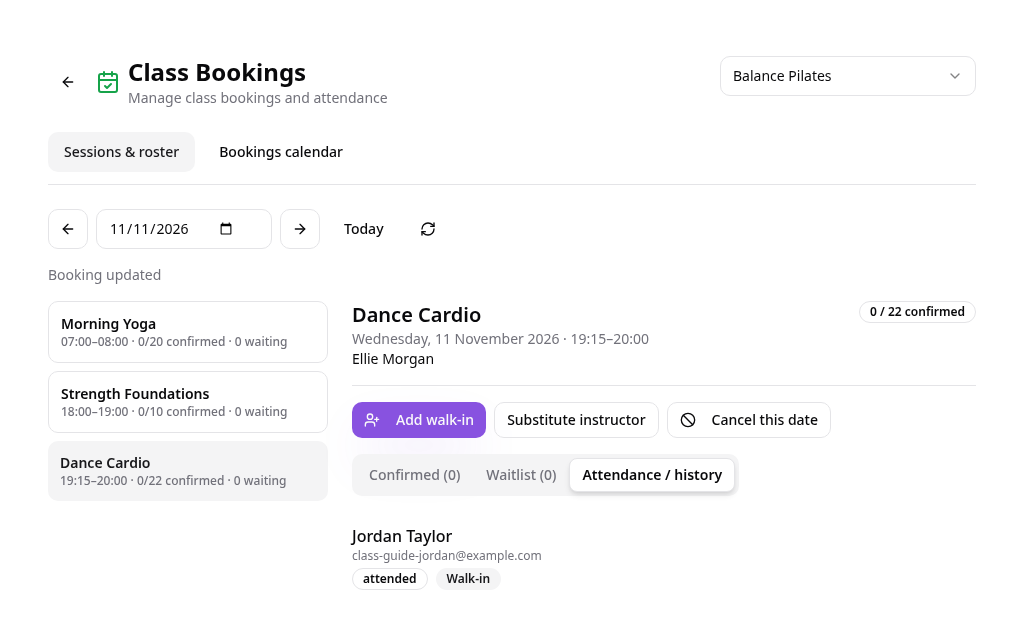
Mark attendance or a no-show
Use Attended or No-show on a confirmed member, then open Attendance / history to review the saved outcome.
- 27
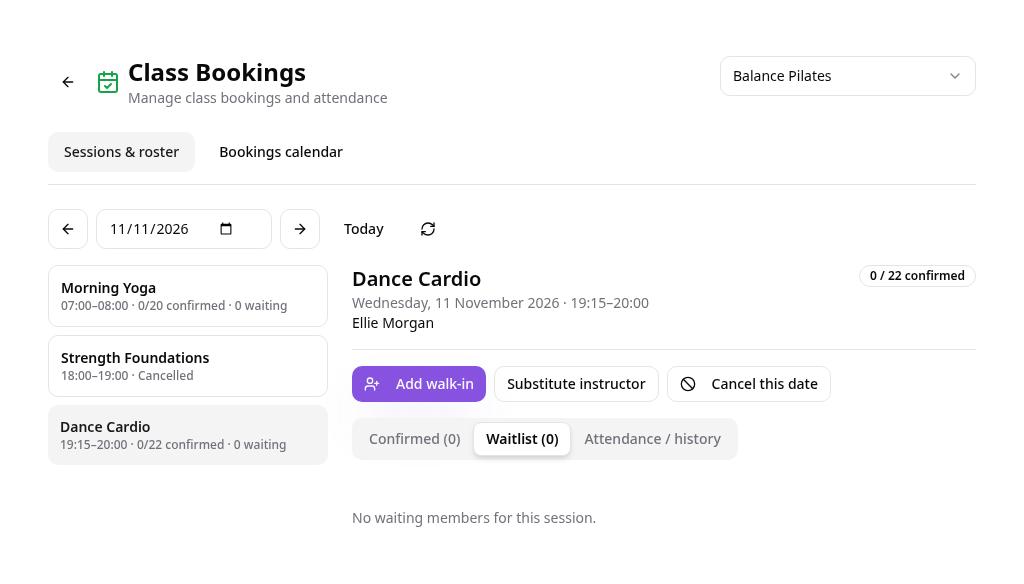
Review waiting members
The Waitlist tab shows waiting members in queue order; this demo session has no waiting members and does not demonstrate a promotion.
- 28
Understand an opening on the waitlist
When a confirmed place opens, the next eligible waiting member is promoted without exceeding capacity; successful promotion queues a member email.
- 29
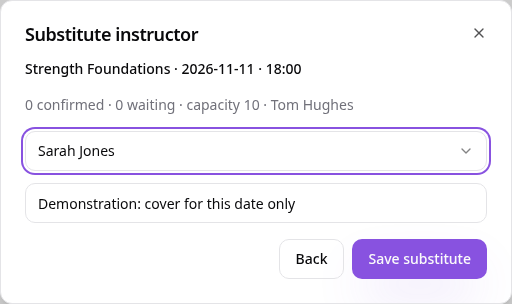
Assign cover for one date
Select Substitute instructor, choose another instructor and optionally enter a reason before selecting Save substitute.
- 30
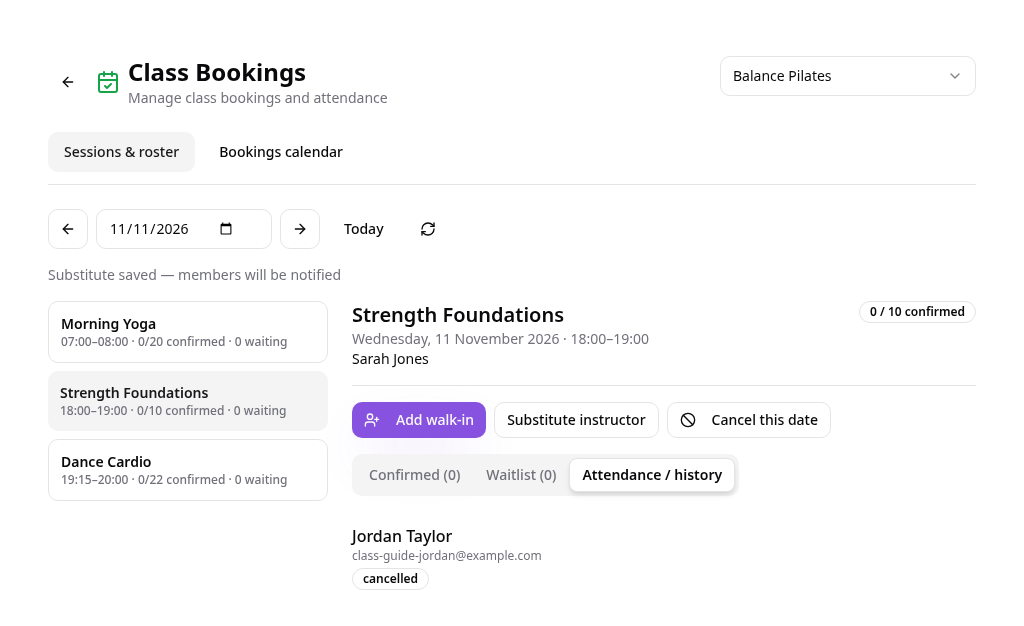
Check the dated instructor change
The selected date shows the substitute; alerts are queued only for members currently confirmed or waitlisted for that dated session.
- 31
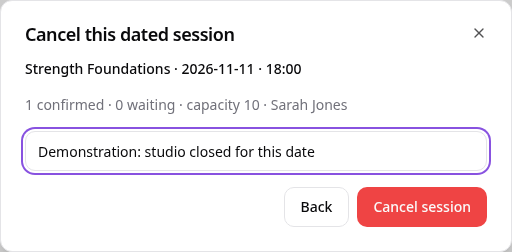
Cancel a session rather than one booking
Select Cancel this date, check the displayed member counts, optionally add a reason and select Cancel session.
- 32
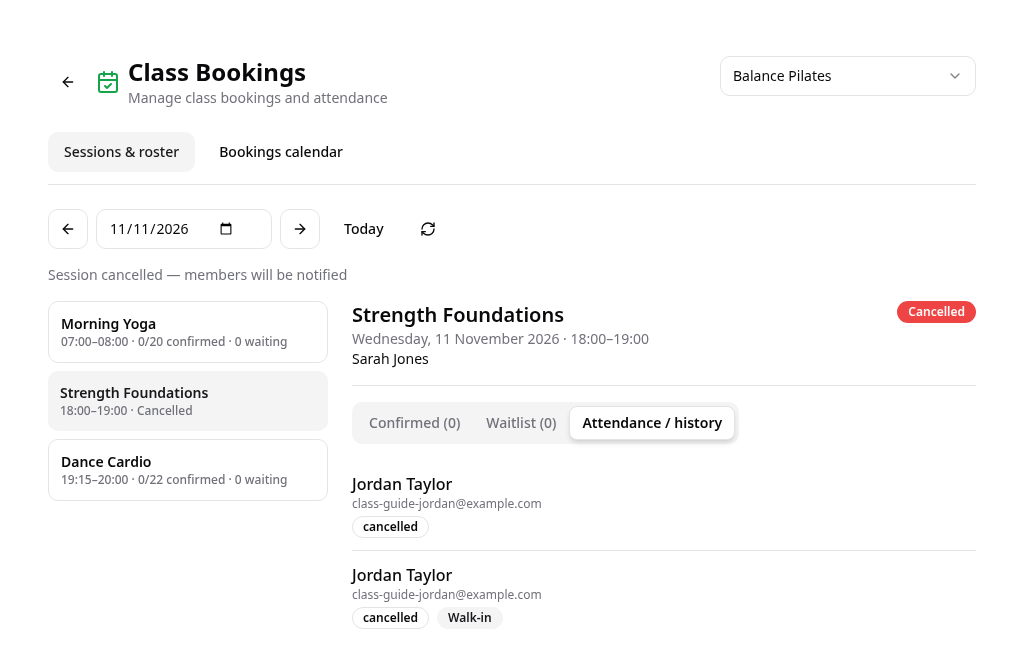
Review the cancelled session
That date is marked Cancelled, affected bookings move into history and member cancellation alerts are queued.
- 33
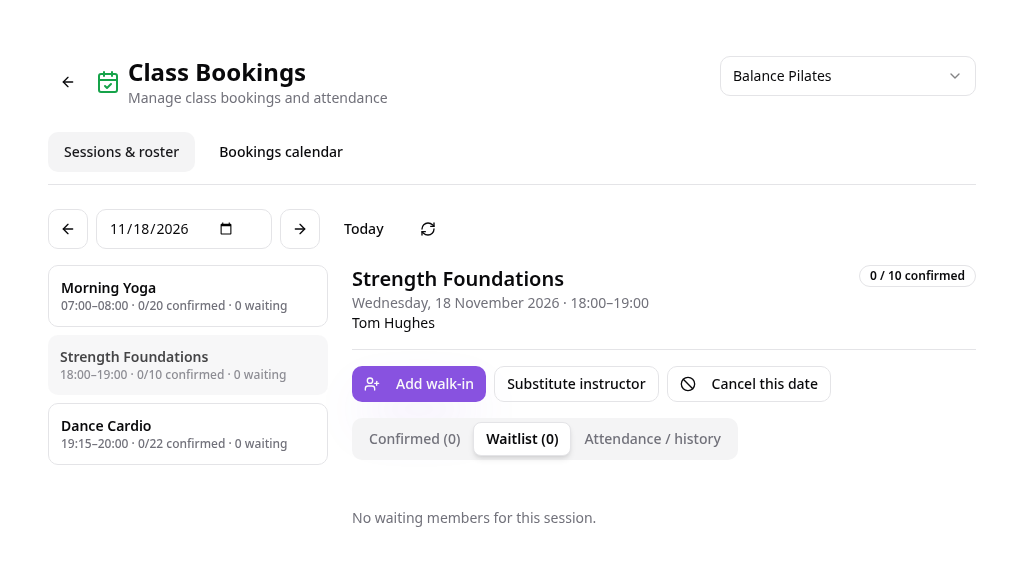
Keep the weekly timetable intact
The following week still has the original instructor and a bookable session; one-date changes do not rewrite the recurring timetable.
- 34
Know which member emails are supported
Email alerts cover waitlist promotion, dated-session cancellation and instructor changes, using the member email recorded on the booking.
- 35
Distinguish queued alerts from delivered email
The demonstrated session cancellation queued an alert, but the email provider rejected that demo send; no received email or inbox delivery is claimed.
- 36
Know the current email limits
Routine booking, individual-cancellation and advance class-reminder emails are not implemented; the editor notification-email field does not currently send studio alerts.
You have reviewed CSV and manual setup, member booking and cancellation, staff calendars and rosters, walk-ins, attendance, waitlists and dated changes, with the current email limits clearly distinguished from confirmed booking outcomes.