Step-by-step guide
Follow these steps, then download the PDF to keep.
- 1
Open Pages
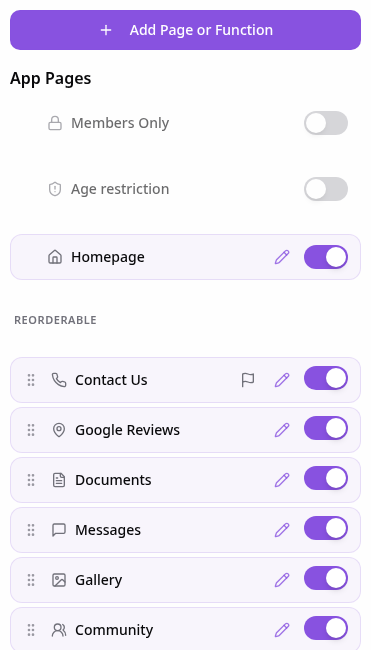
In your app editor, open Pages and tap Add Page or Function.
- 2
Choose Table Booking
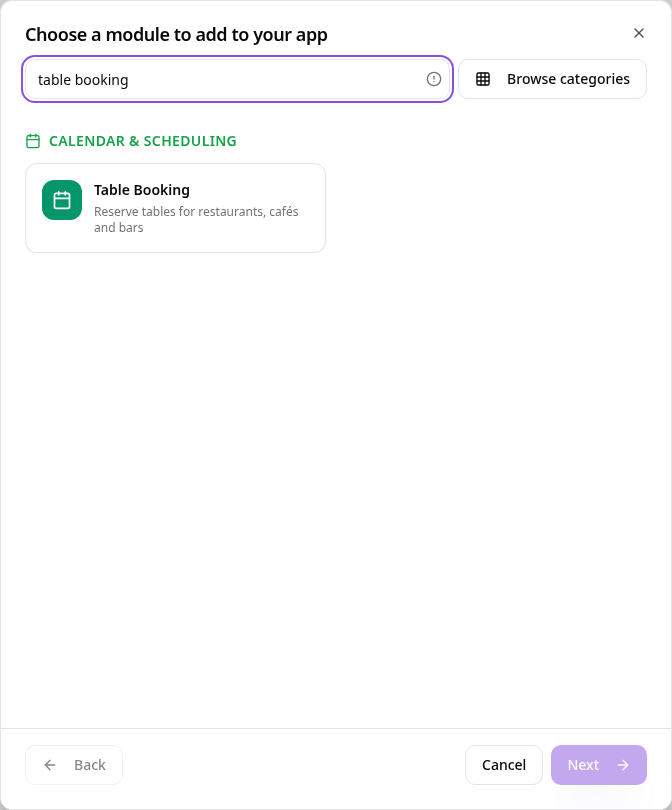
Search “table booking” and tap Table Booking.
- 3
Pick how to add tables
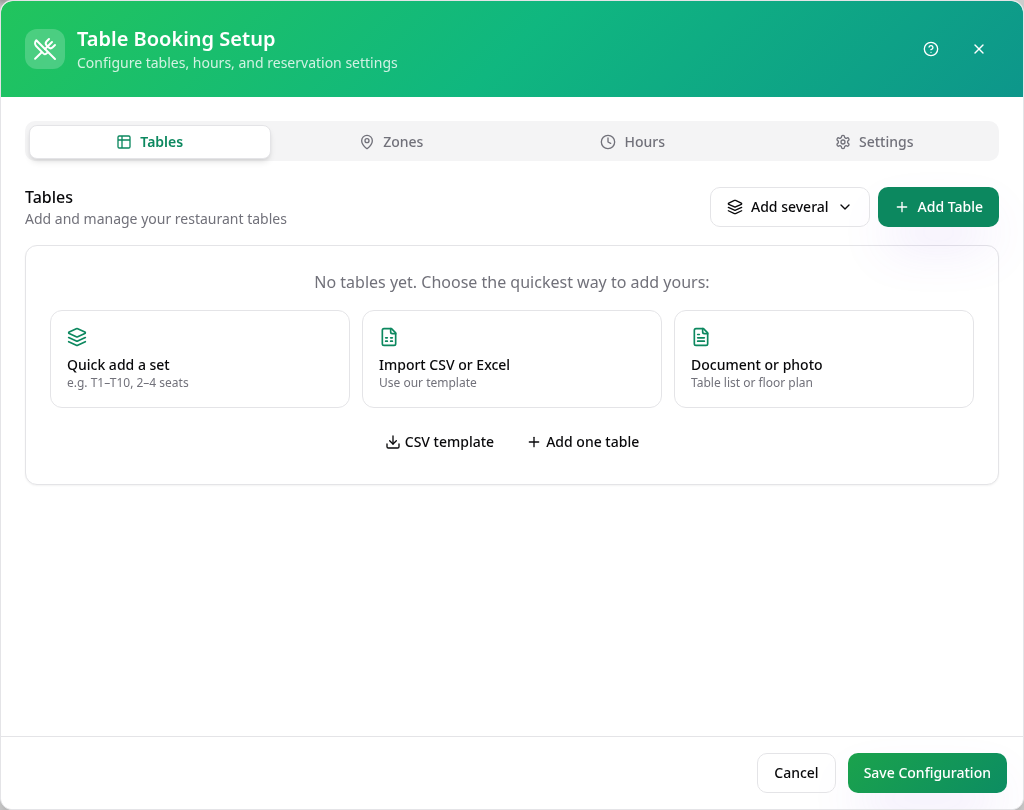
Quick add a numbered set, import a CSV or Excel file, or upload a table list or floor plan.
- 4
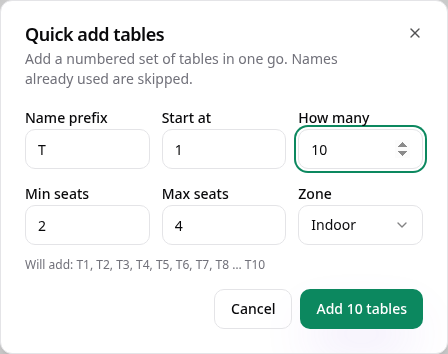
Quick add a set
Choose a name prefix, how many tables, seats and zone. Tap Add.
- 5
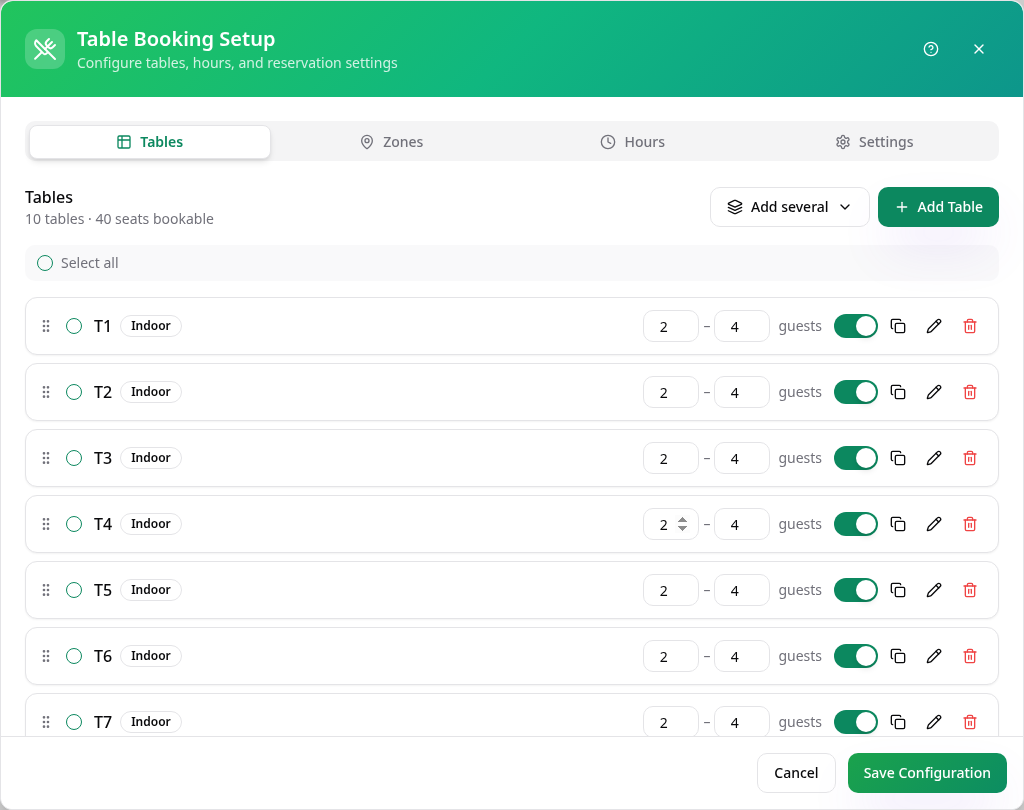
Check your tables
Change seats on any row, duplicate a table or switch it off.
- 6
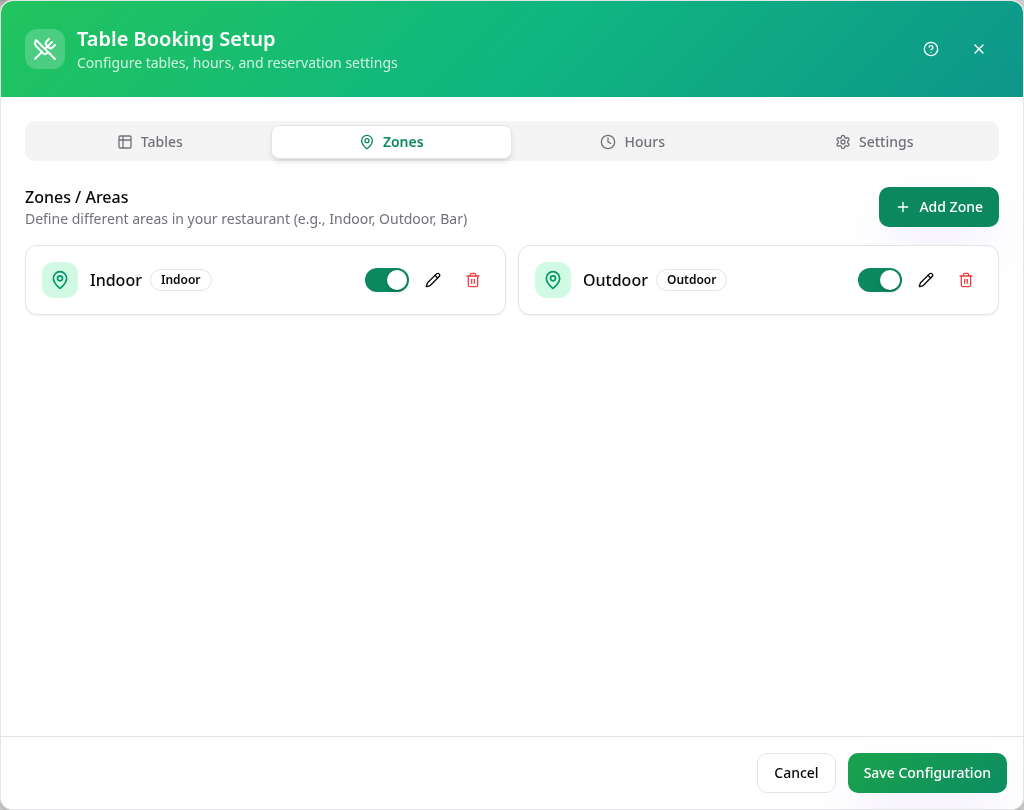
Set your zones
Keep Indoor and Outdoor, or add areas like Bar or Terrace.
- 7
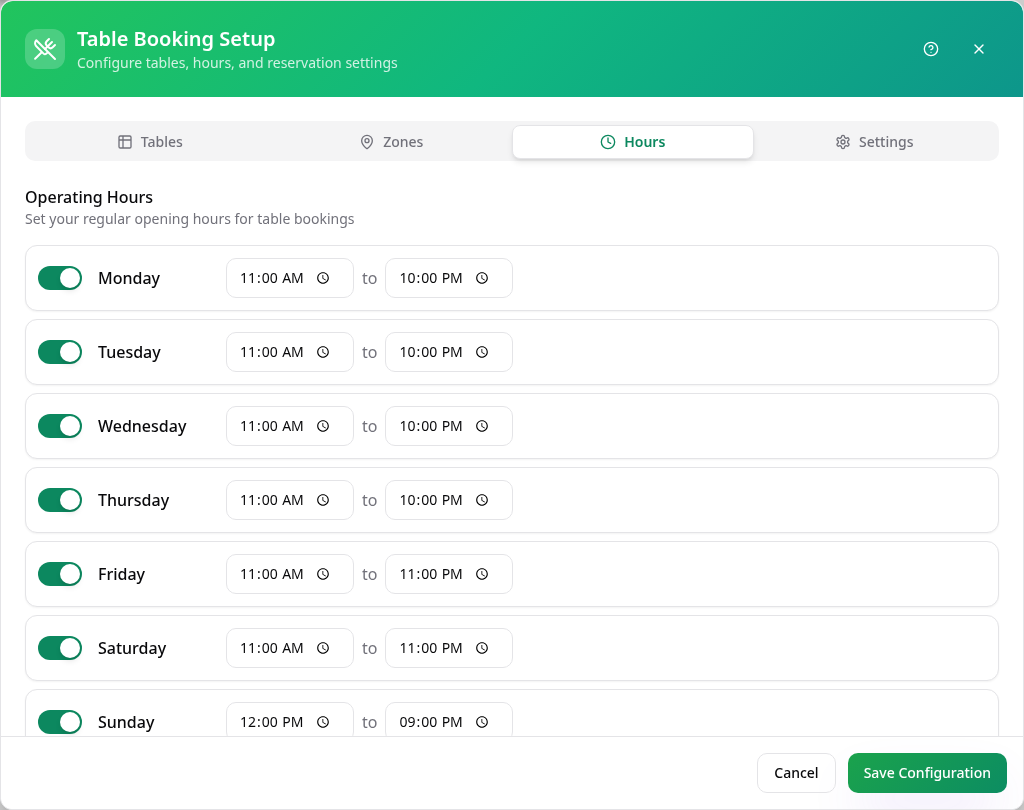
Set opening hours
Switch days on or off and set booking times for each.
- 8
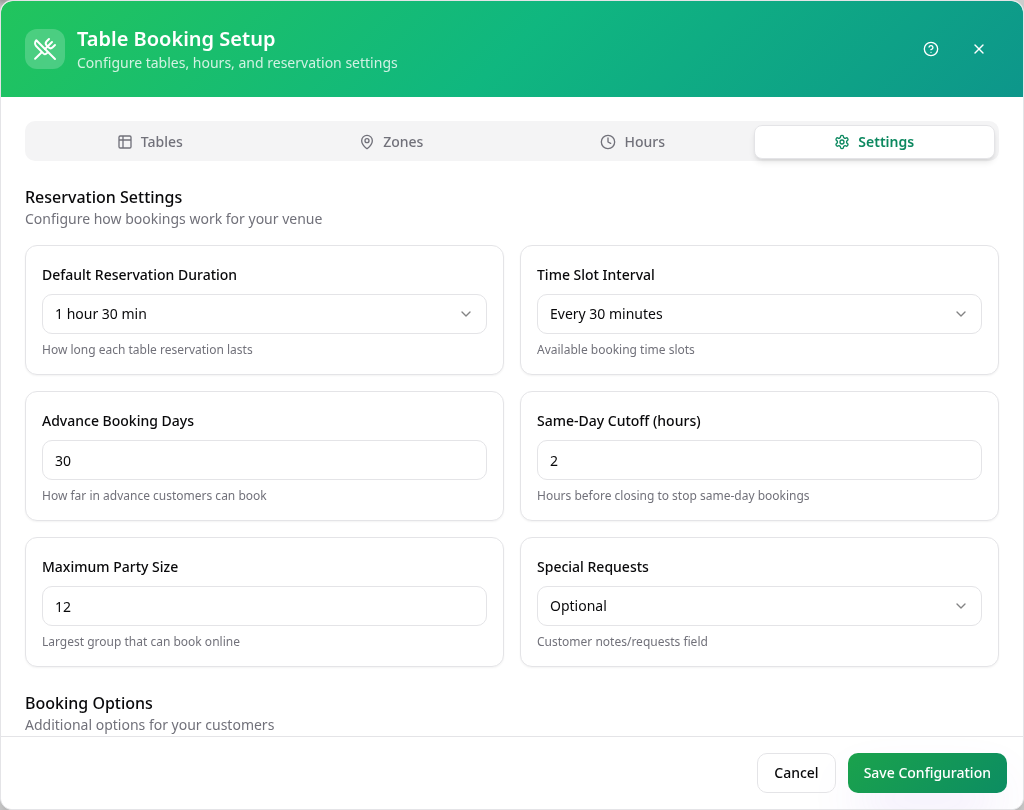
Choose booking rules
Set booking length, time slots, how far ahead people can book and party size. Tap Save Configuration.
- 9
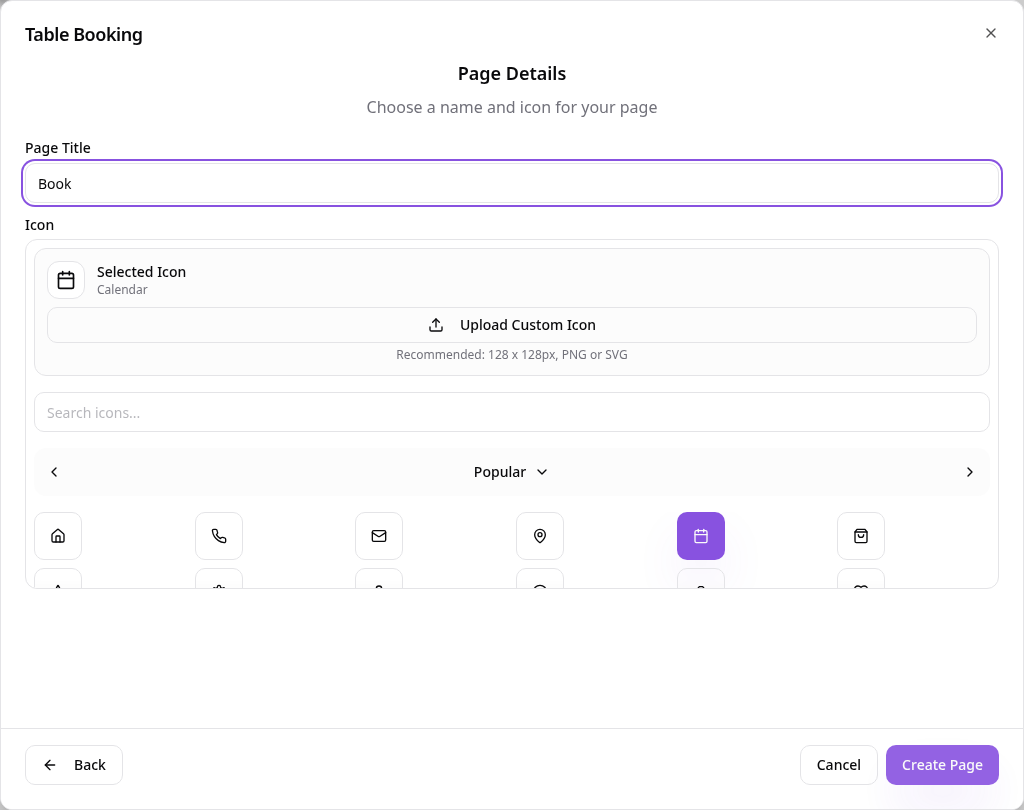
Name the page
Use a short name such as Book, choose an icon and tap Create Page.
- 10
See it in your app
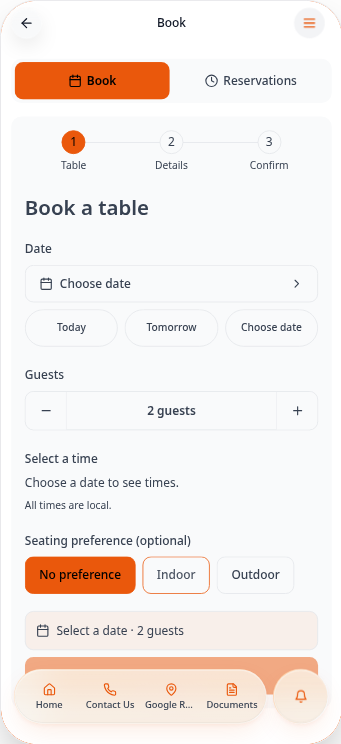
Customers pick a date, guests and time, then confirm their booking.
To change tables or hours later, open the page in Pages and choose Edit Page Content. New reservations appear in Data Manager.