Trade Jobs & Quotes
Set up estimates and quote requests, then manage customer acceptance, changes, scheduled jobs and invoices.
Step-by-step guide
Follow these steps, then download the PDF to keep.
- 1
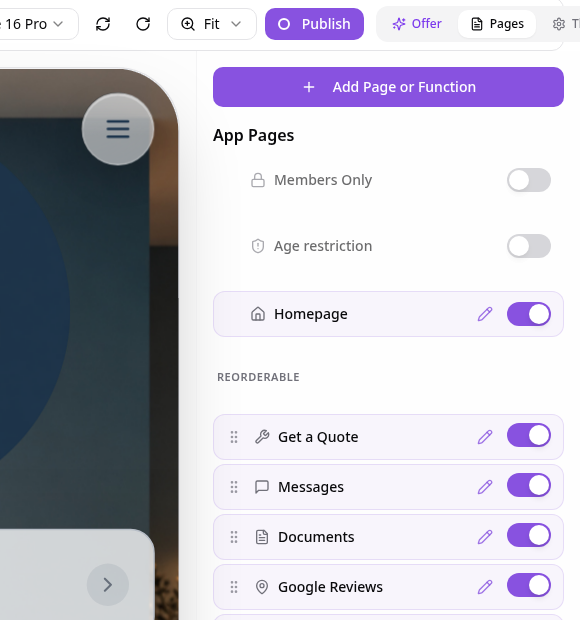
Open Pages
In your app editor, open Pages and choose Add Page or Function.
- 2
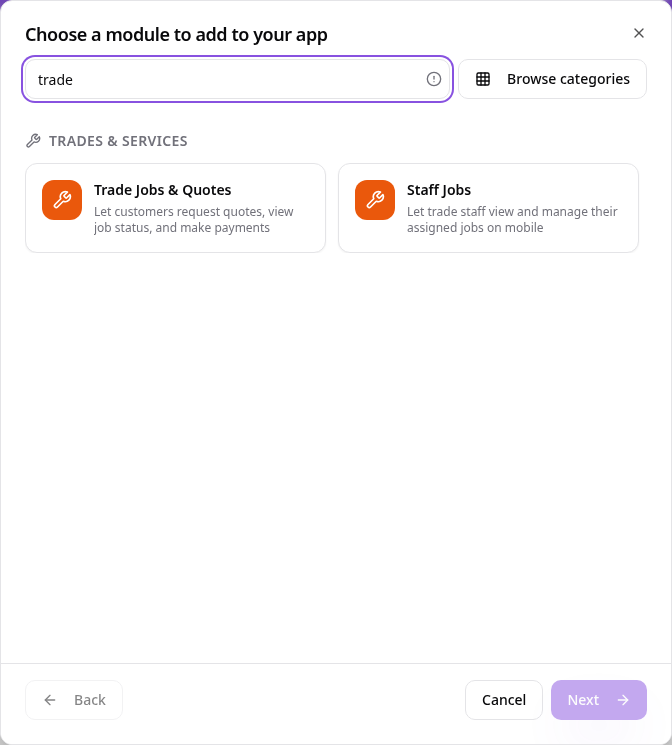
Choose Trade Jobs & Quotes
Search for trade and select Trade Jobs & Quotes.
- 3
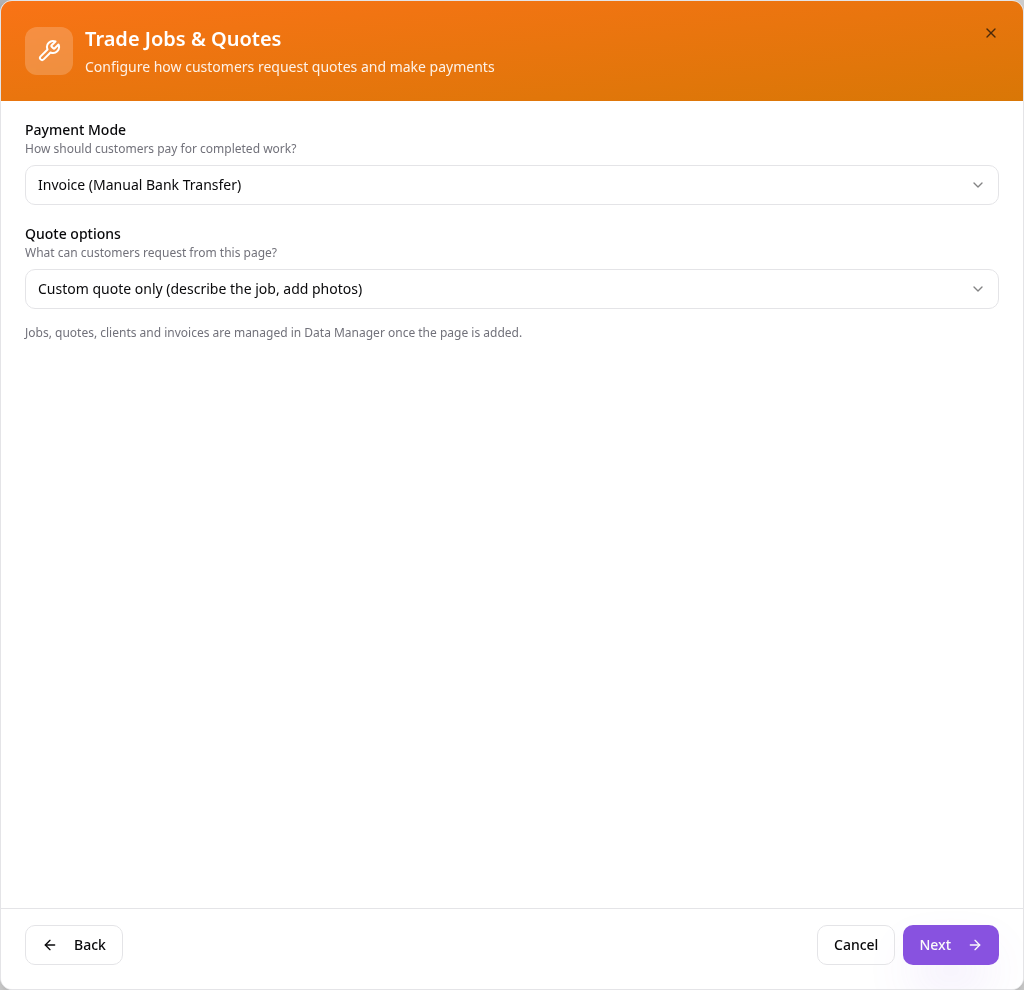
Choose payment and quote options
Choose invoice or Stripe payments, then custom quotes, instant estimates or both; this example uses invoices.
- 4
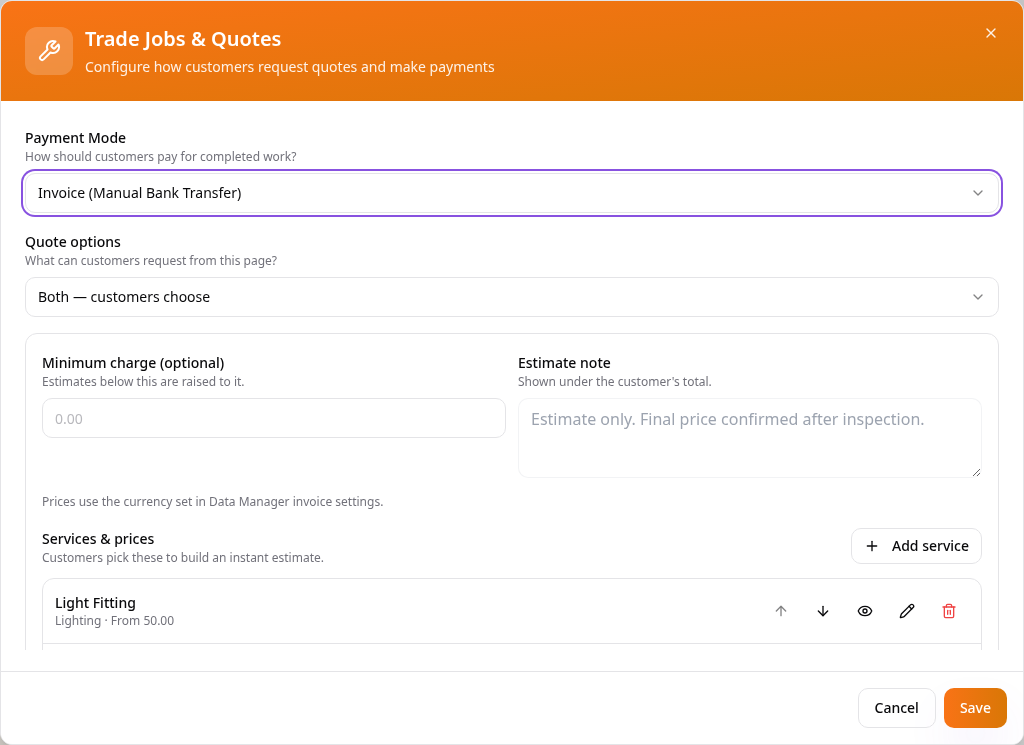
Set up instant estimates
With estimates enabled, set an optional minimum charge and an estimate note; manage your service prices here.
- 5
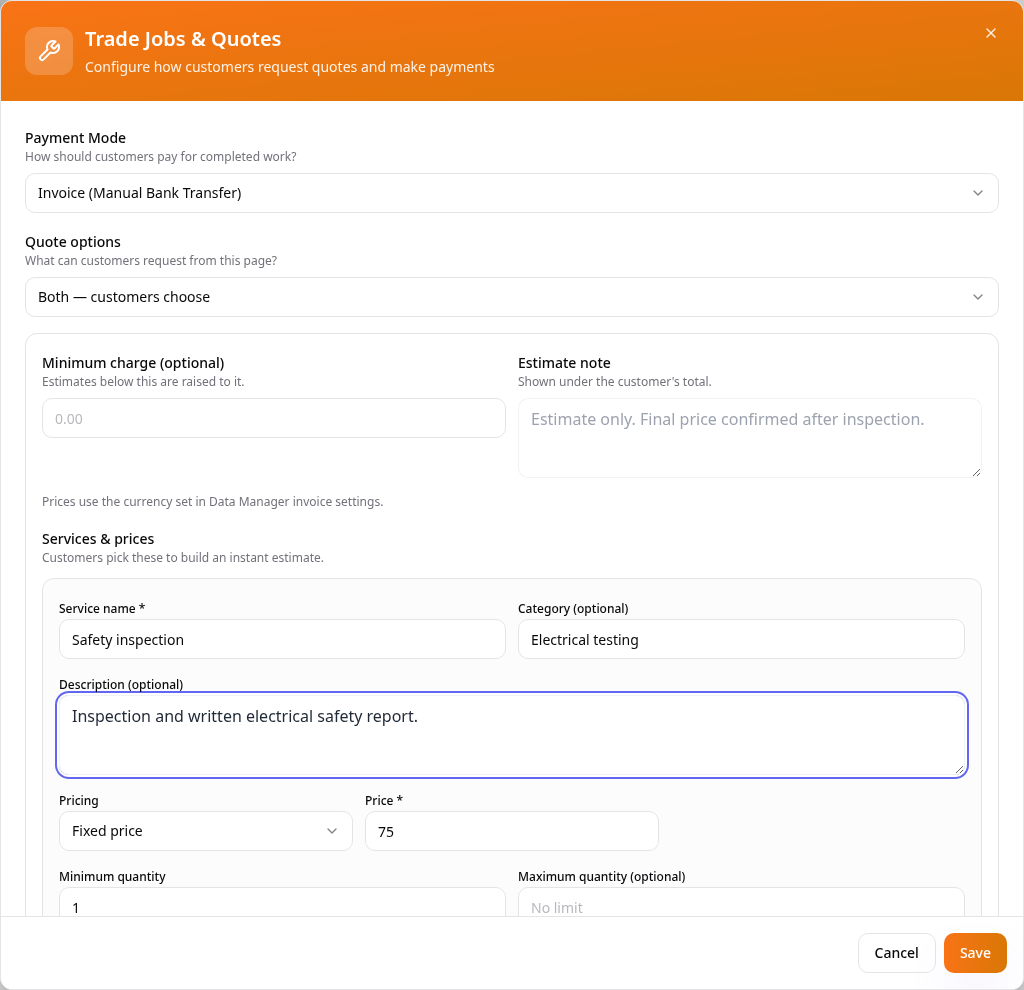
Add a service
Enter the service name, category, description, pricing and quantity limits; choose Add service to save it.
- 6
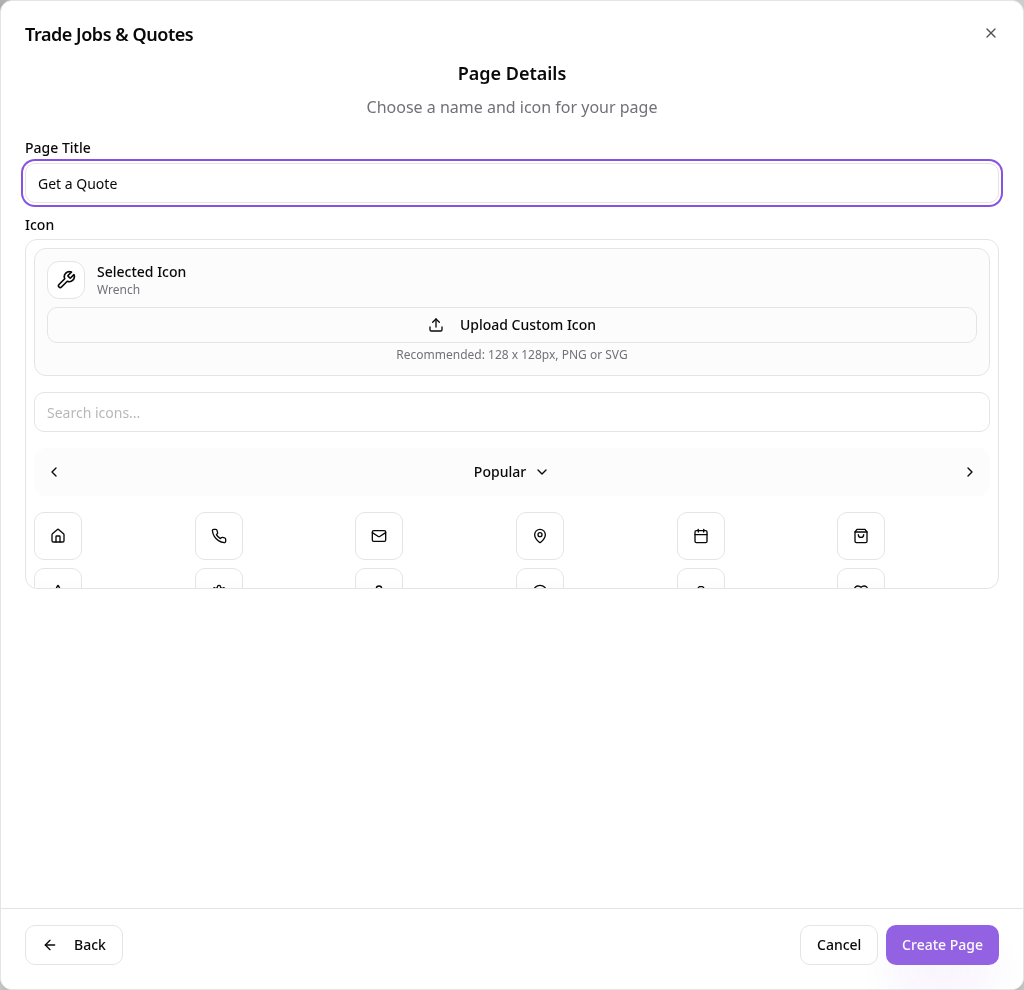
Name your page
After Next, check the page name and icon, then choose Create Page; this example uses Get a Quote.
- 7
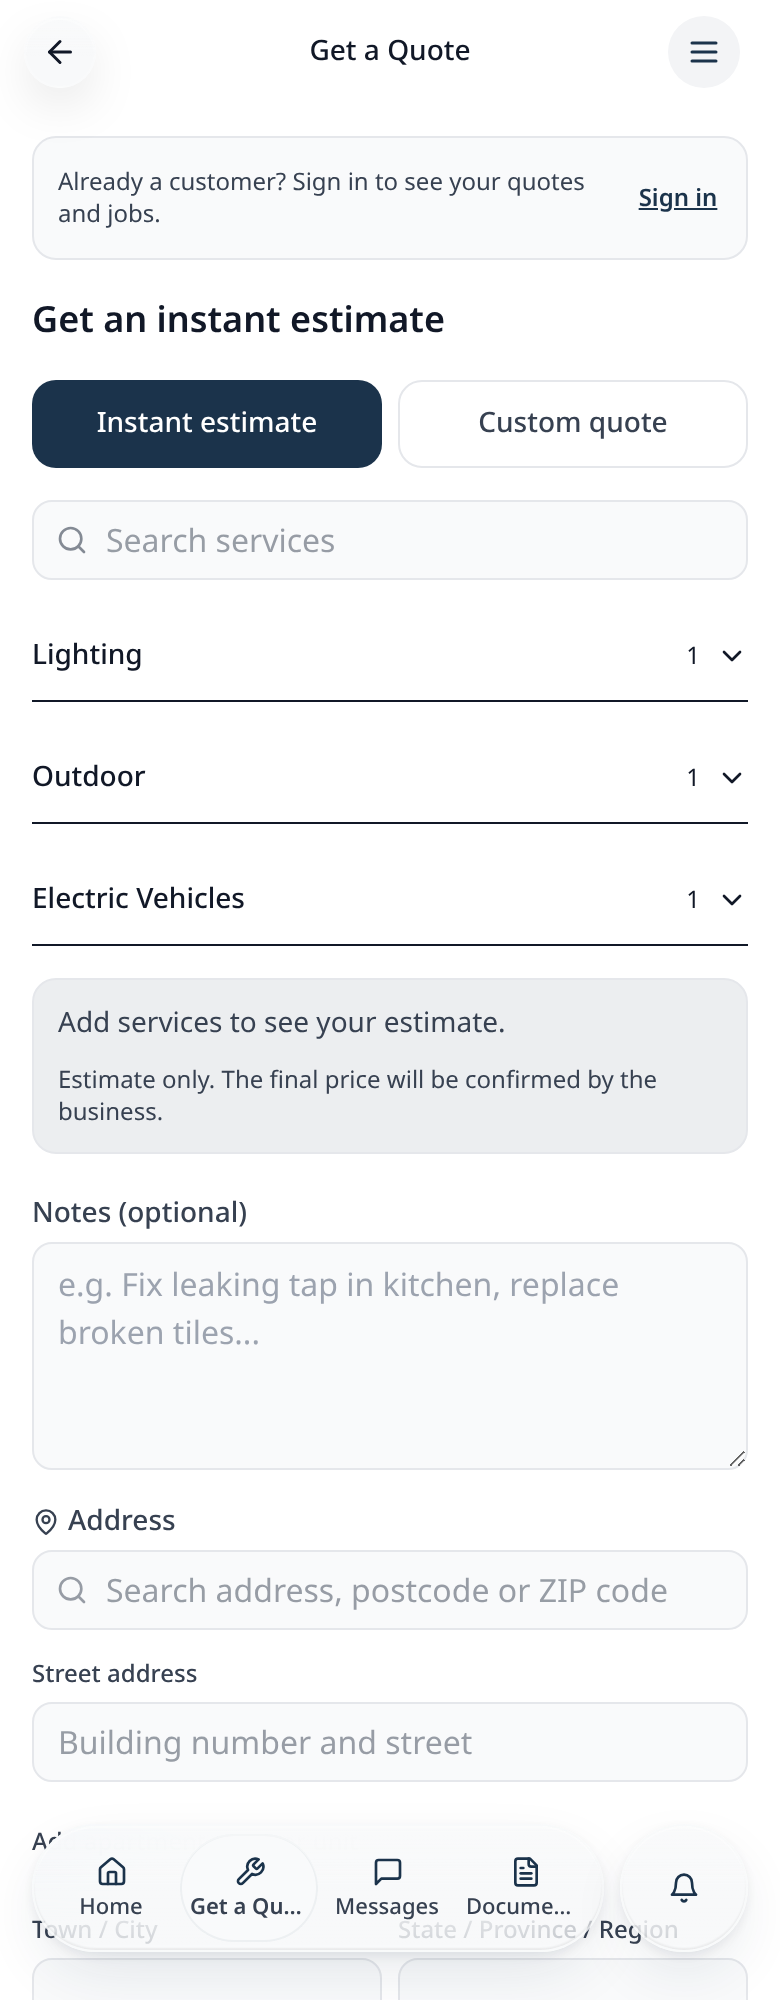
Customers browse your services
Customers open Get a Quote and choose an instant estimate or a custom quote.
- 8
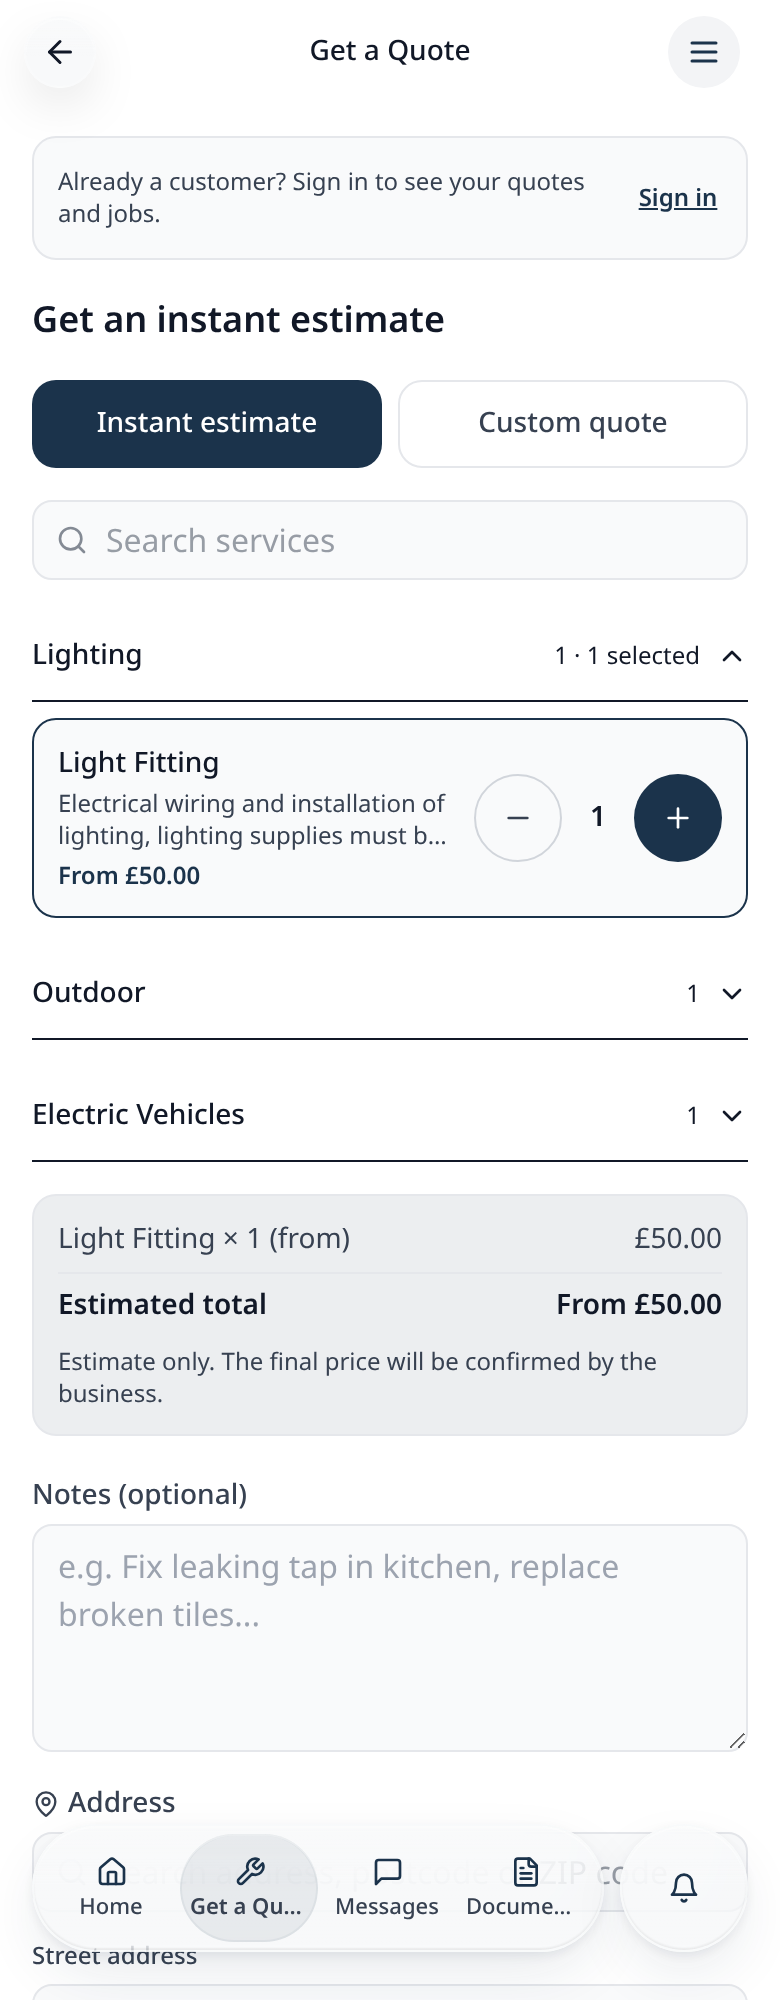
Build an instant estimate
Add a service and adjust its quantity; the estimated total updates before any request is sent.
- 9
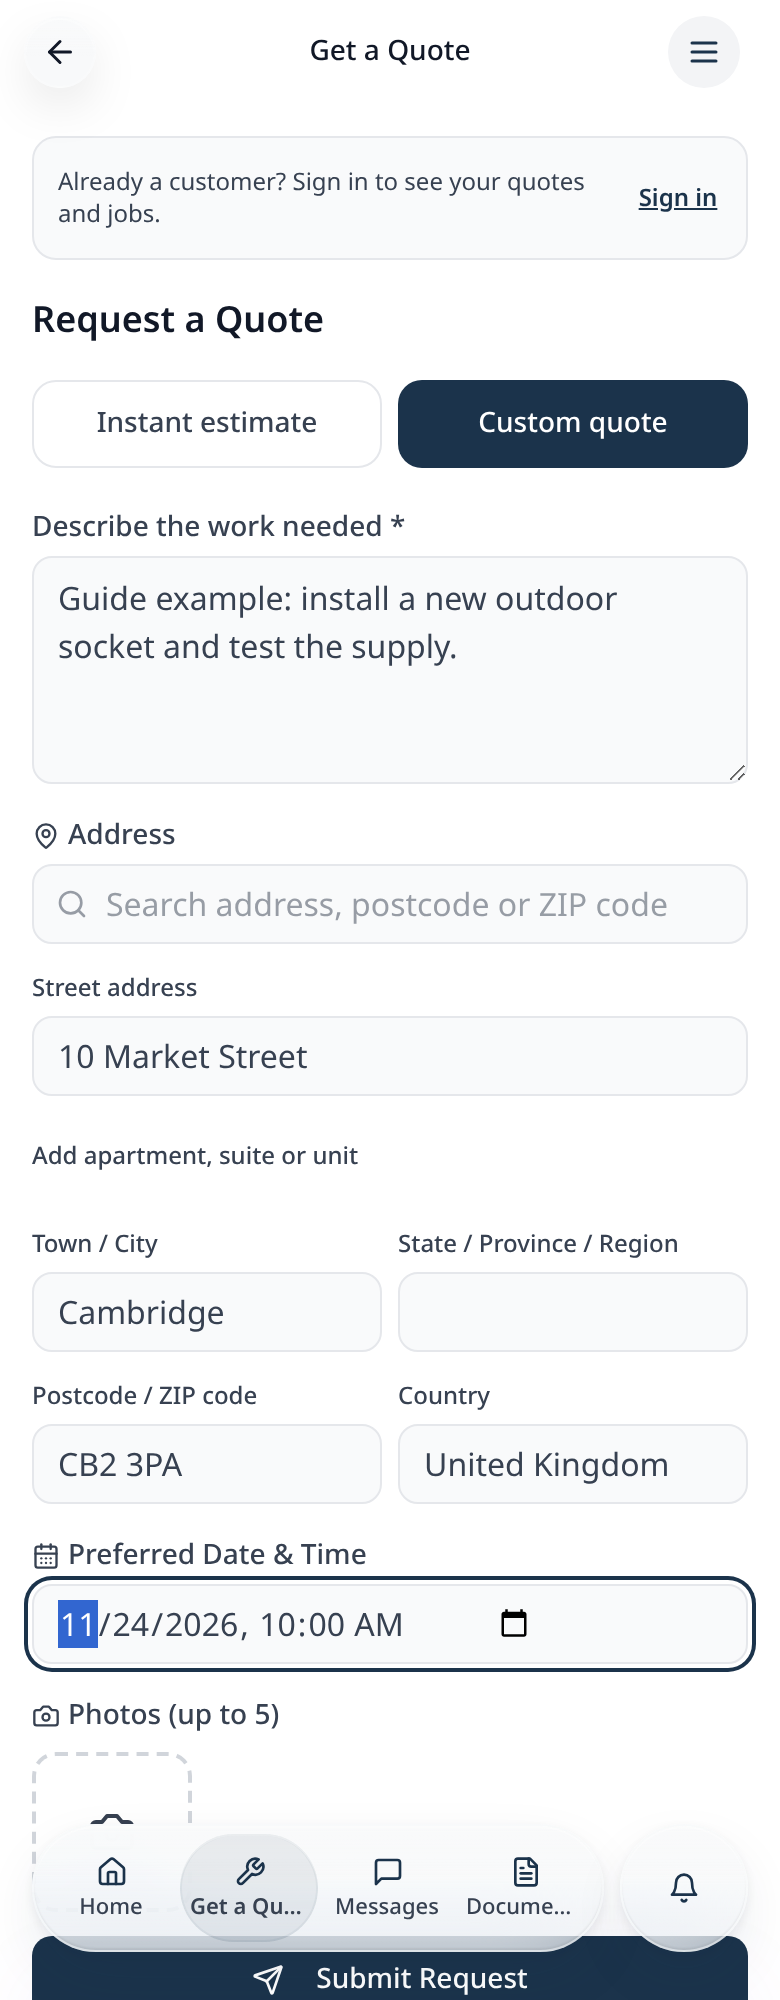
Describe a custom job
For work without a fixed price, describe the job, add its address and preferred time, and optionally attach photos.
- 10
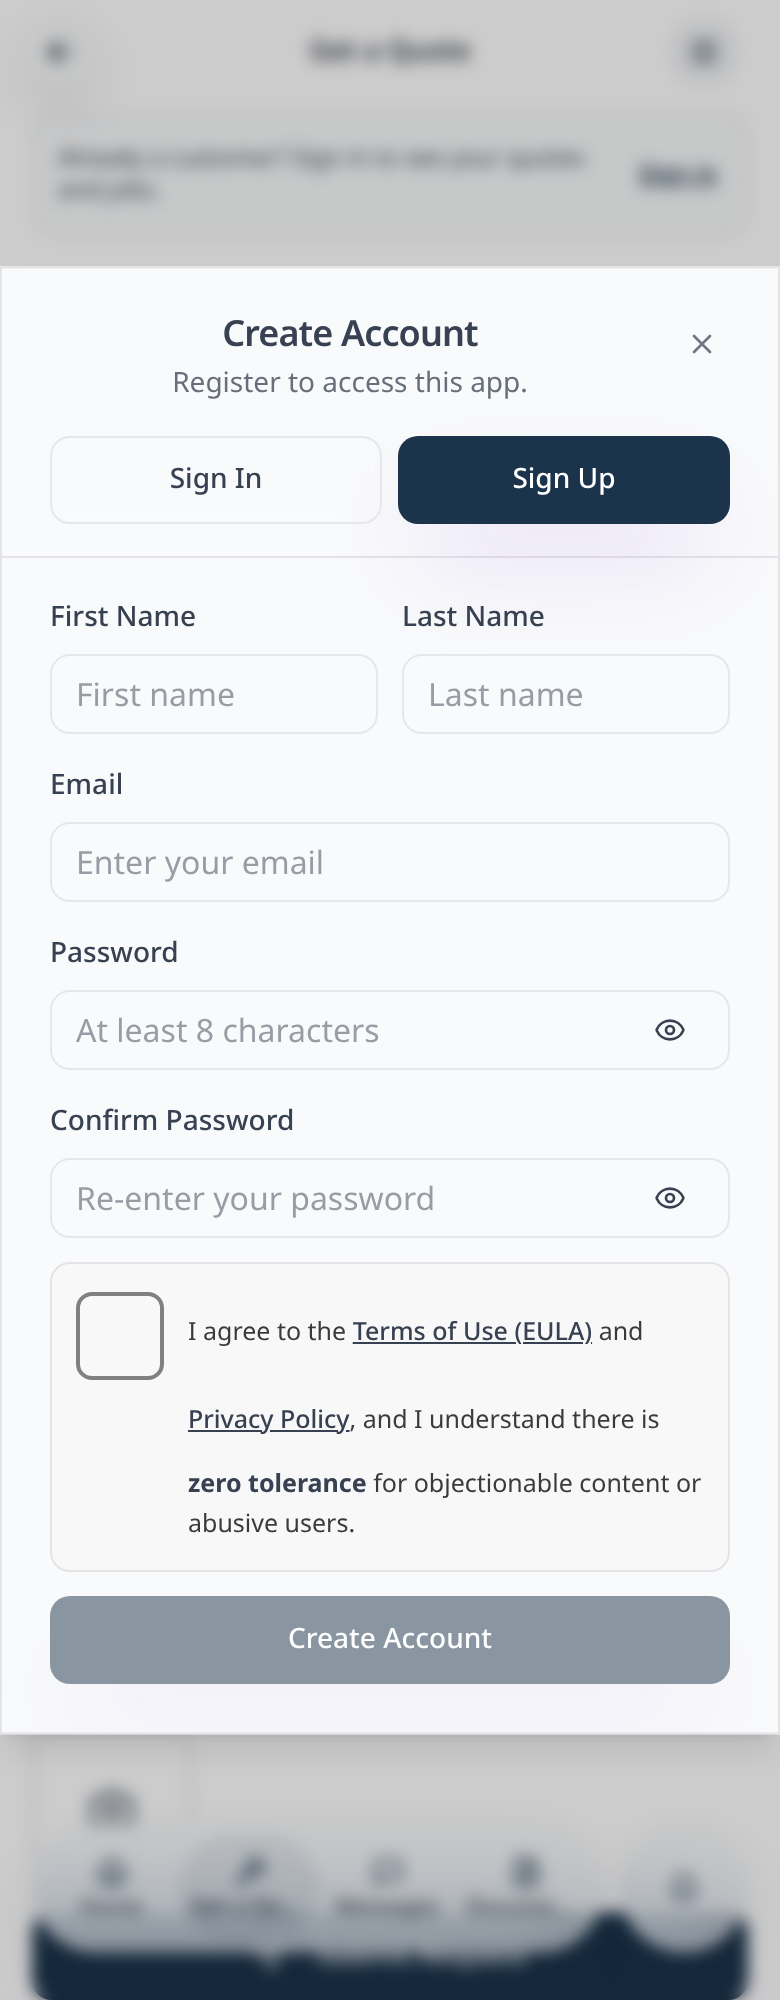
Sign in before sending
Customers must sign in or create an account before submitting; check the request has appeared under Your Requests.
- 11
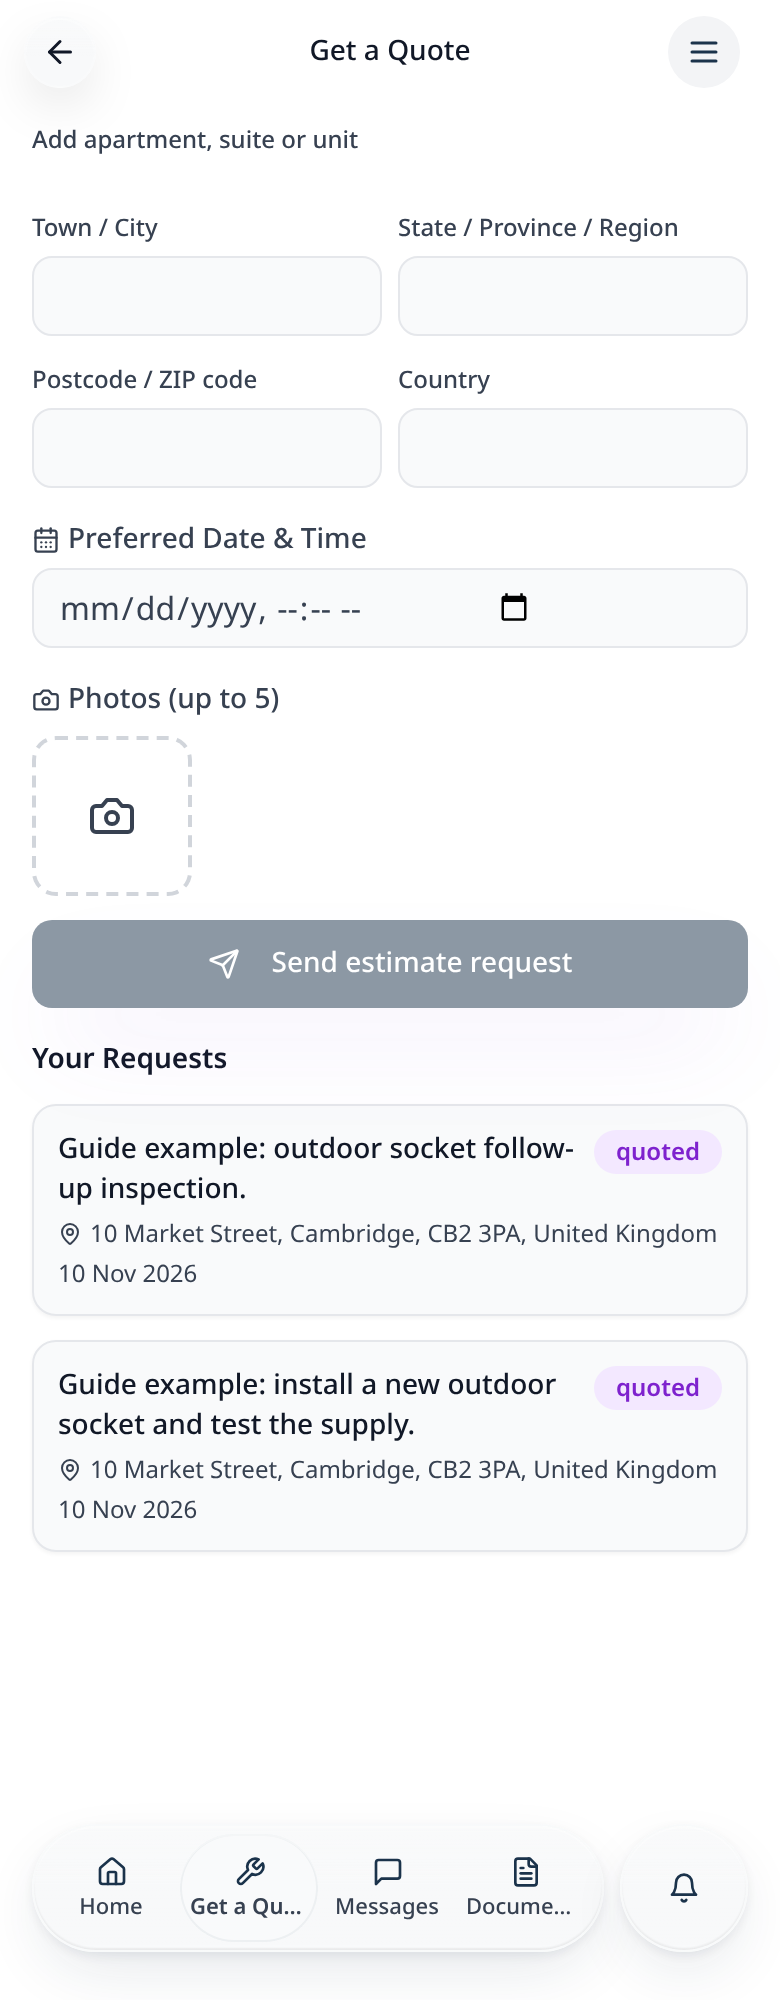
Check the submitted request
The signed-in customer sees the submitted job under Your Requests, with its current status.
- 12
Review requests in Data Manager
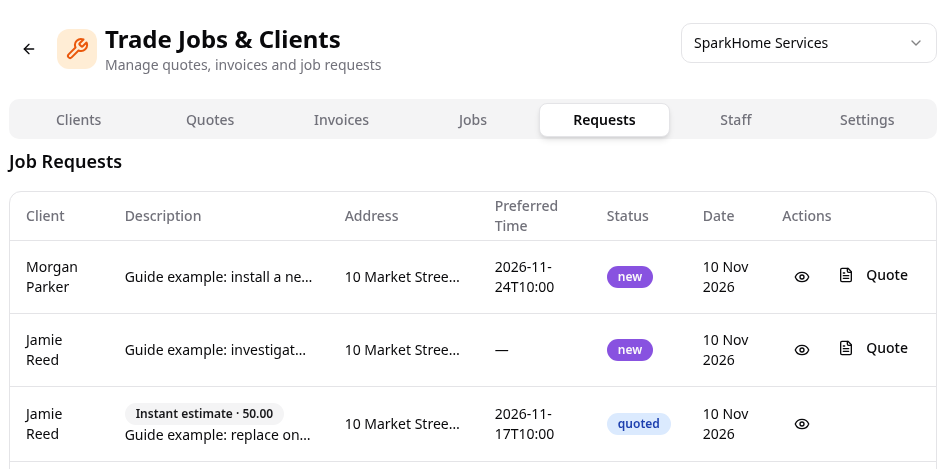
Open Data Manager → Trade Jobs & Clients, select your app, open Requests and choose Quote beside the customer.
- 13
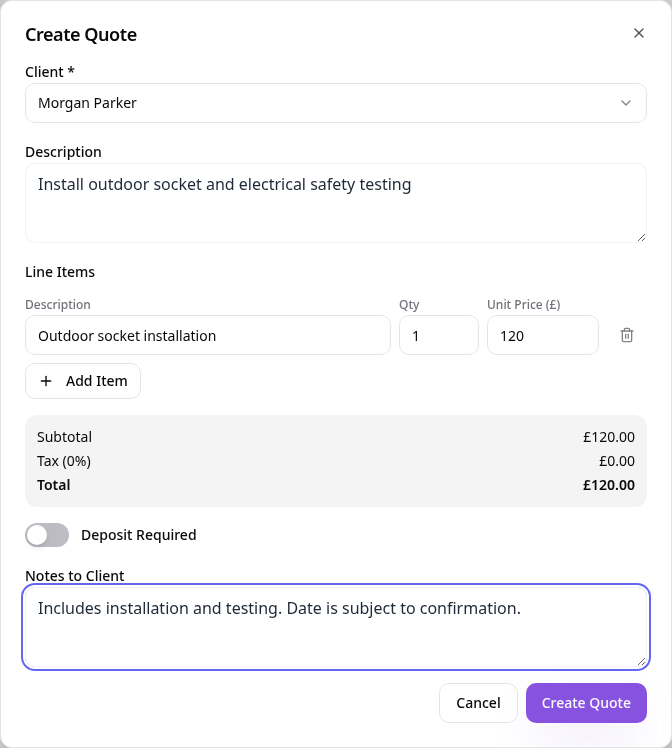
Price the work
Check the client, description, quantities and unit prices; add any deposit or notes, then choose Create Quote.
- 14
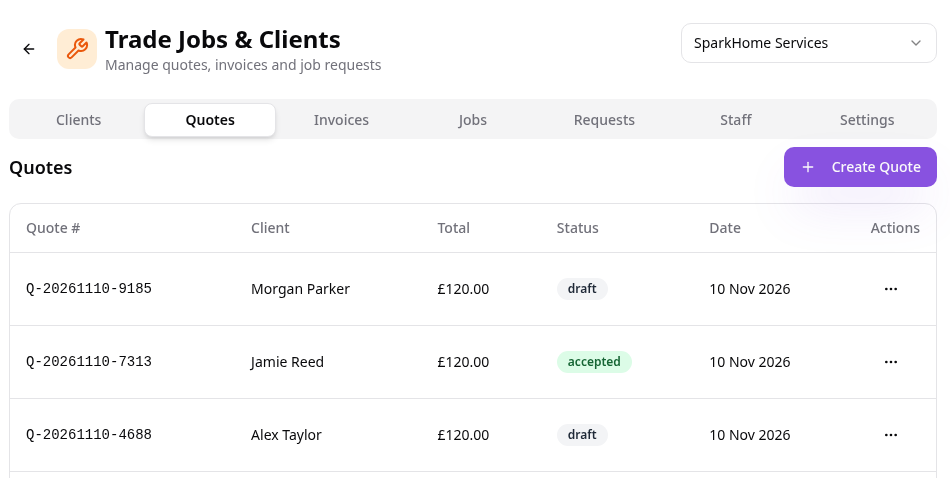
A draft quote is created
The quote starts as draft; check its customer and total before sending it.
- 15
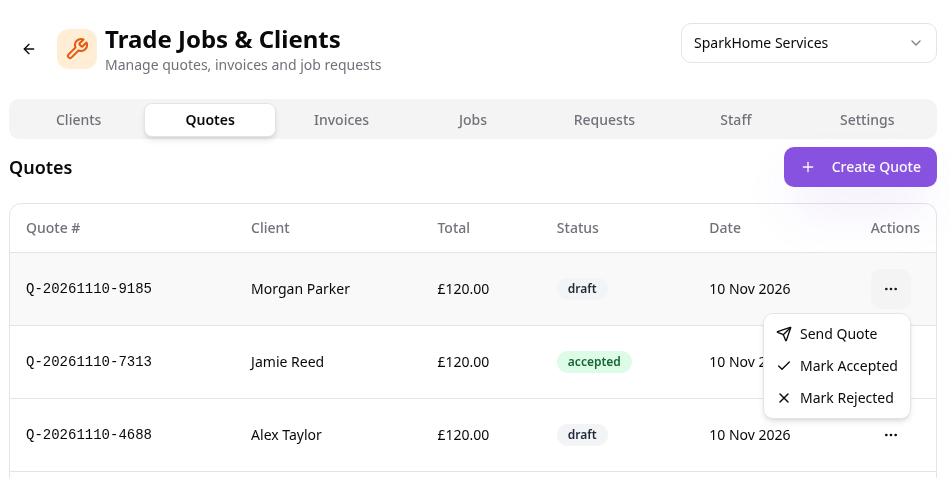
Send the quote
Open the quote’s three-dot menu and choose Send Quote.
- 16
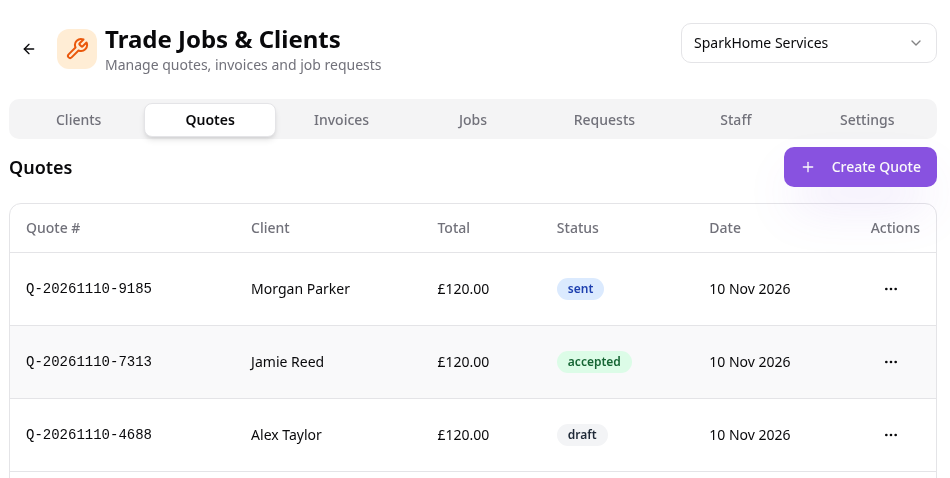
Check the sent status
The quote now shows sent, ready for the customer to review in their app.
- 17
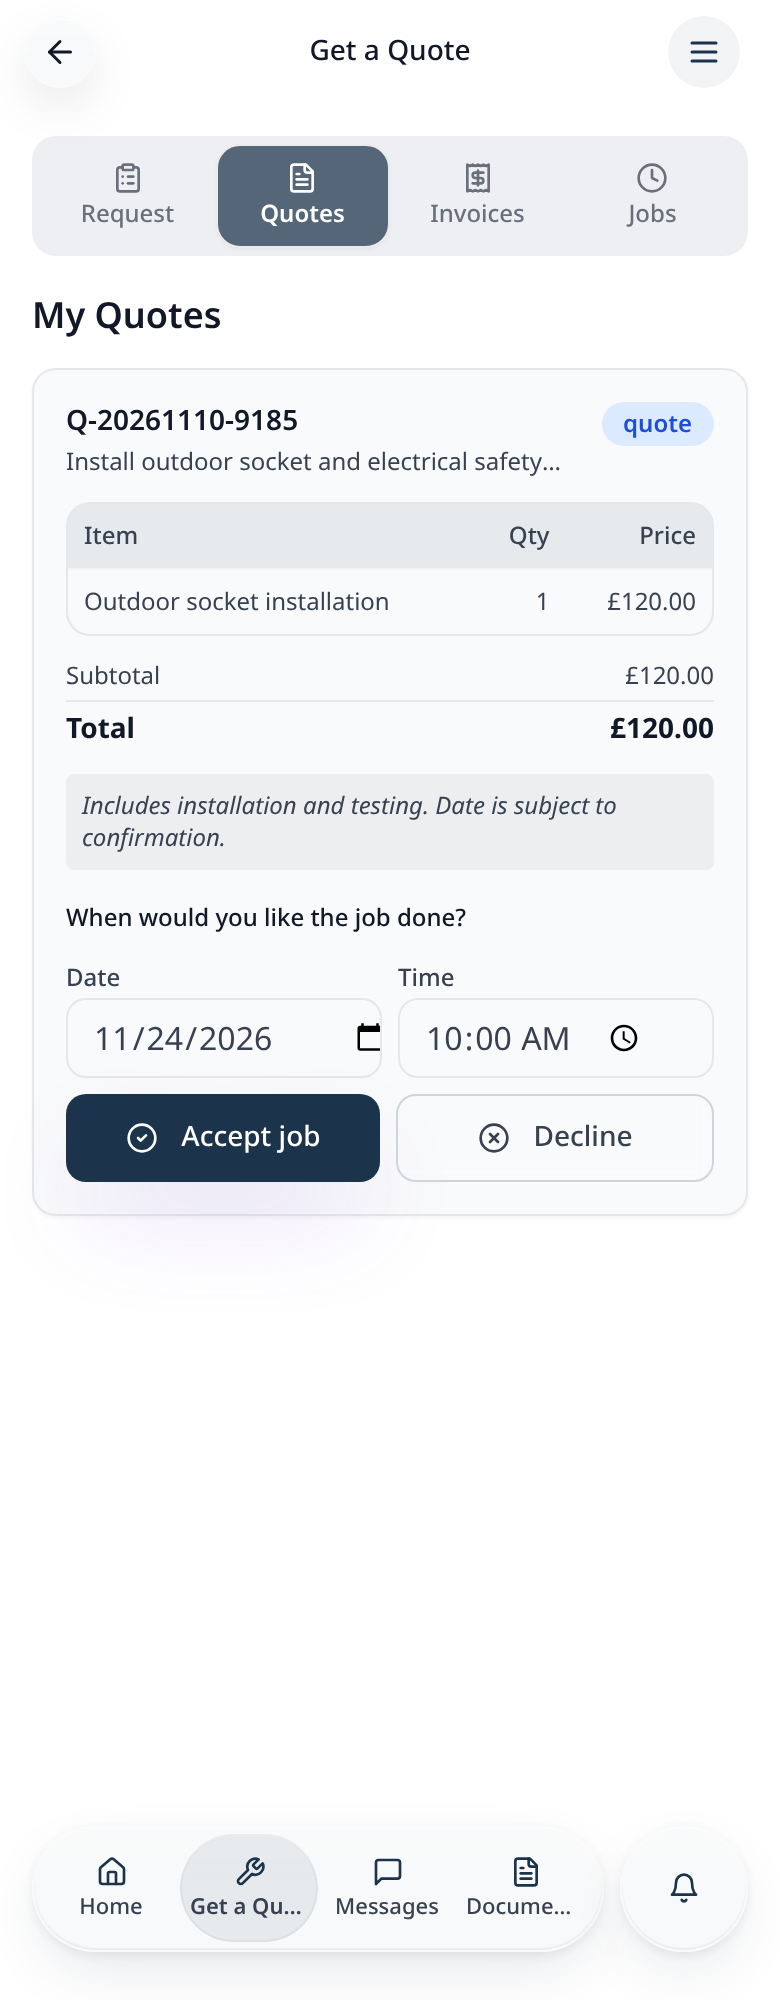
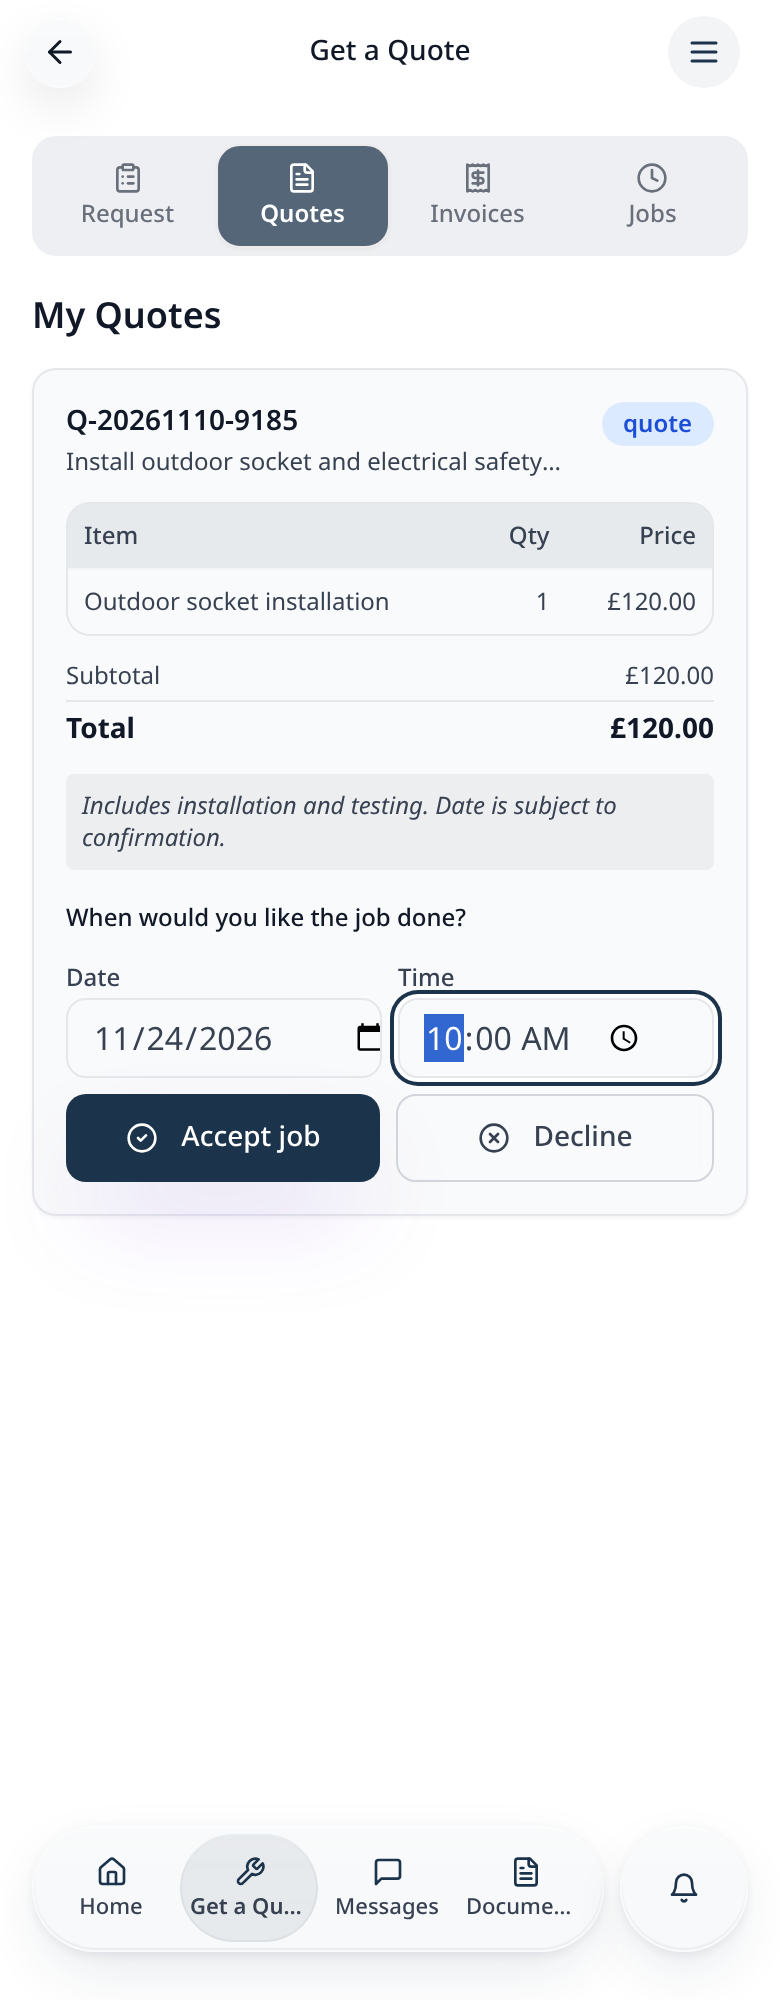
The customer reviews the quote
The customer opens Quotes to check each item, the total and any notes; they can accept or decline.
- 18
Choose a preferred date and time
The customer selects when they would like the work done and chooses Accept job.
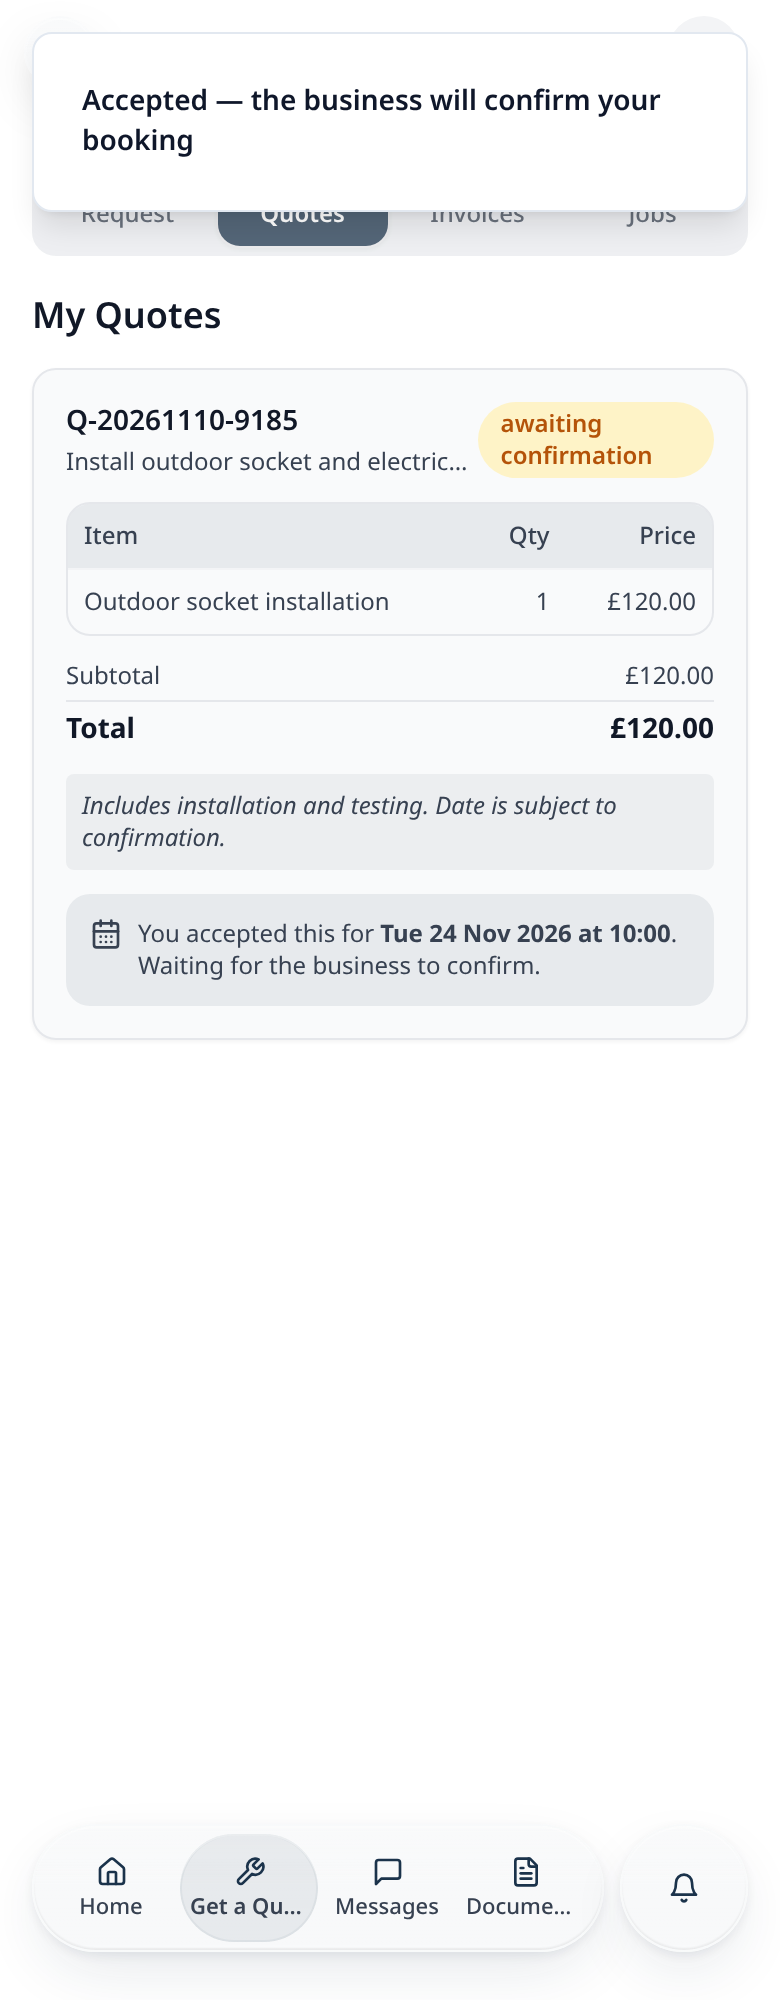
- 19
Acceptance is not yet a booking
The customer sees that the business still needs to confirm the requested date and time.
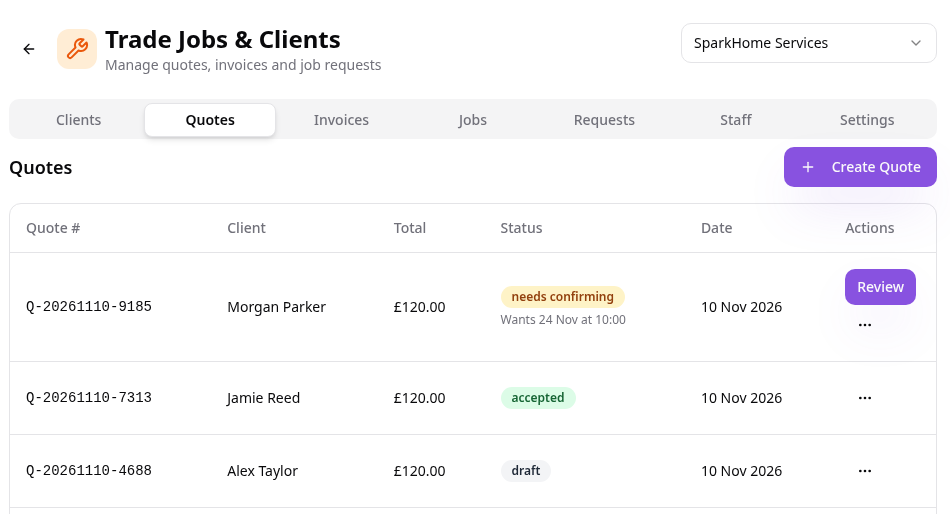
- 20
Review the customer acceptance
In Data Manager, the quote shows needs confirming; choose Review to check the proposed job.
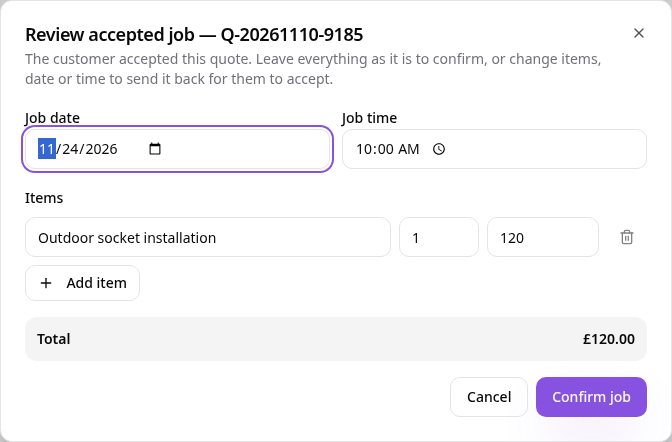
- 21
Confirm as-is or amend
Keep the items, date and time unchanged to use Confirm job, or edit them to propose changes.
- 22
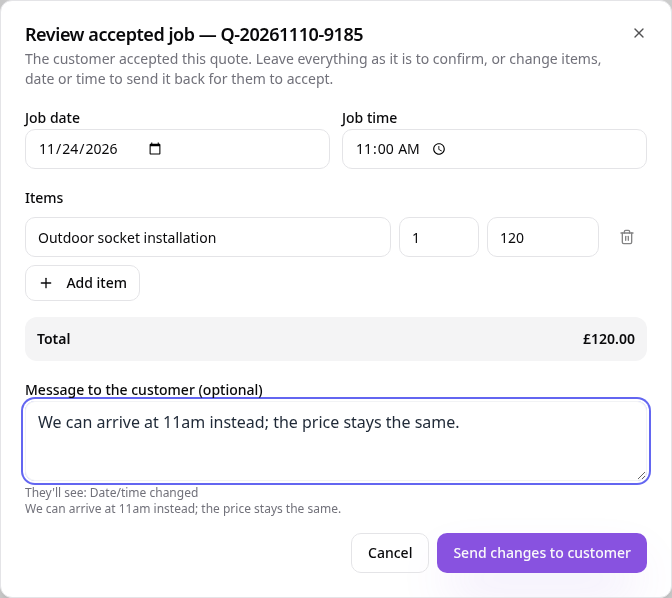
Send proposed changes
In this example the business proposes 11am instead of 10am, adds an explanation and chooses Send changes to customer.
- 23
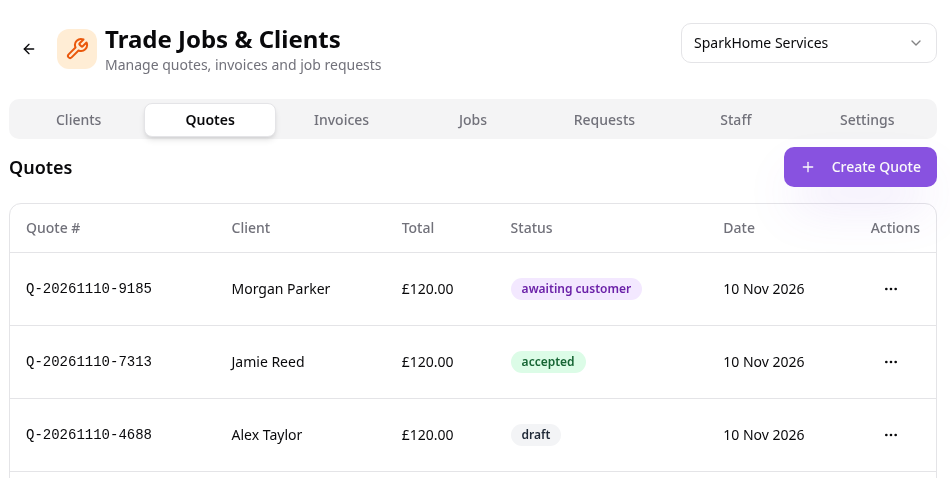
Wait for the customer’s response
The quote shows awaiting customer until they accept or decline the amended details.
- 24
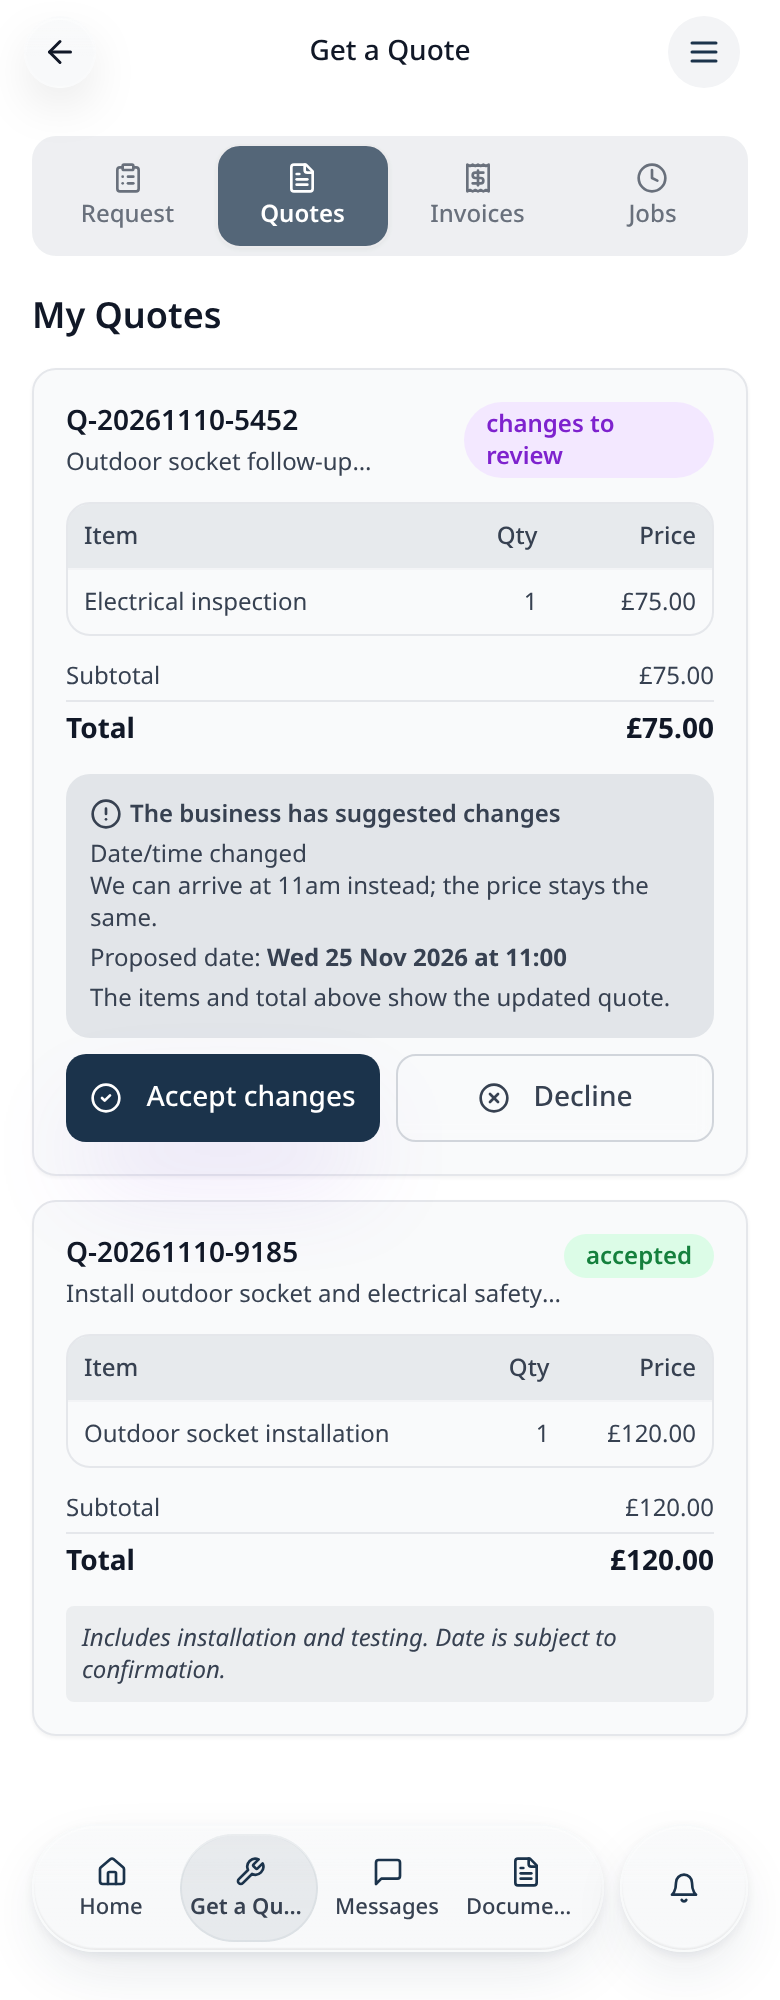
The customer checks the changes
The customer sees the explanation and proposed 11am appointment; this follow-up inspection example shows Accept changes and Decline.
- 25
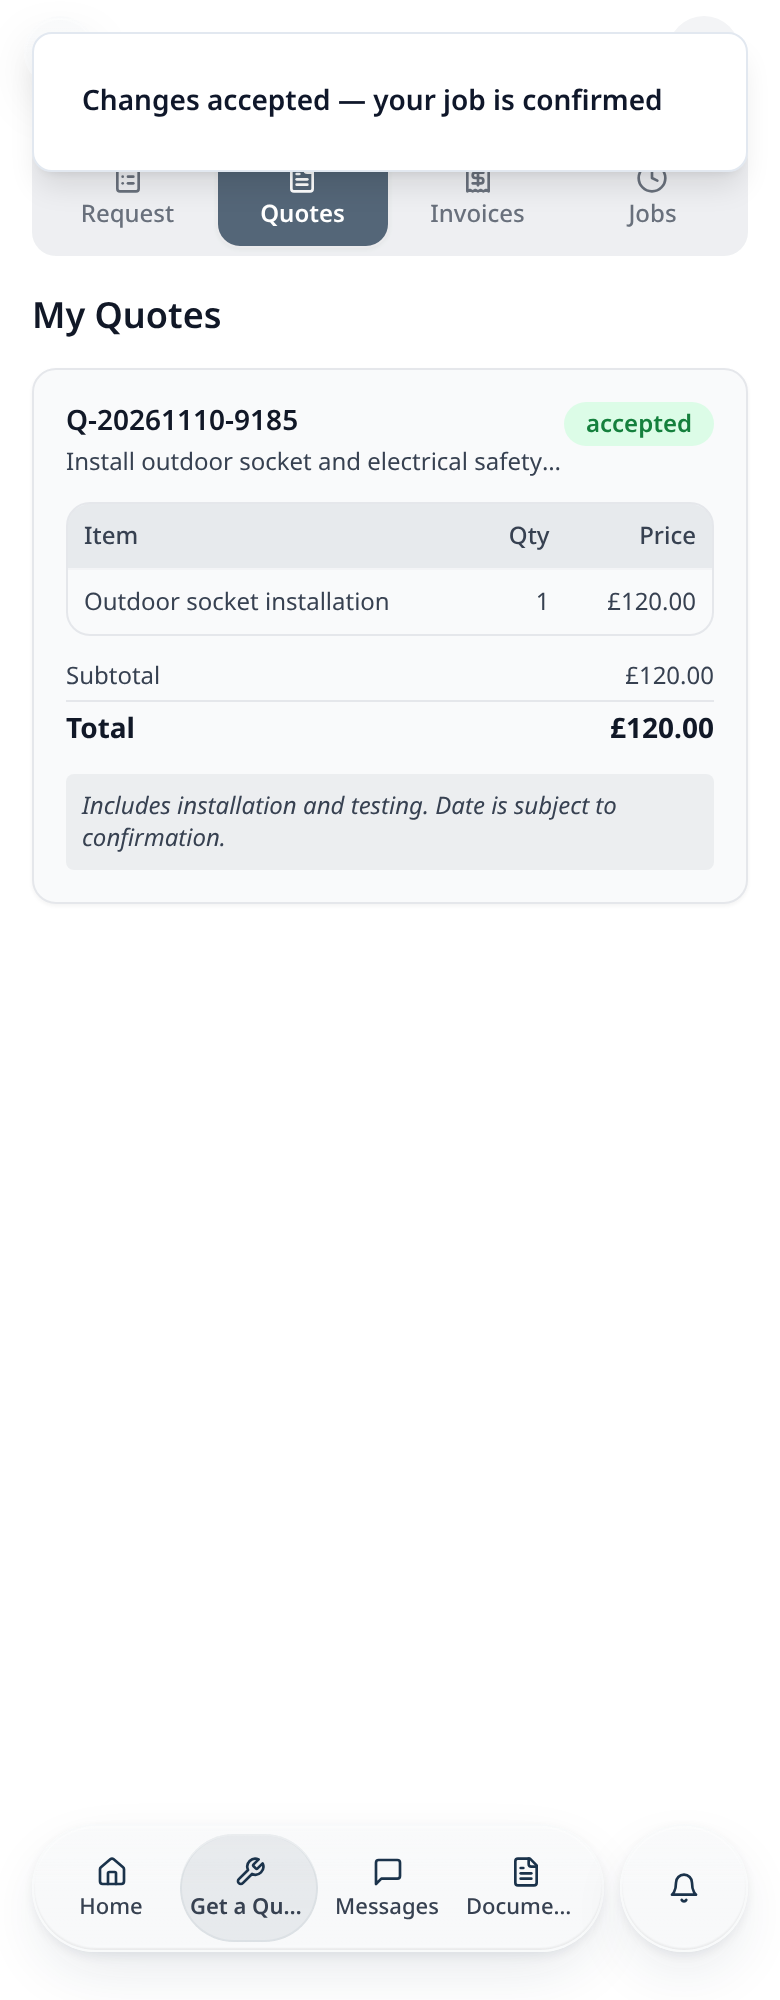
Accepting changes confirms the job
Accept changes confirms the revised job; the agreed details are saved, without another business review.
- 26
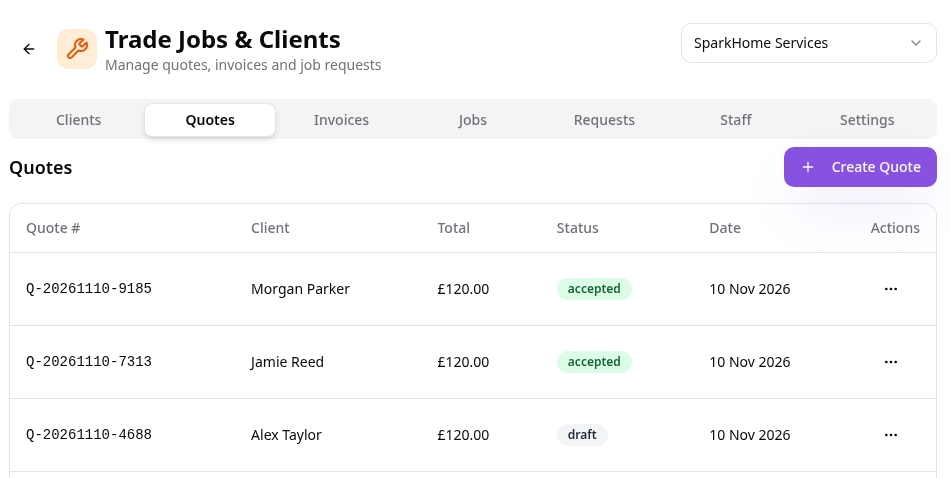
The quote is accepted
Data Manager now shows accepted; this is different from the earlier needs confirming stage.
- 27
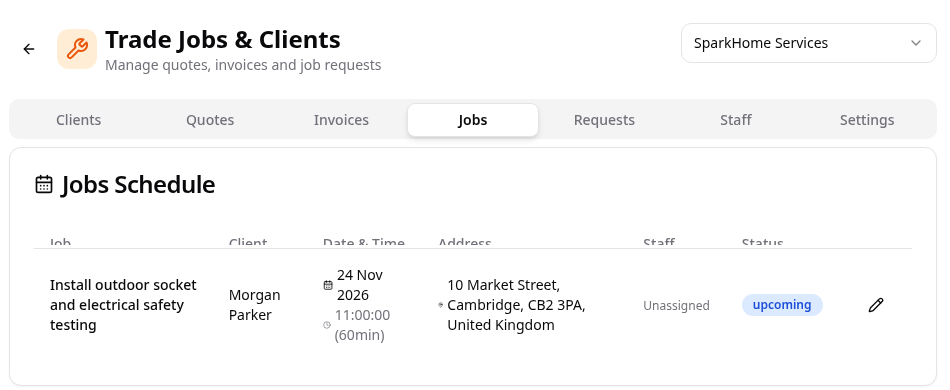
The job appears in the schedule
Open Jobs to see the confirmed date and time; staff assignment and job updates are managed here.
- 28
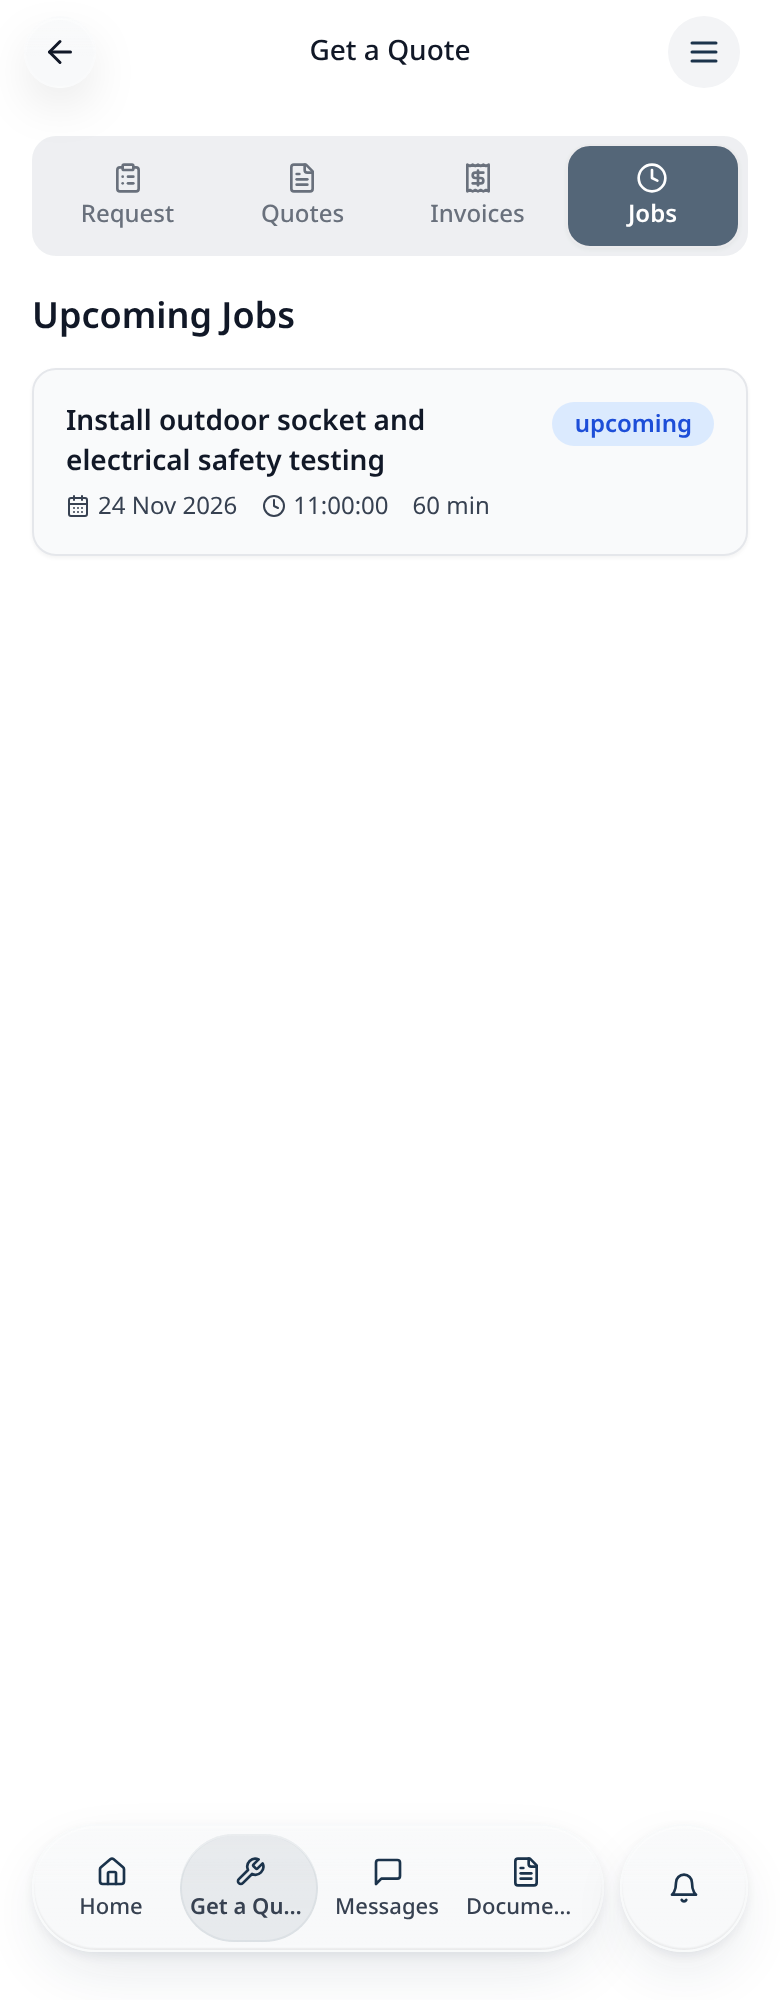
Customers see their upcoming work
In the app, Jobs shows the confirmed appointment, duration and current status.
- 29
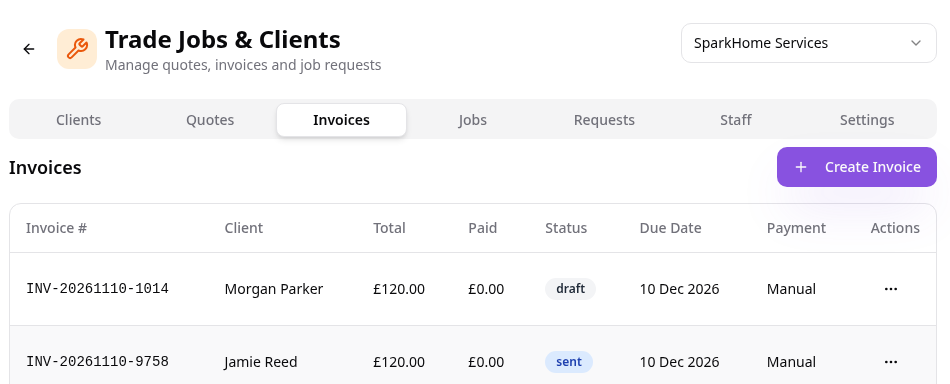
Convert the accepted quote to an invoice
From the accepted quote’s three-dot menu choose Convert to Invoice; the invoice initially appears as draft.
- 30
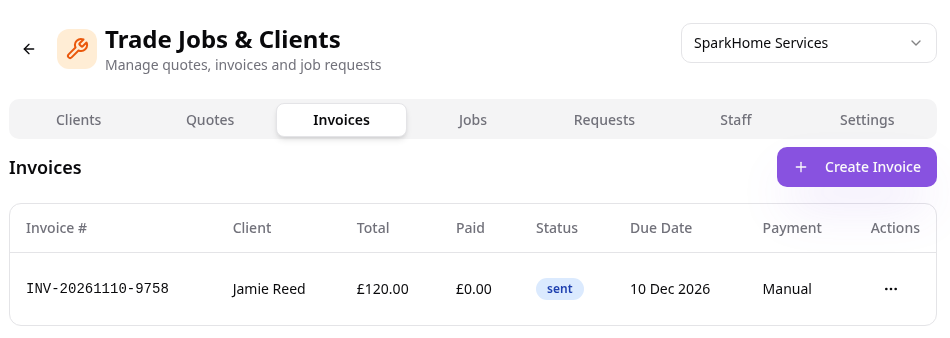
Manage invoices
Use Invoices to review amounts, payment progress and due dates; sending an invoice does not itself record payment.
- 31
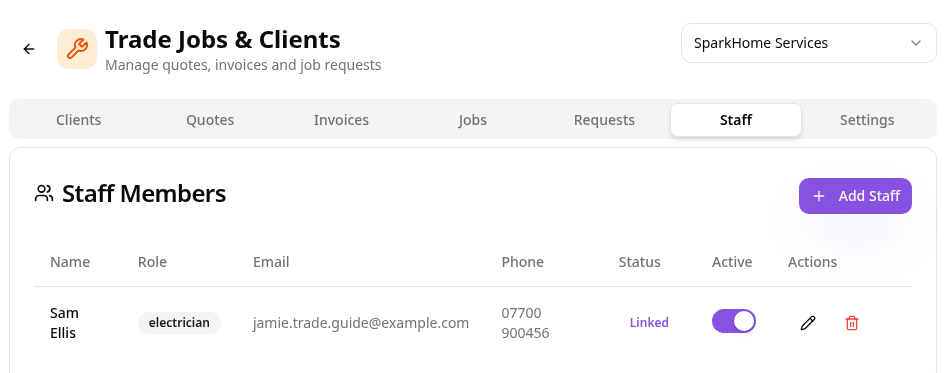
Manage your staff
Use Staff to maintain team members and their access, then assign staff to scheduled jobs.
- 32
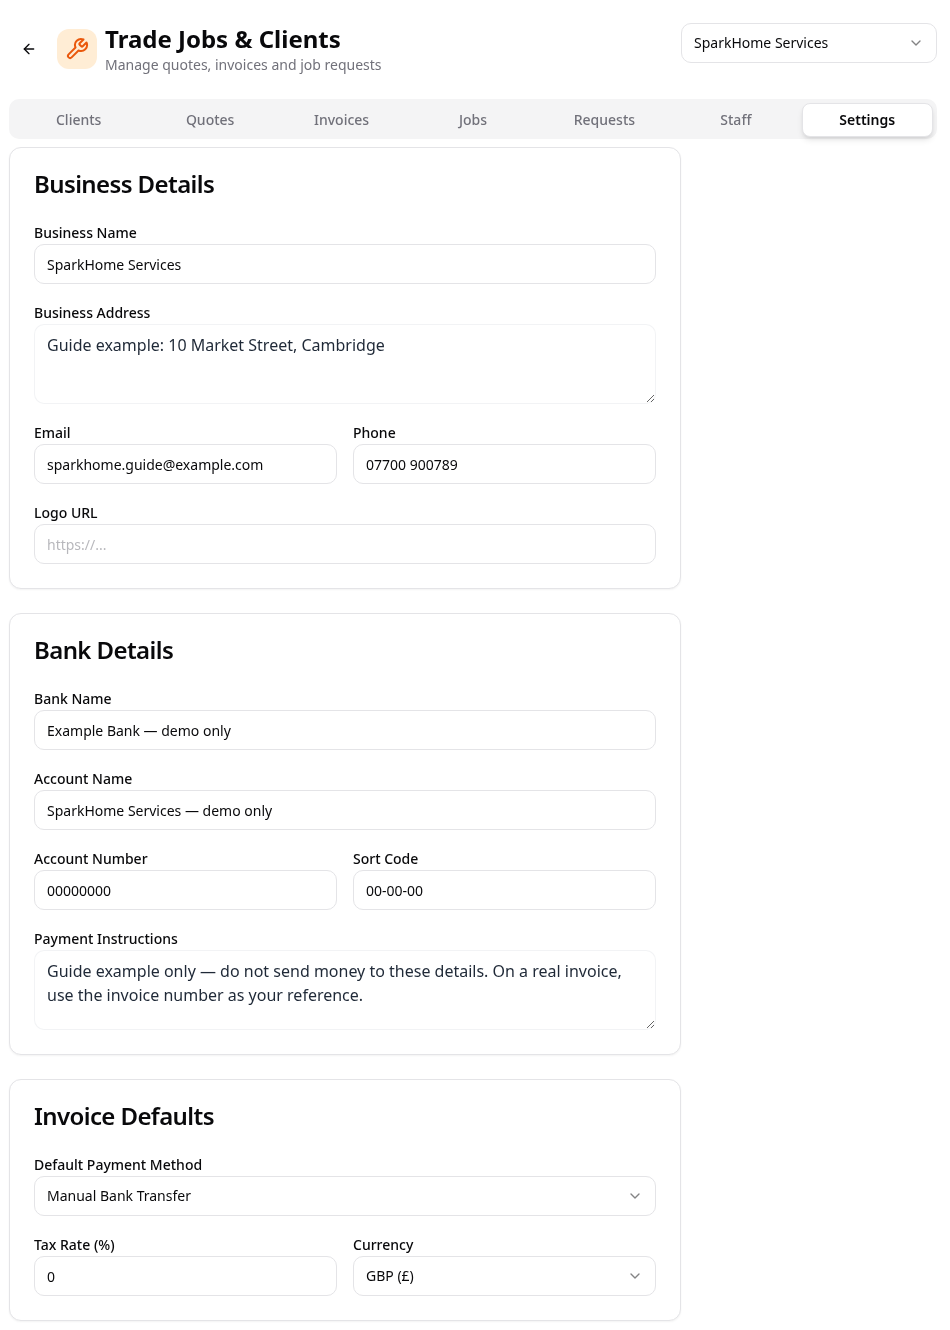
Set invoice details
Use Settings to enter business and payment details, currency and tax; use your real details rather than these demo examples.
Edit services and quote options in Edit Page Content. Manage incoming requests, clients, quotes, staff, jobs and invoices in Data Manager; accepting a date request and confirming a job are separate stages unless the customer accepts your proposed changes.