Step-by-step guide
Follow these steps, then download the PDF to keep.
- 1
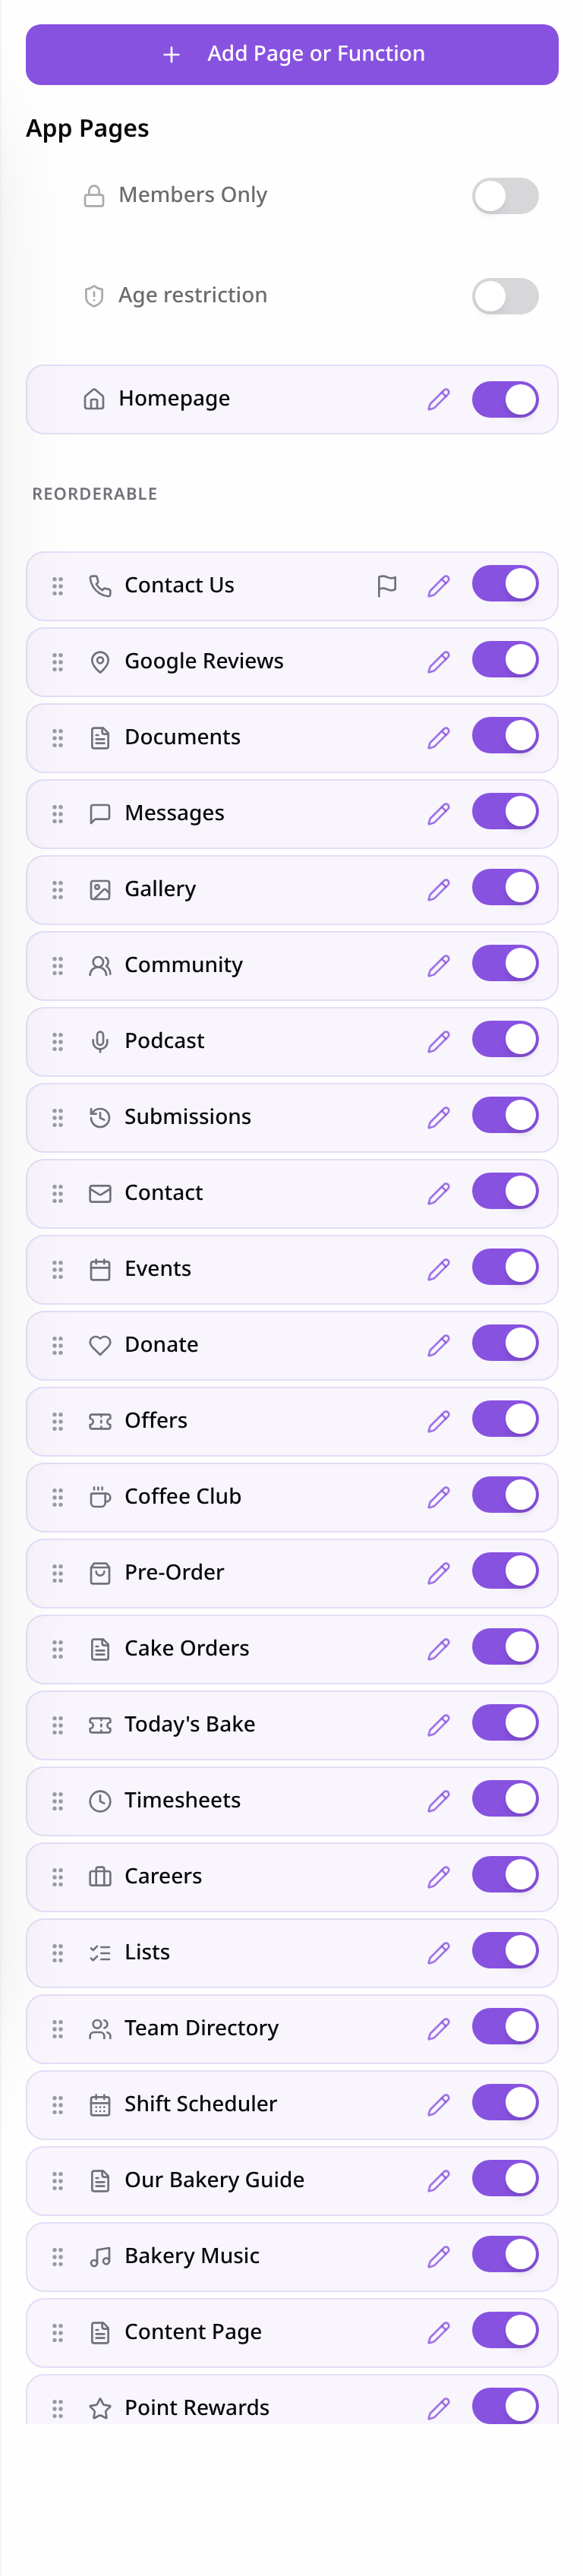
Open Pages
Open your app editor, select Pages, then Add Page or Function.
- 2
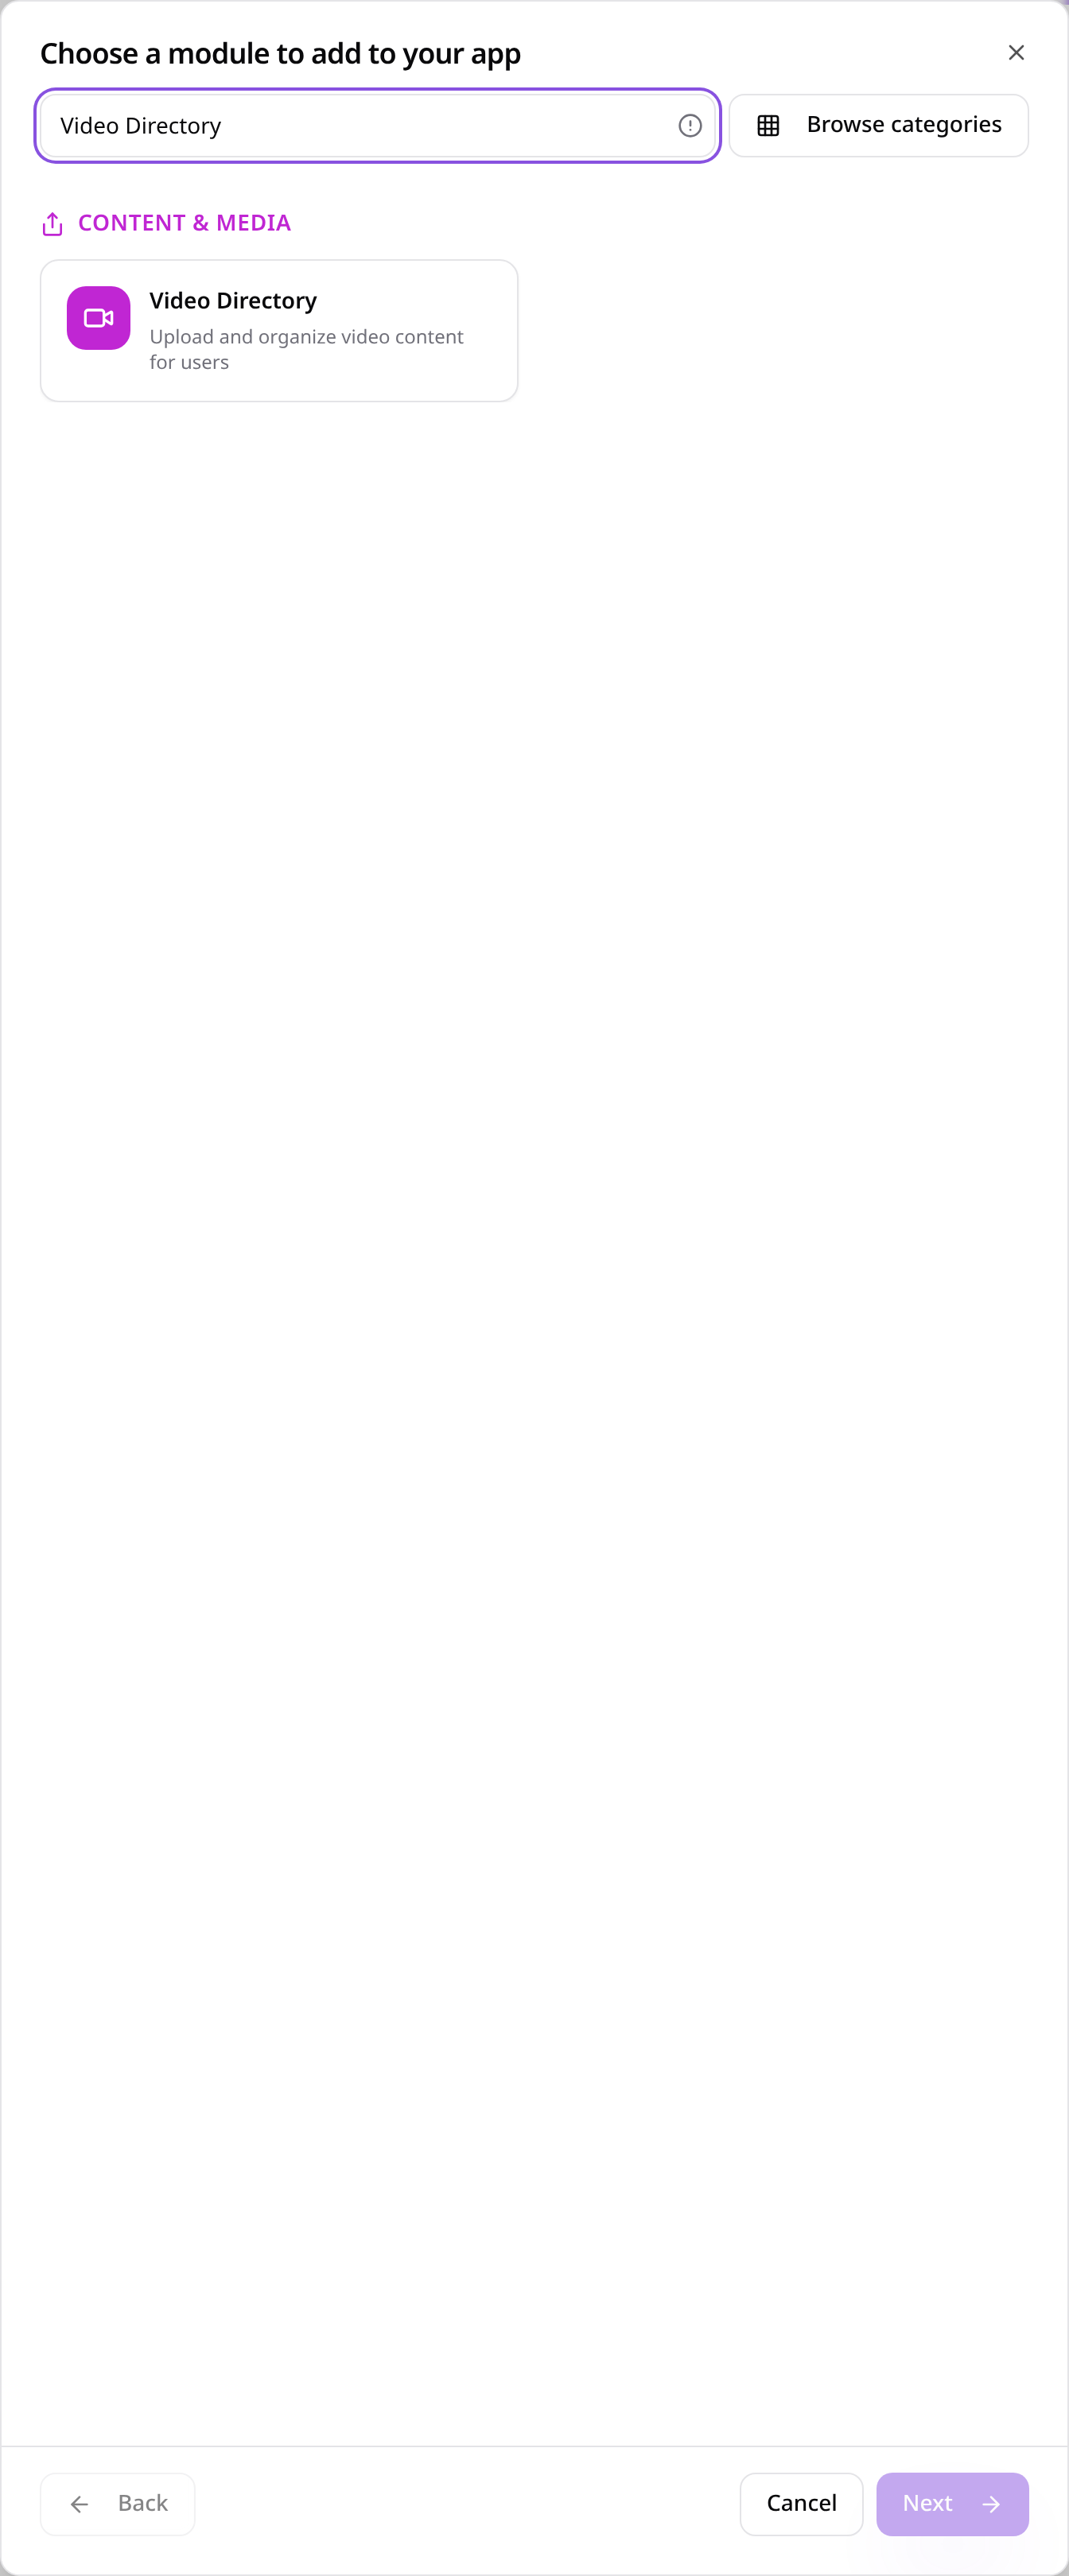
Choose Video Directory
Search for Video Directory and select it.
- 3
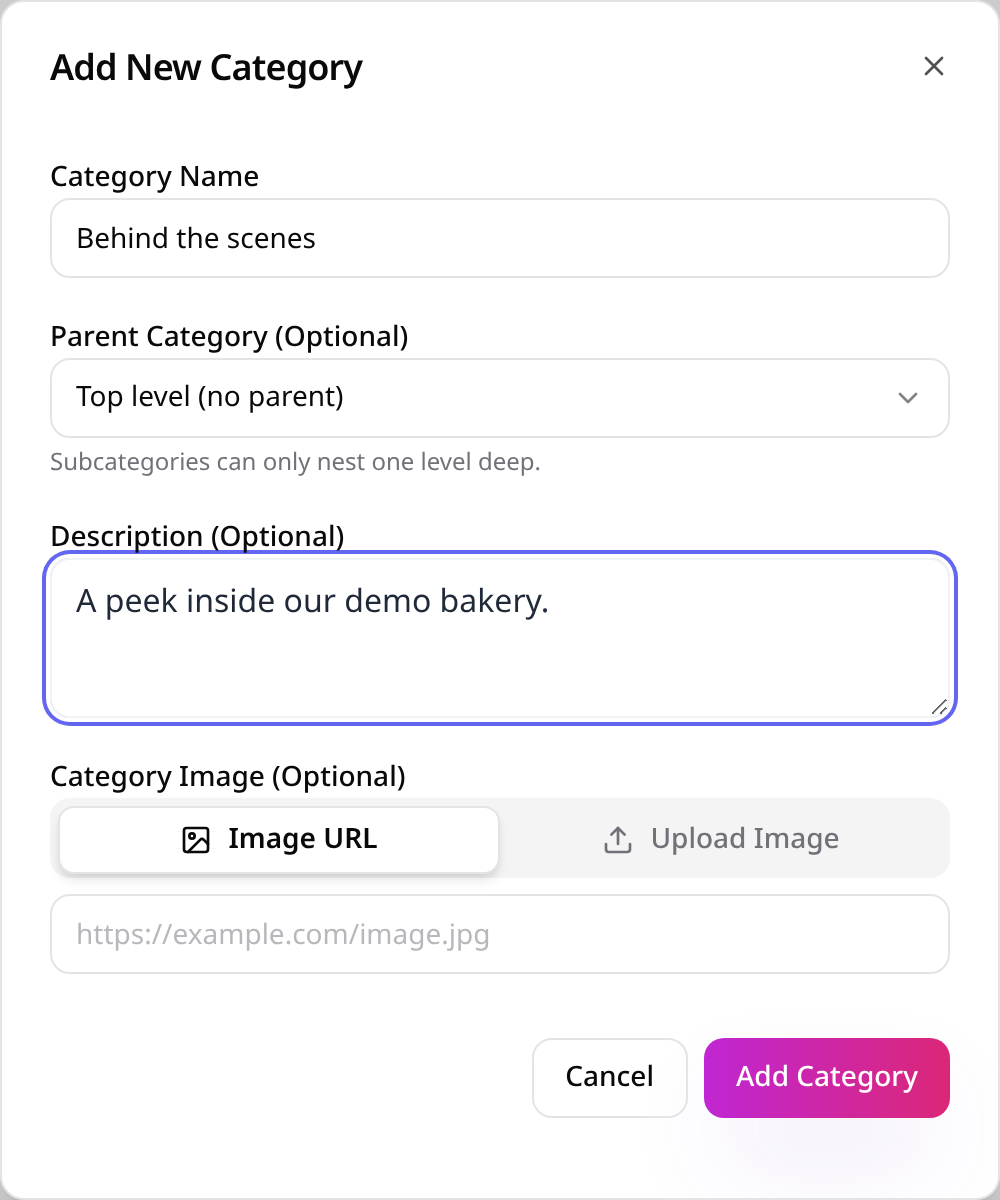
Create a video category
Choose Add Category, enter its name and optional description or image, then Add Category.
- 4
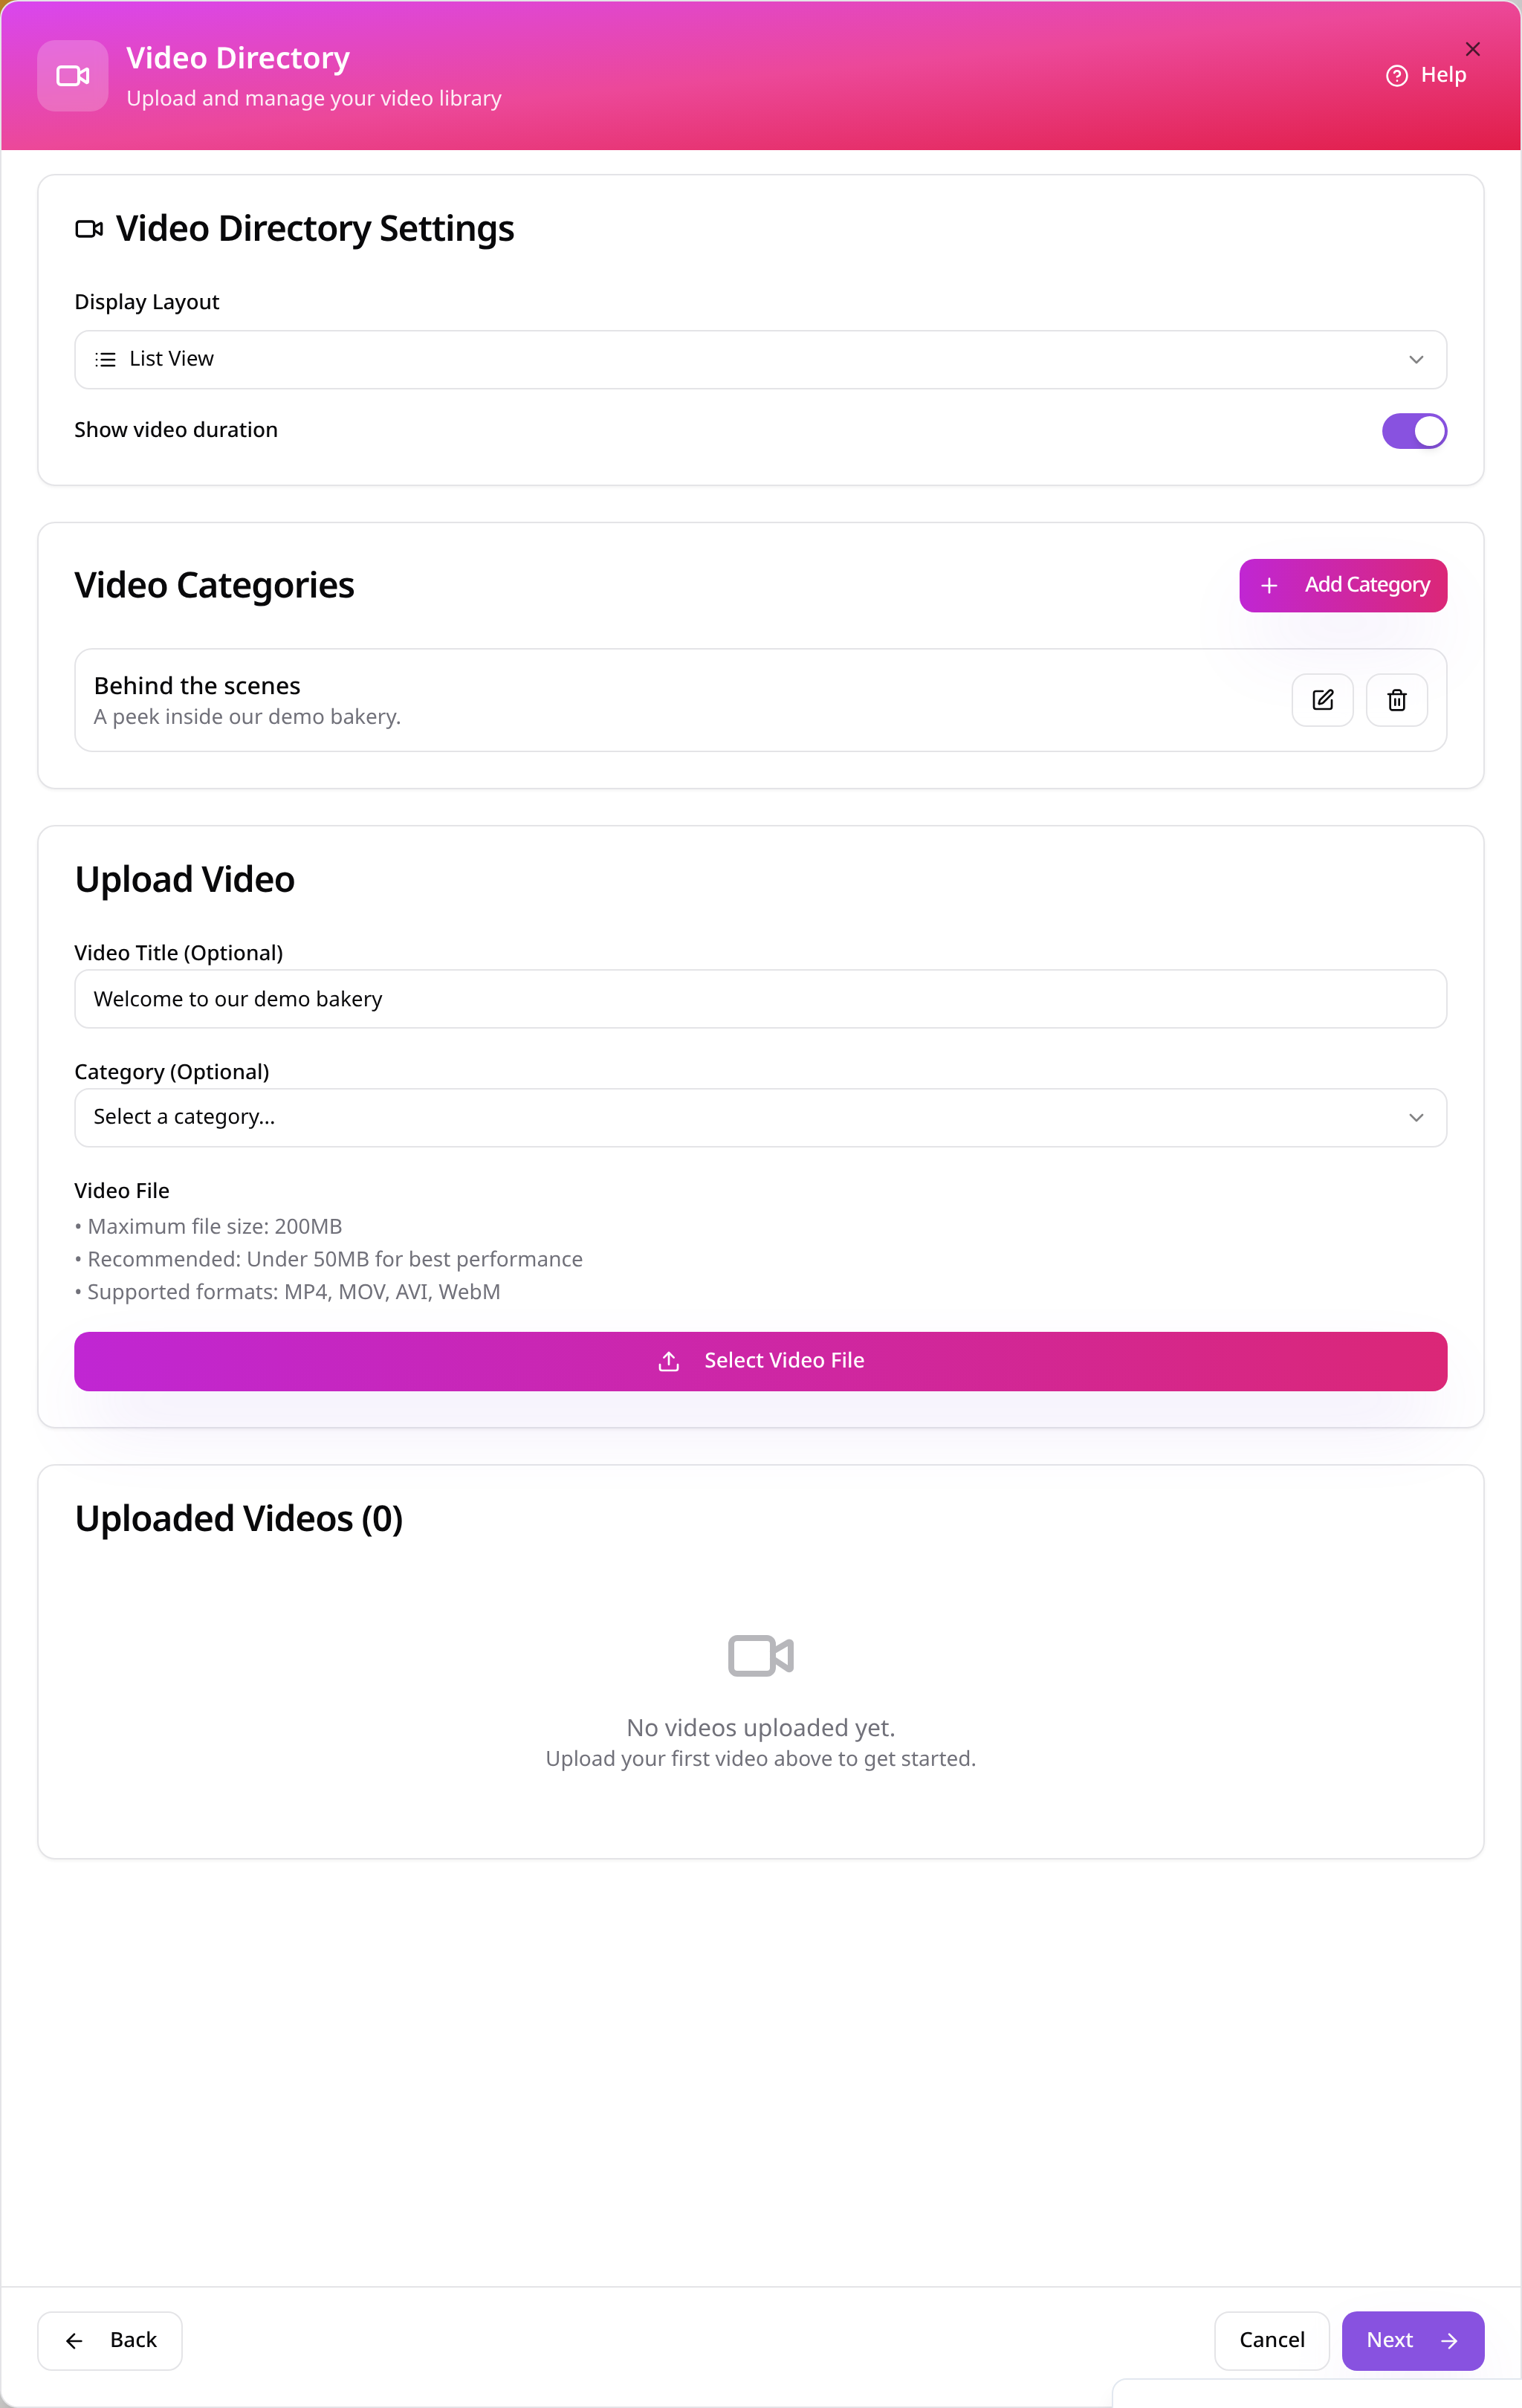
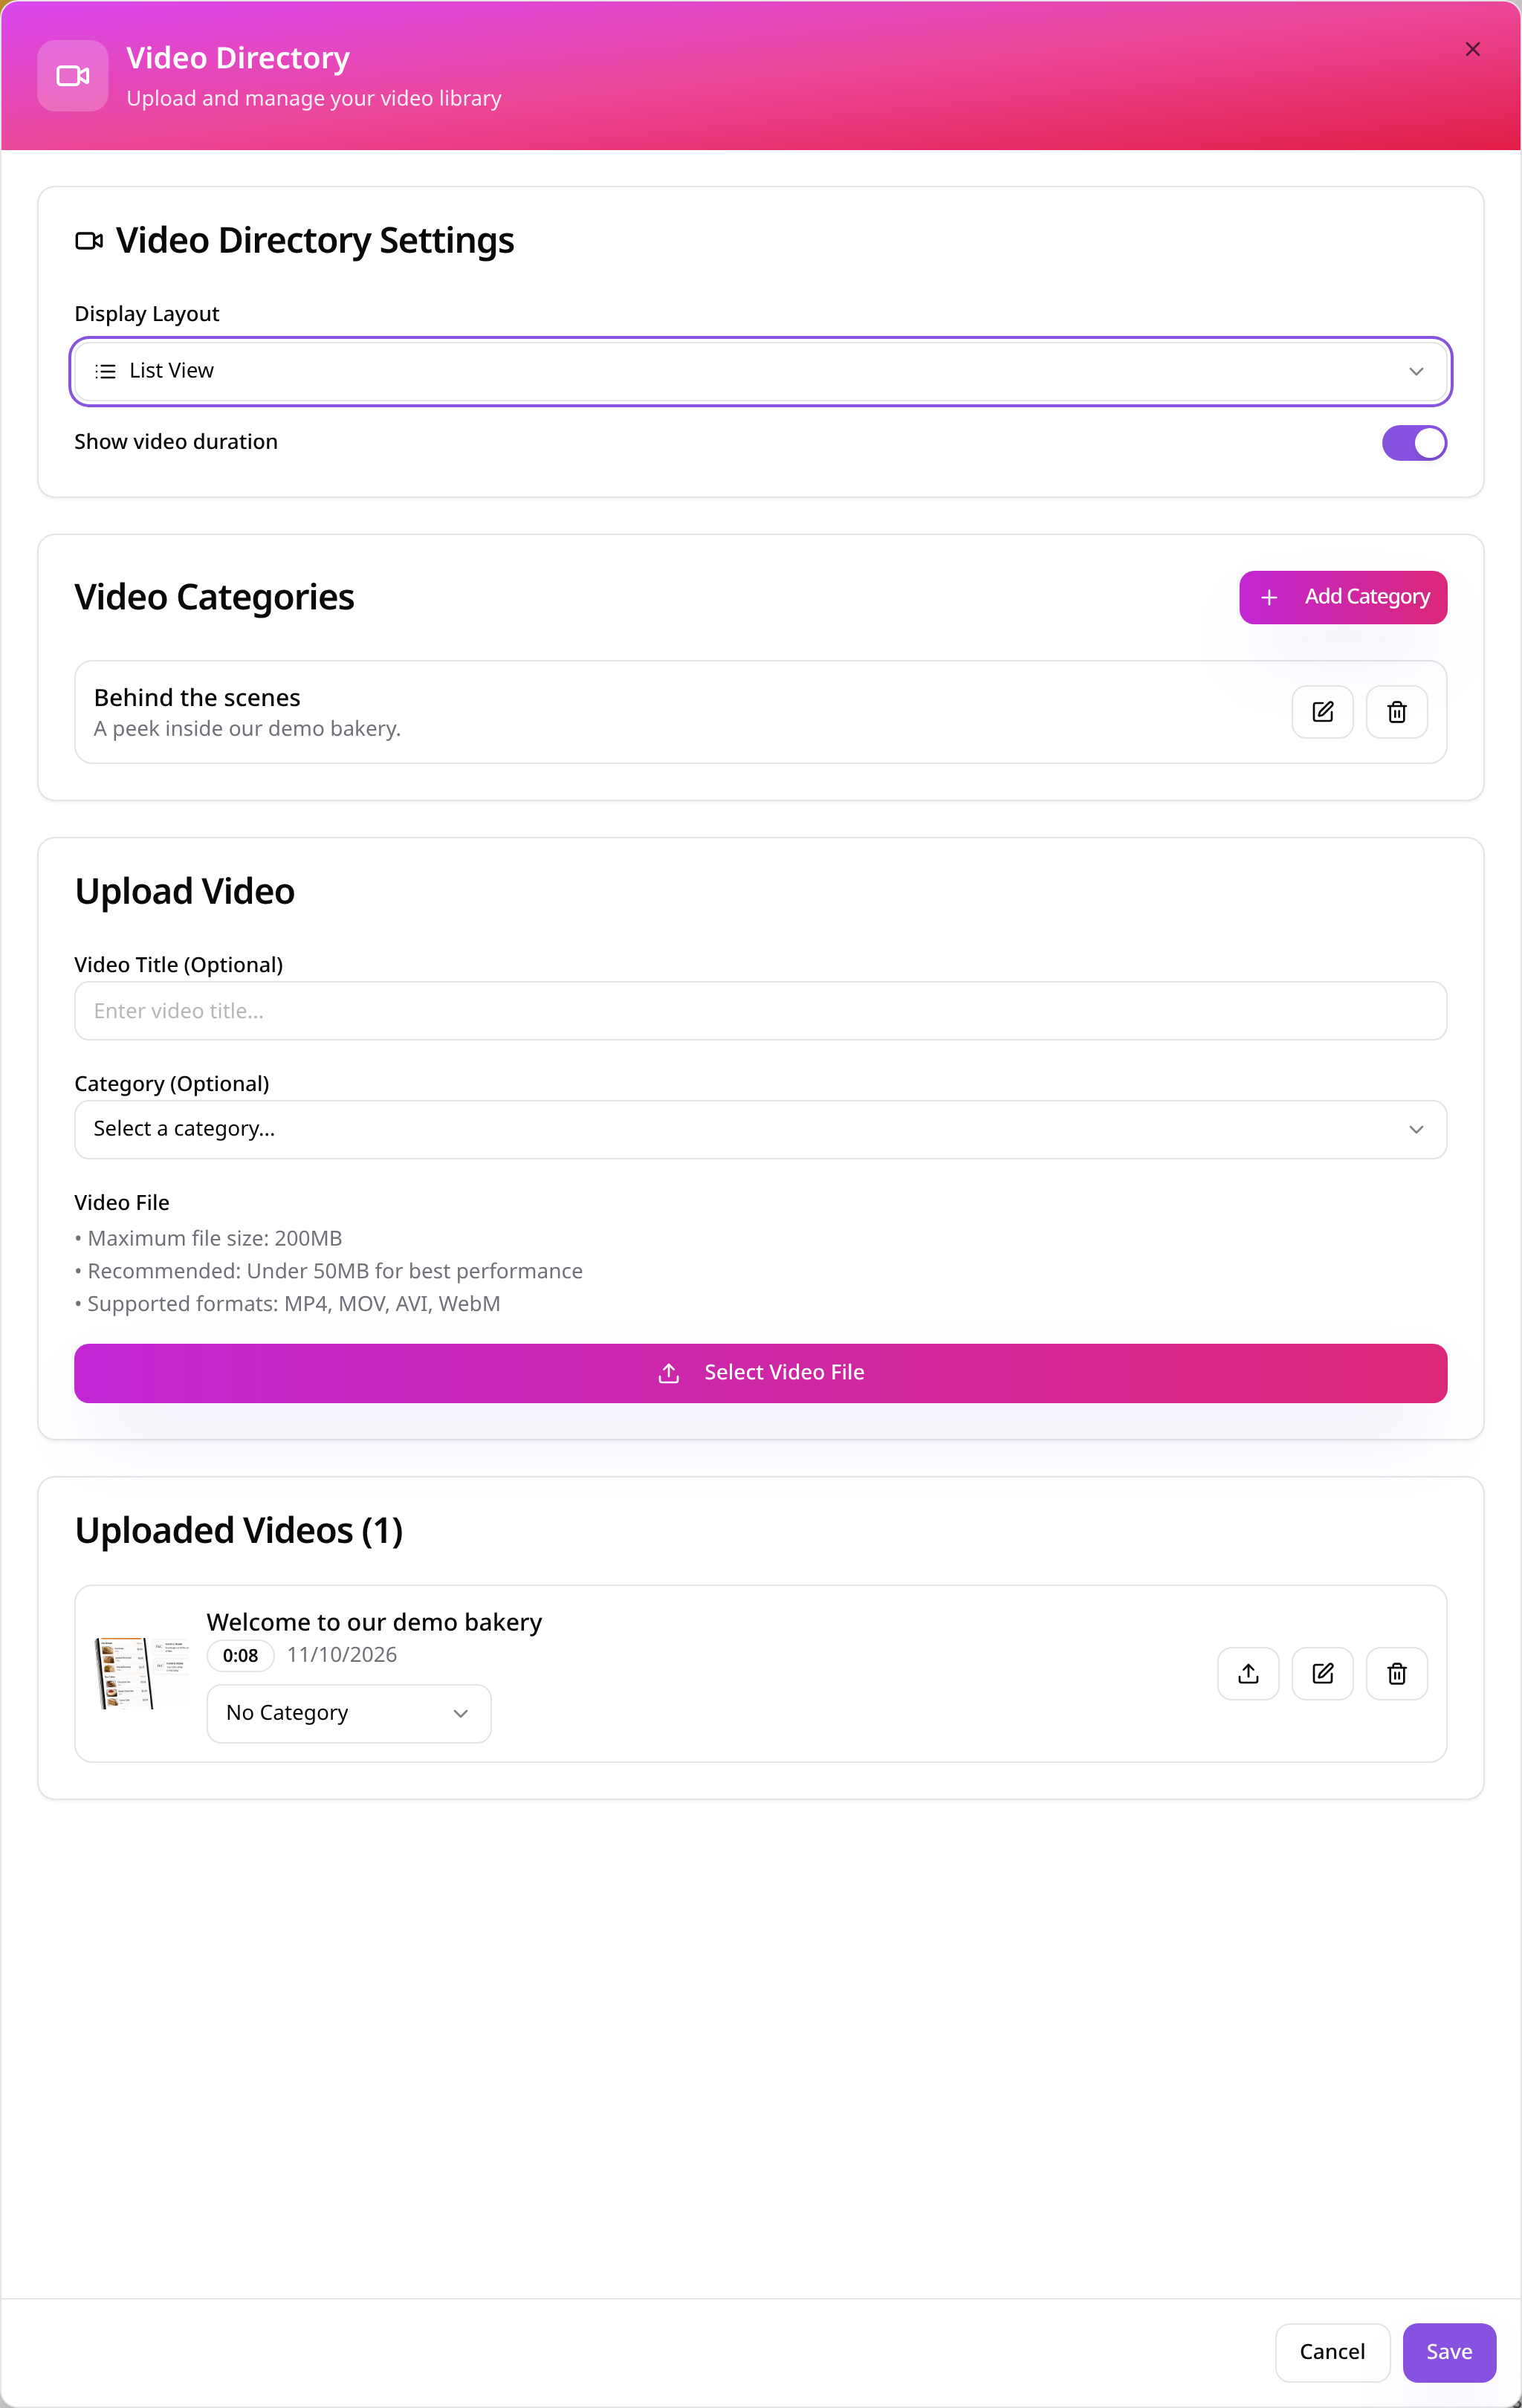
Upload a video
Enter a title, choose its category and select a video file; keep files small for faster loading.
- 5
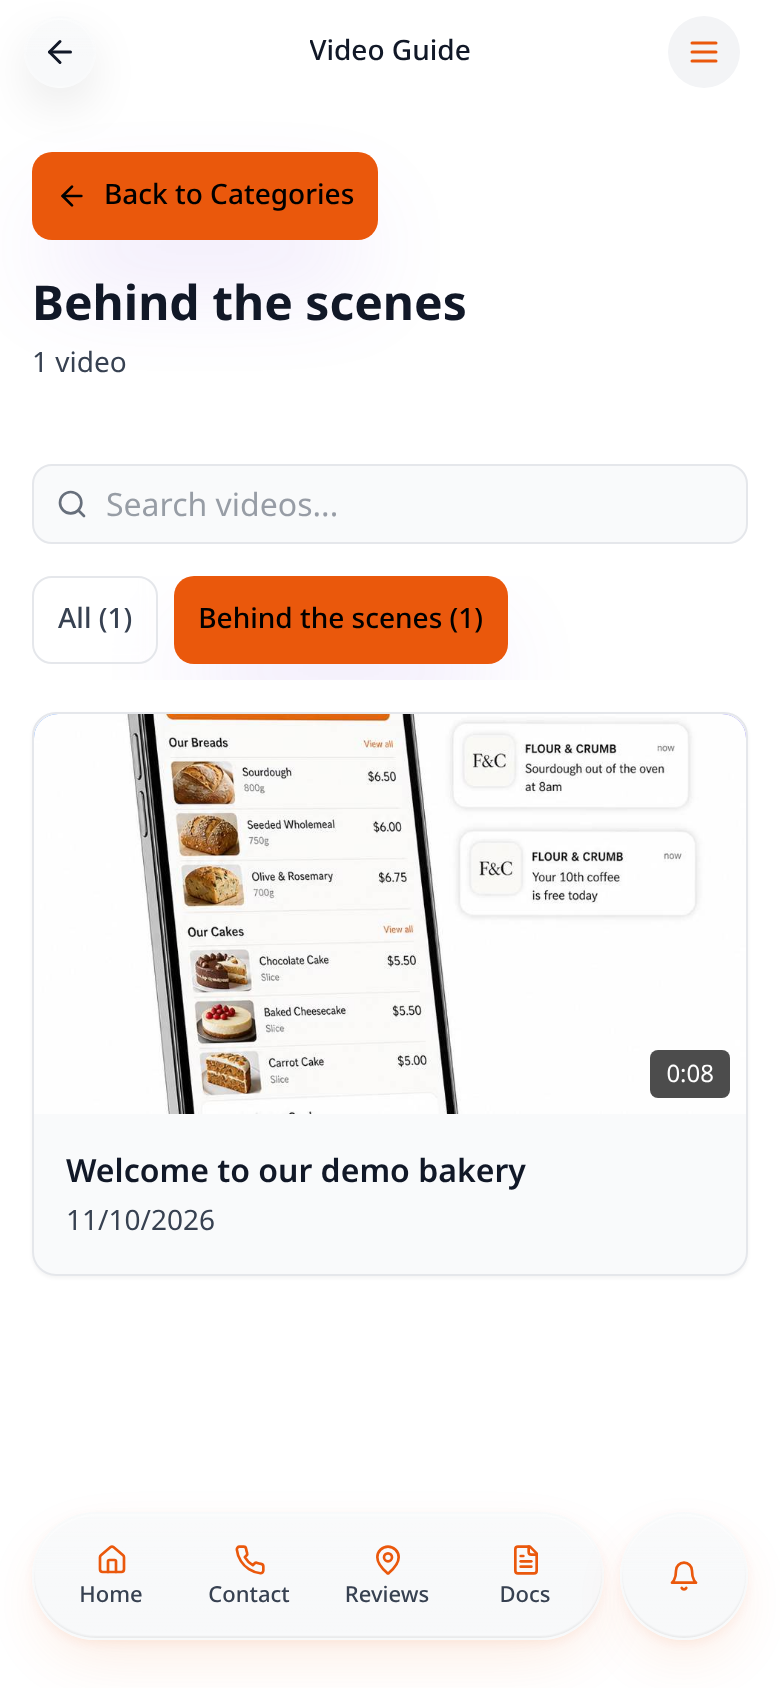
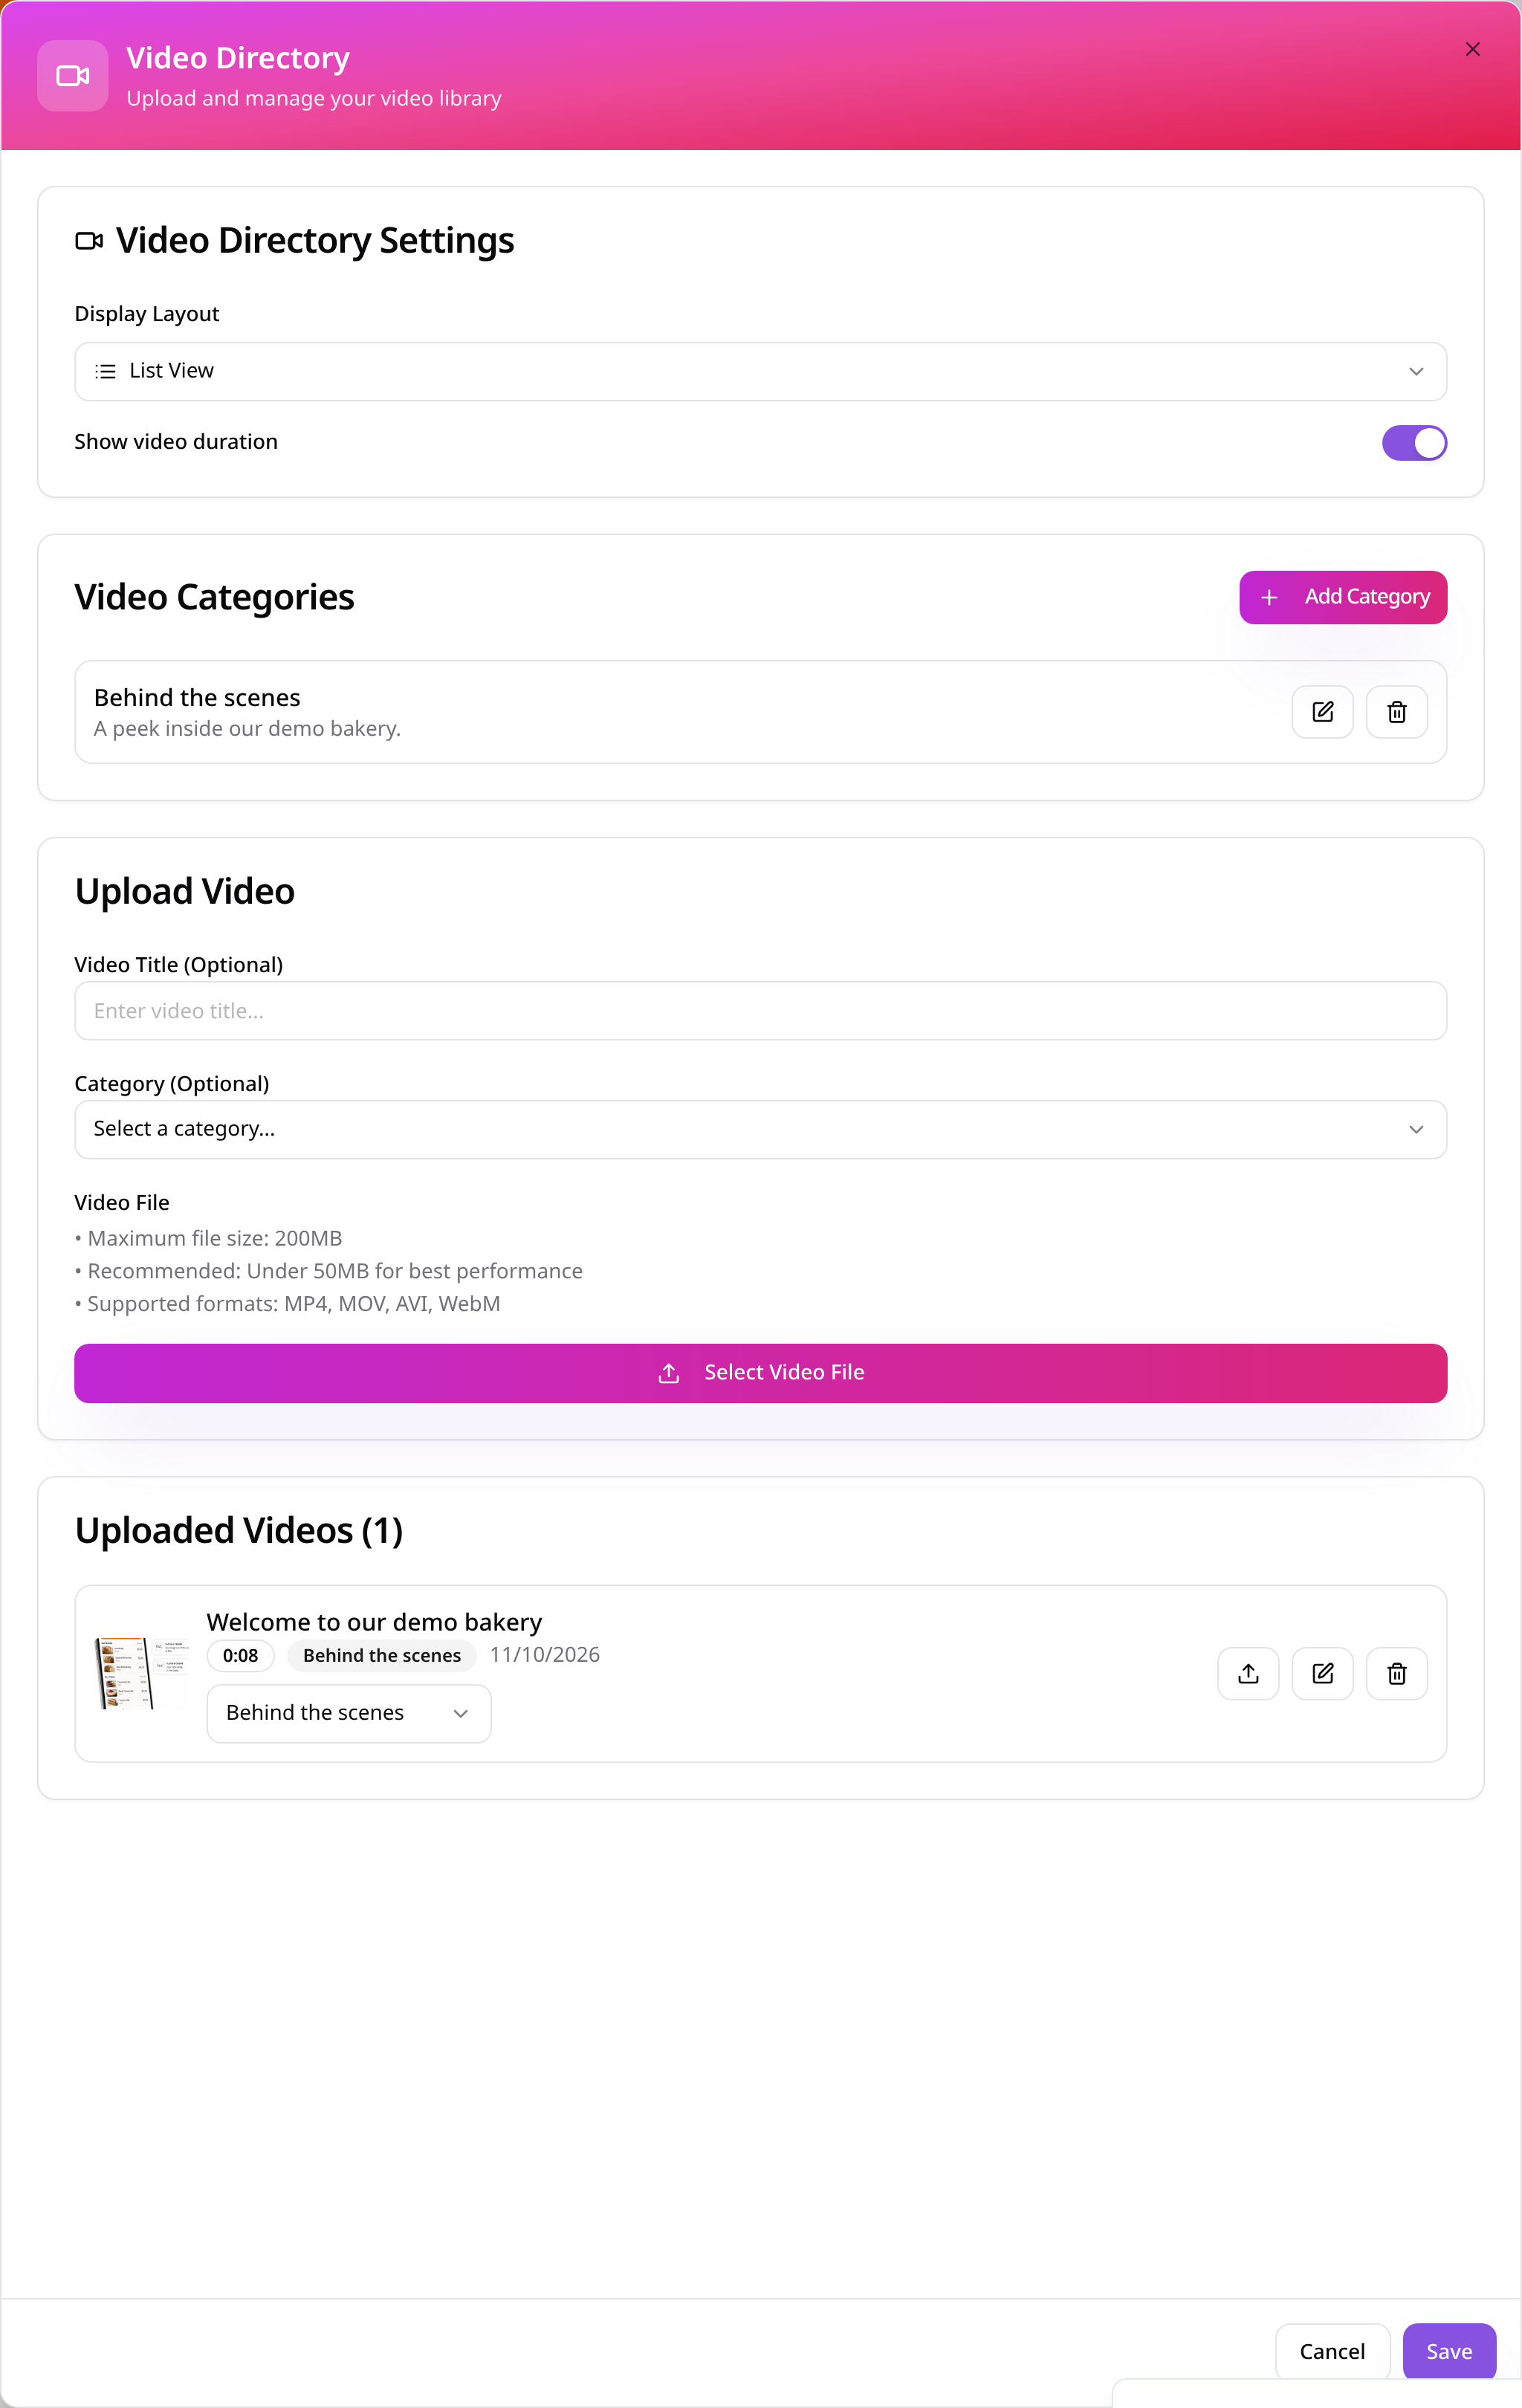
Review the video library
Check the uploaded video, choose list or grid view and keep the duration visible if useful.
- 6
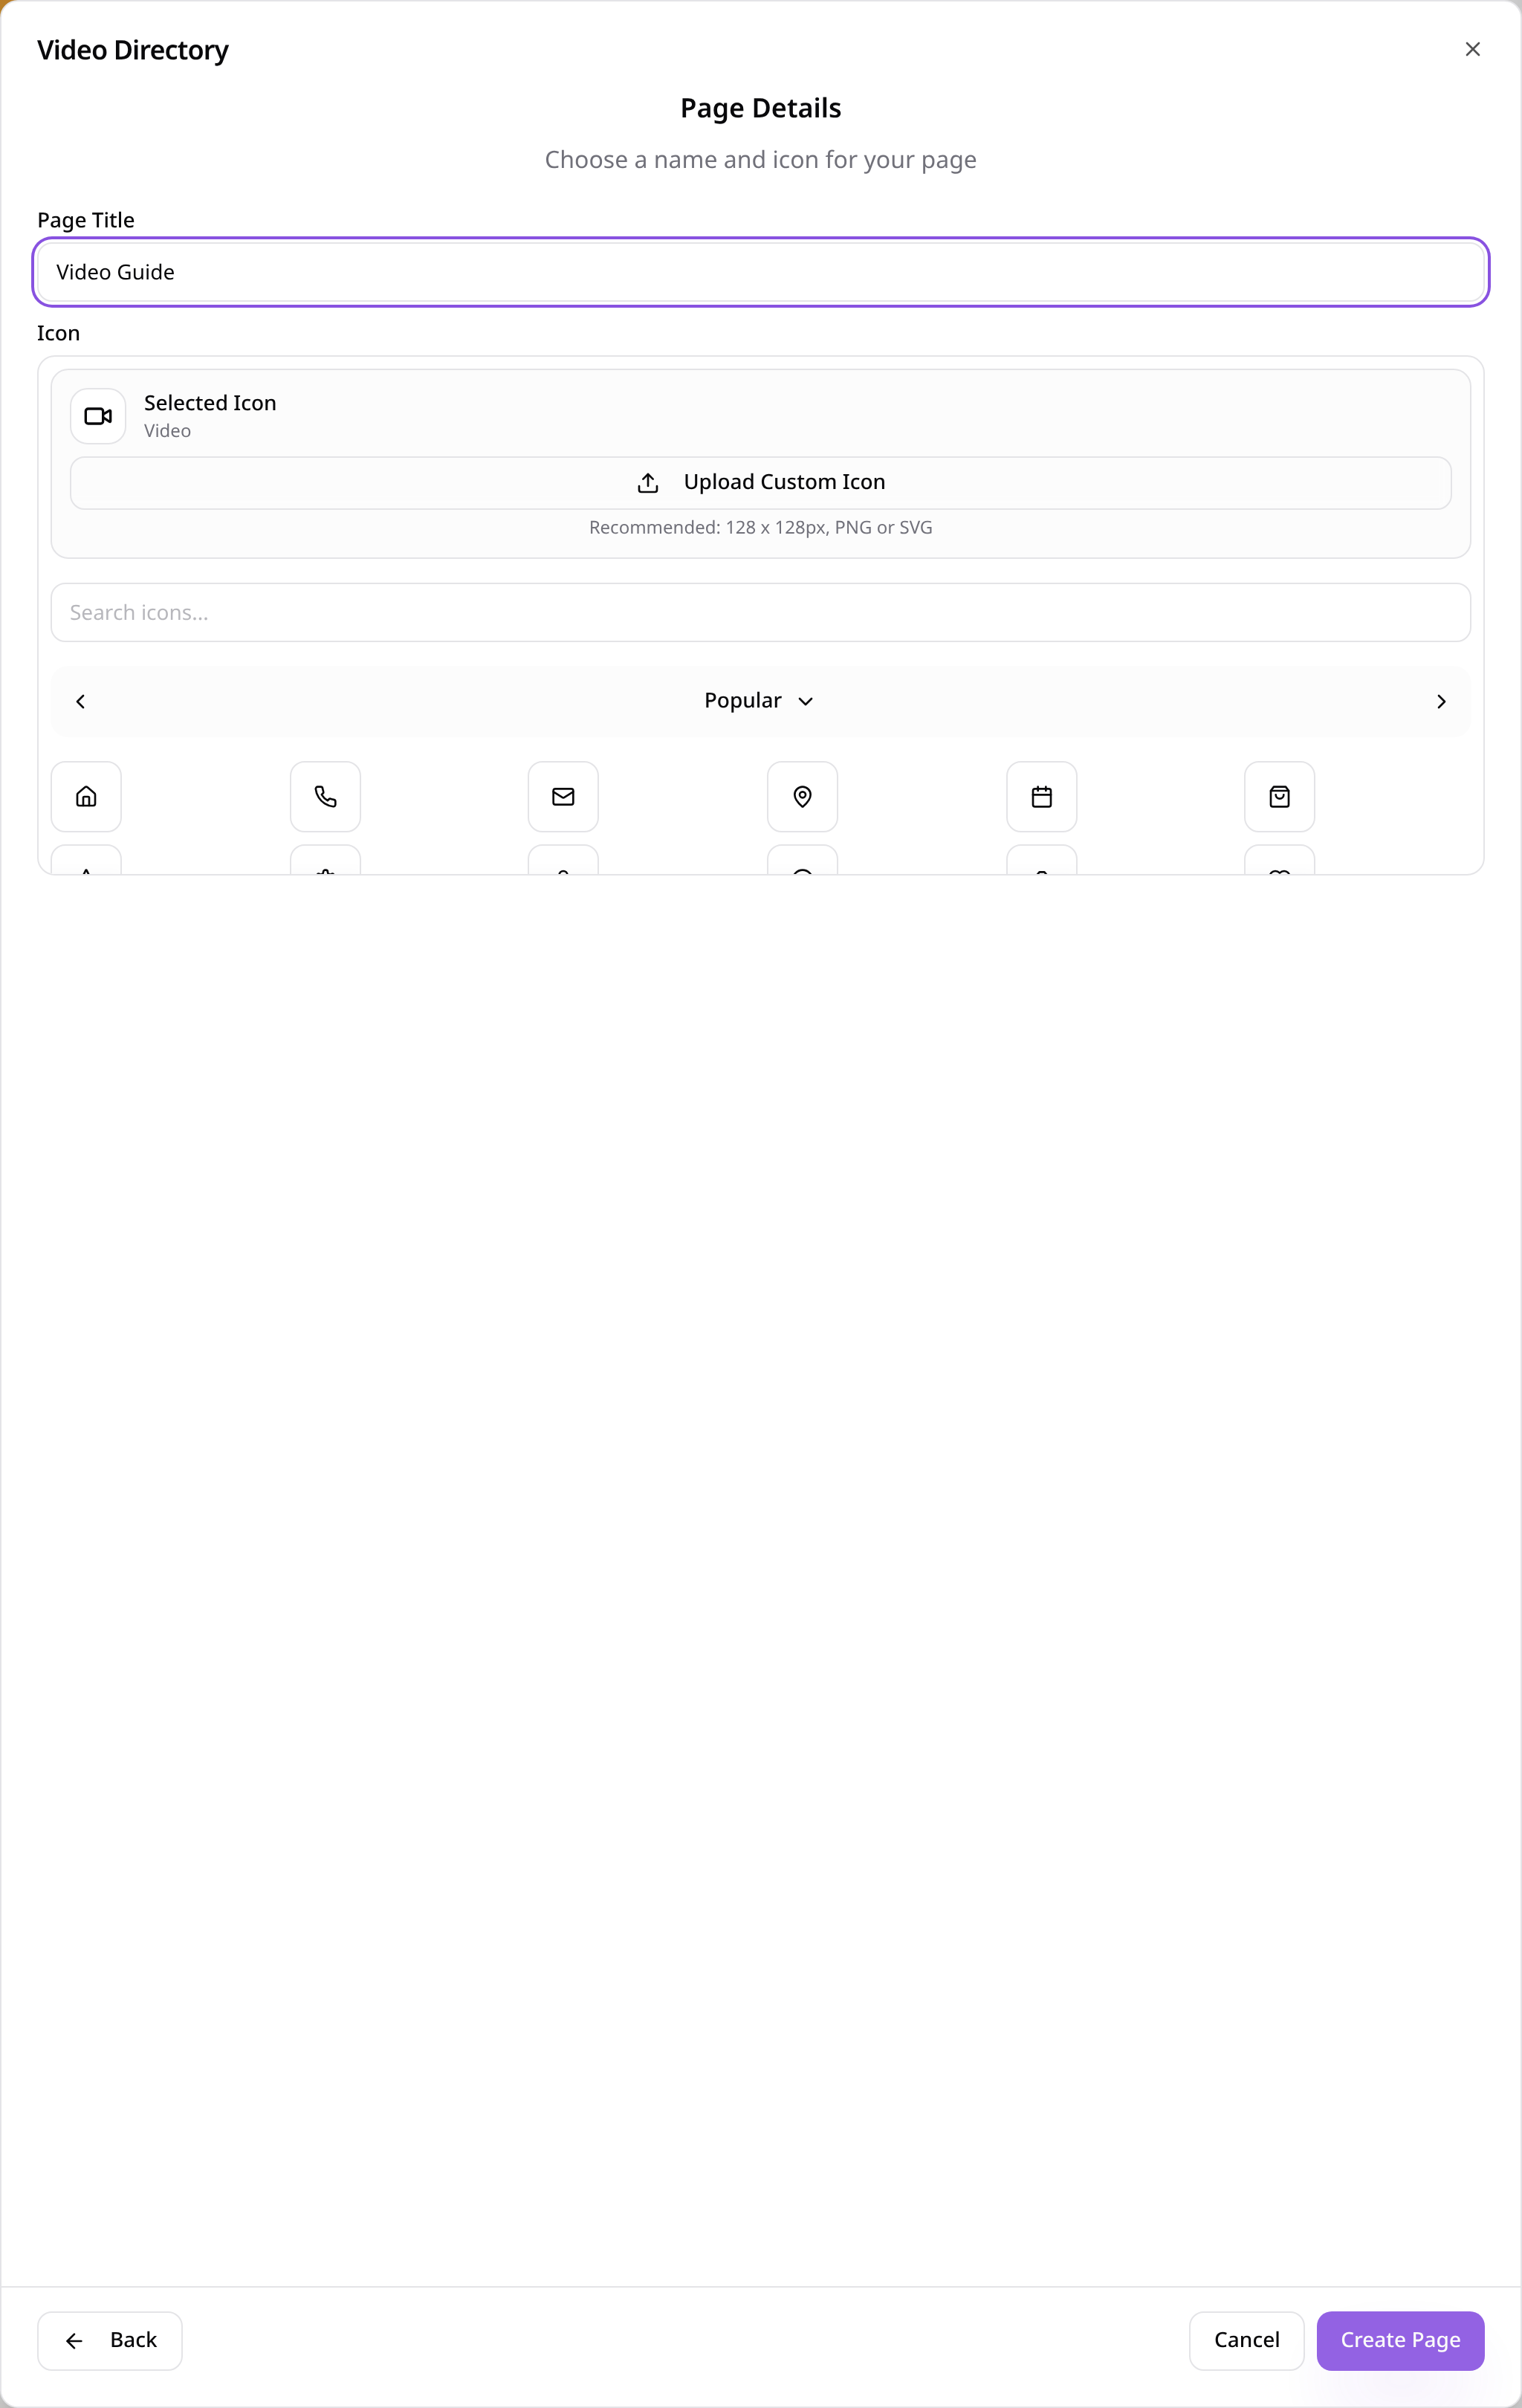
Name the page and choose an icon
Give the page a short, clear title, choose an icon, then select Create Page.
- 7
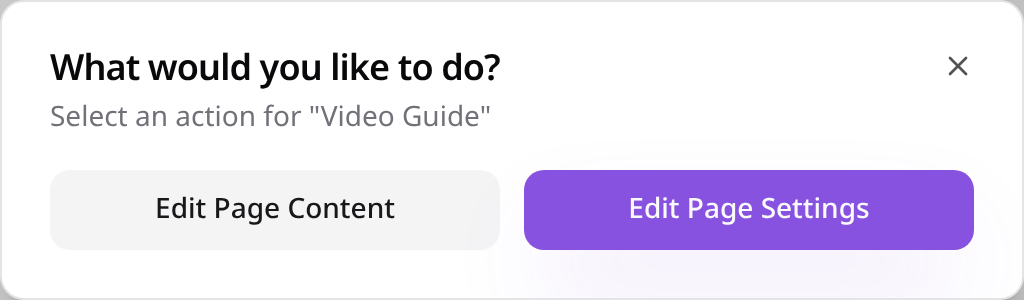
Change it later
Select the page in Pages, then choose Edit Page Content to update its settings.
- 8
Check your saved settings
The saved content reopens here; make changes and select Save when ready.
- 9
Check the page in your app
Open the page from your app menu and check the customer view before publishing.
- 10
Play an uploaded video
Open a category and select a video to watch it; close the player to return to the library.
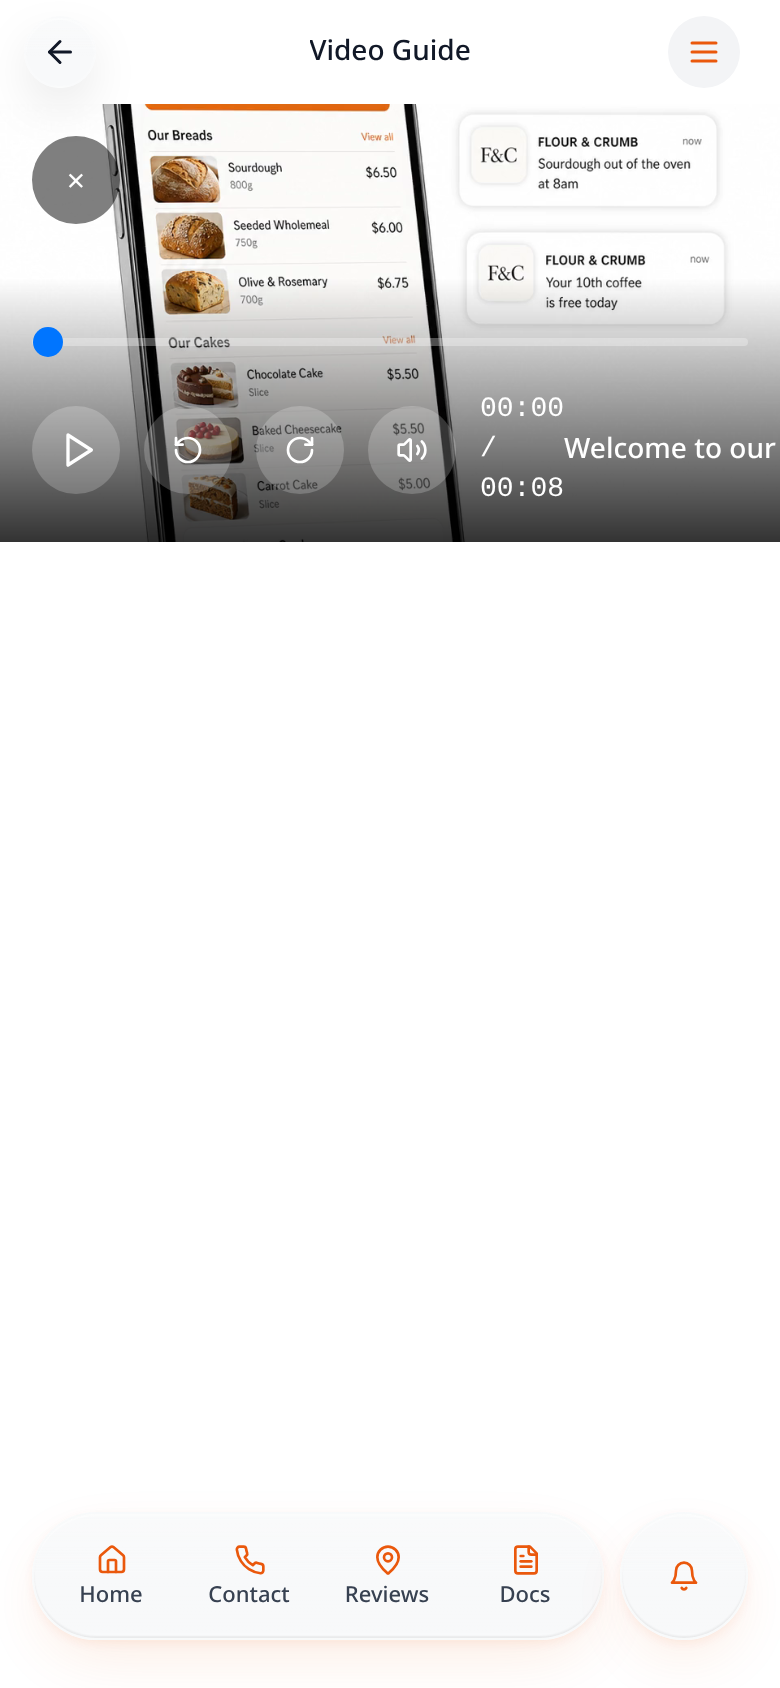
Check the page on your phone, then publish your app when you are ready. Provider content and availability are controlled by the provider.