Set up and manage Cliniko Appointments
Connect your clinic, configure booking rules, and guide patients through booking, changes and cancellations.
Step-by-step guide
Follow these steps, then download the PDF to keep.
- 1
Open Pages
Select Add Page or Function in the app editor.

- 2
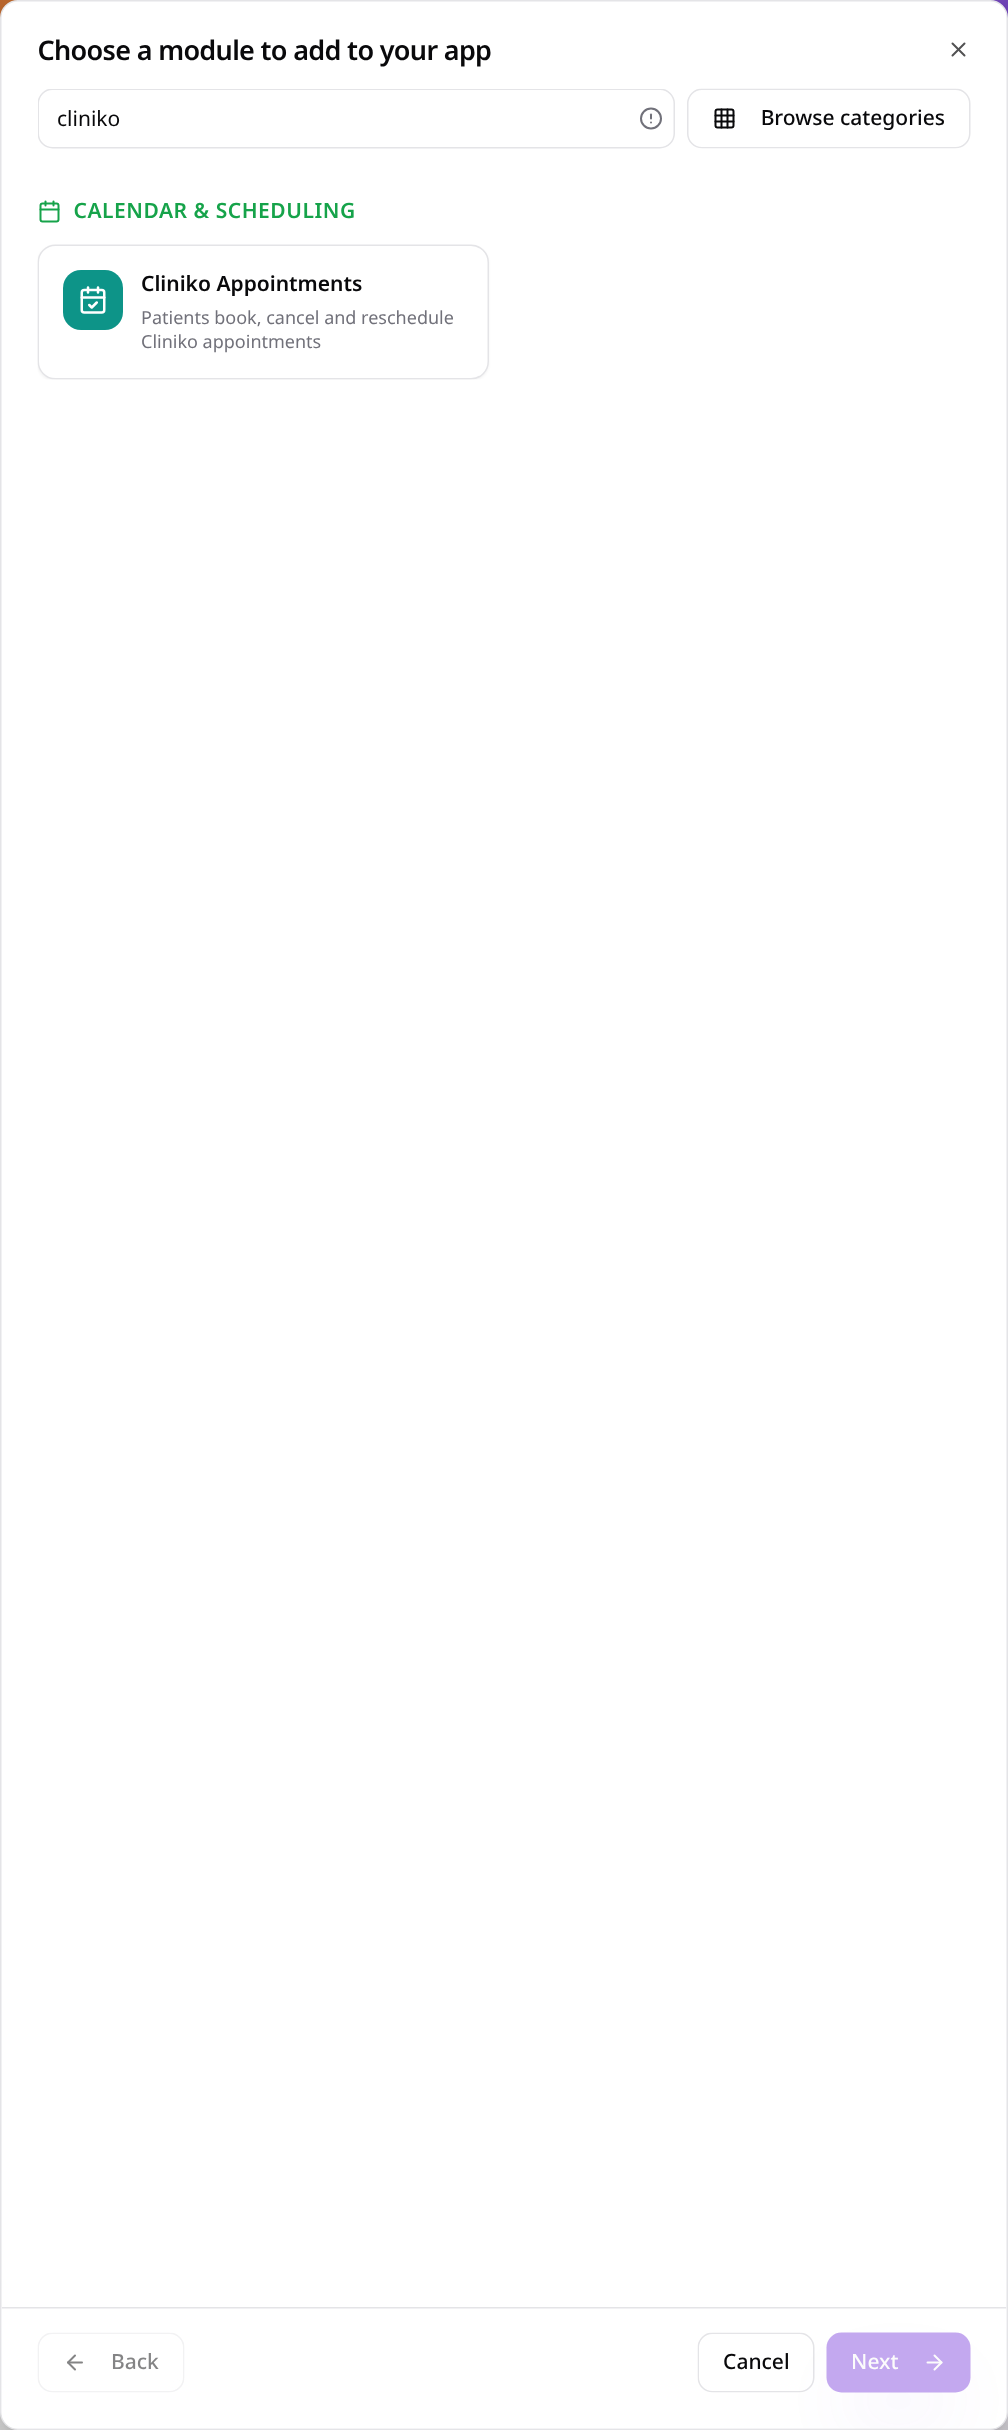
Choose Cliniko Appointments
Search for Cliniko and select Cliniko Appointments.
- 3
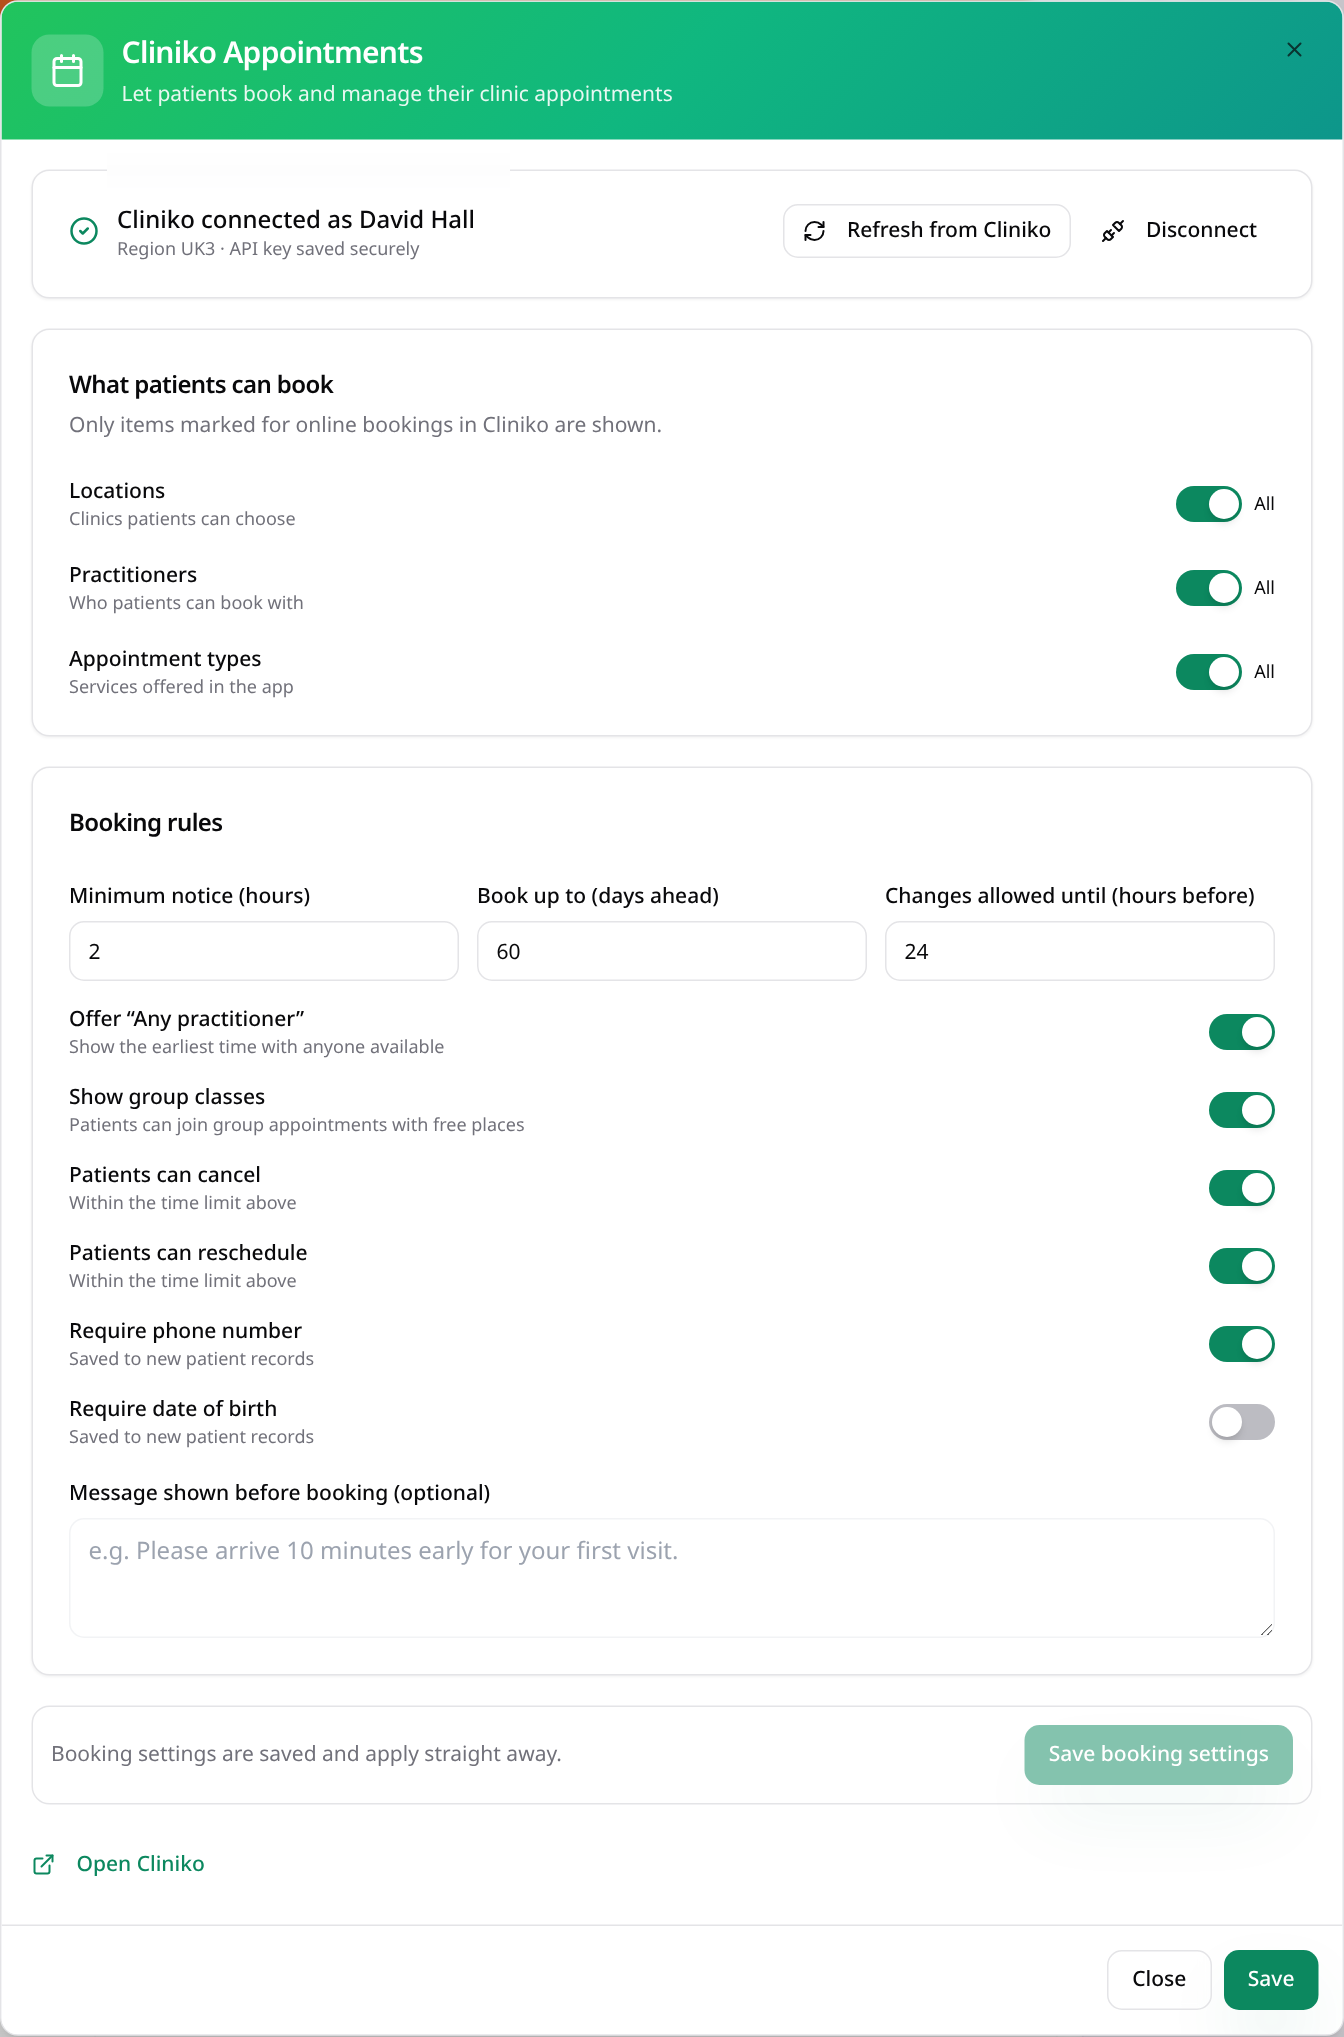
Connect your Cliniko account
In Cliniko, open My Info → Manage API keys; create a key and enter it in Connect. A successful connection shows the saved connection and booking settings, as pictured.
- 4
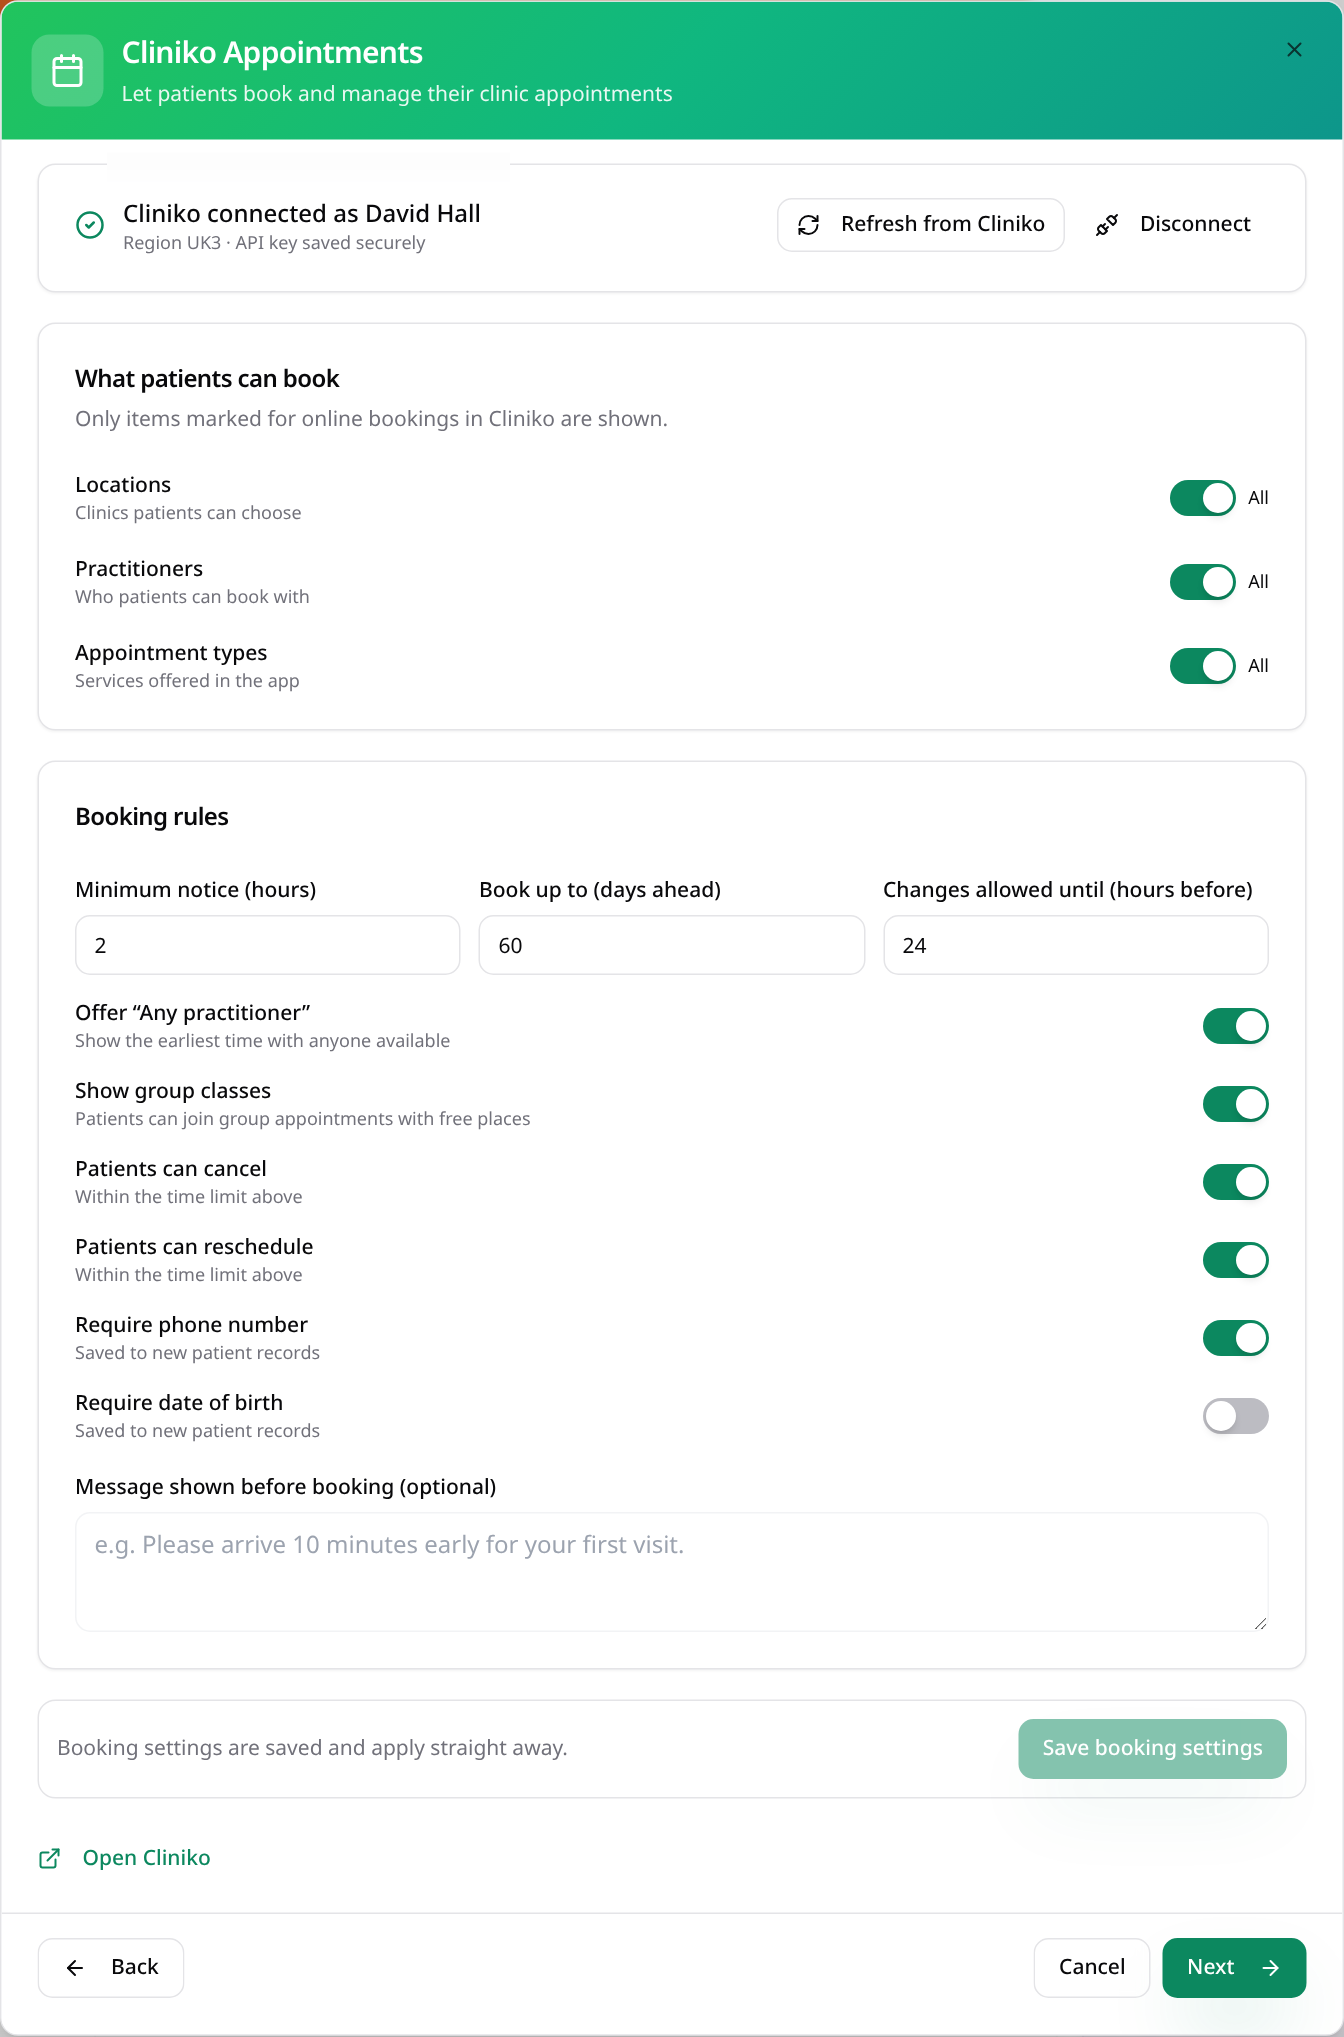
Choose what patients can book
Use All or select particular locations, practitioners and appointment types; items must also be enabled for online booking in Cliniko.
- 5
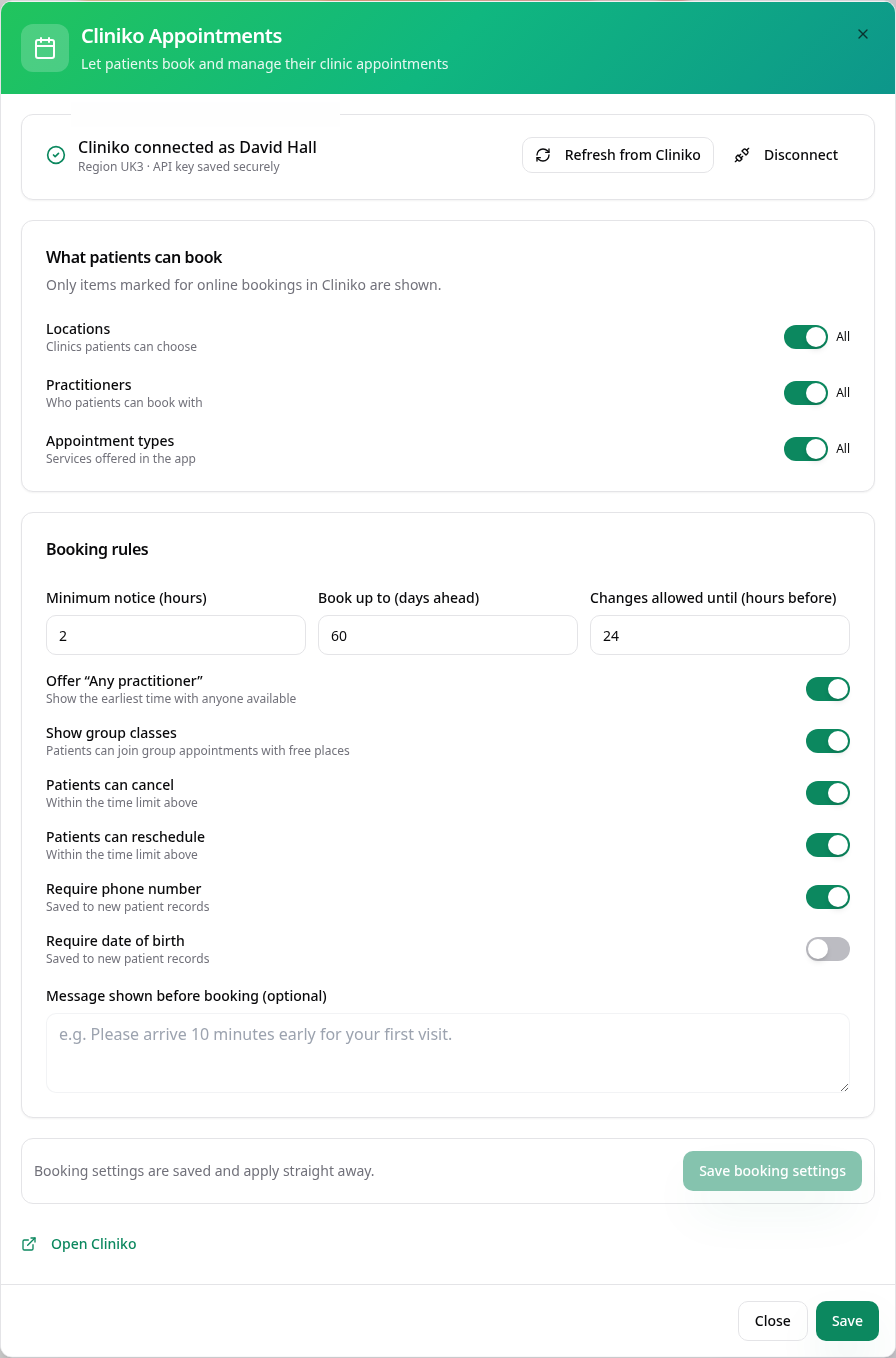
Set notice and change rules
Set minimum notice, days ahead and the change deadline; choose cancellation, rescheduling, phone and date-of-birth requirements, then Save booking settings.
- 6
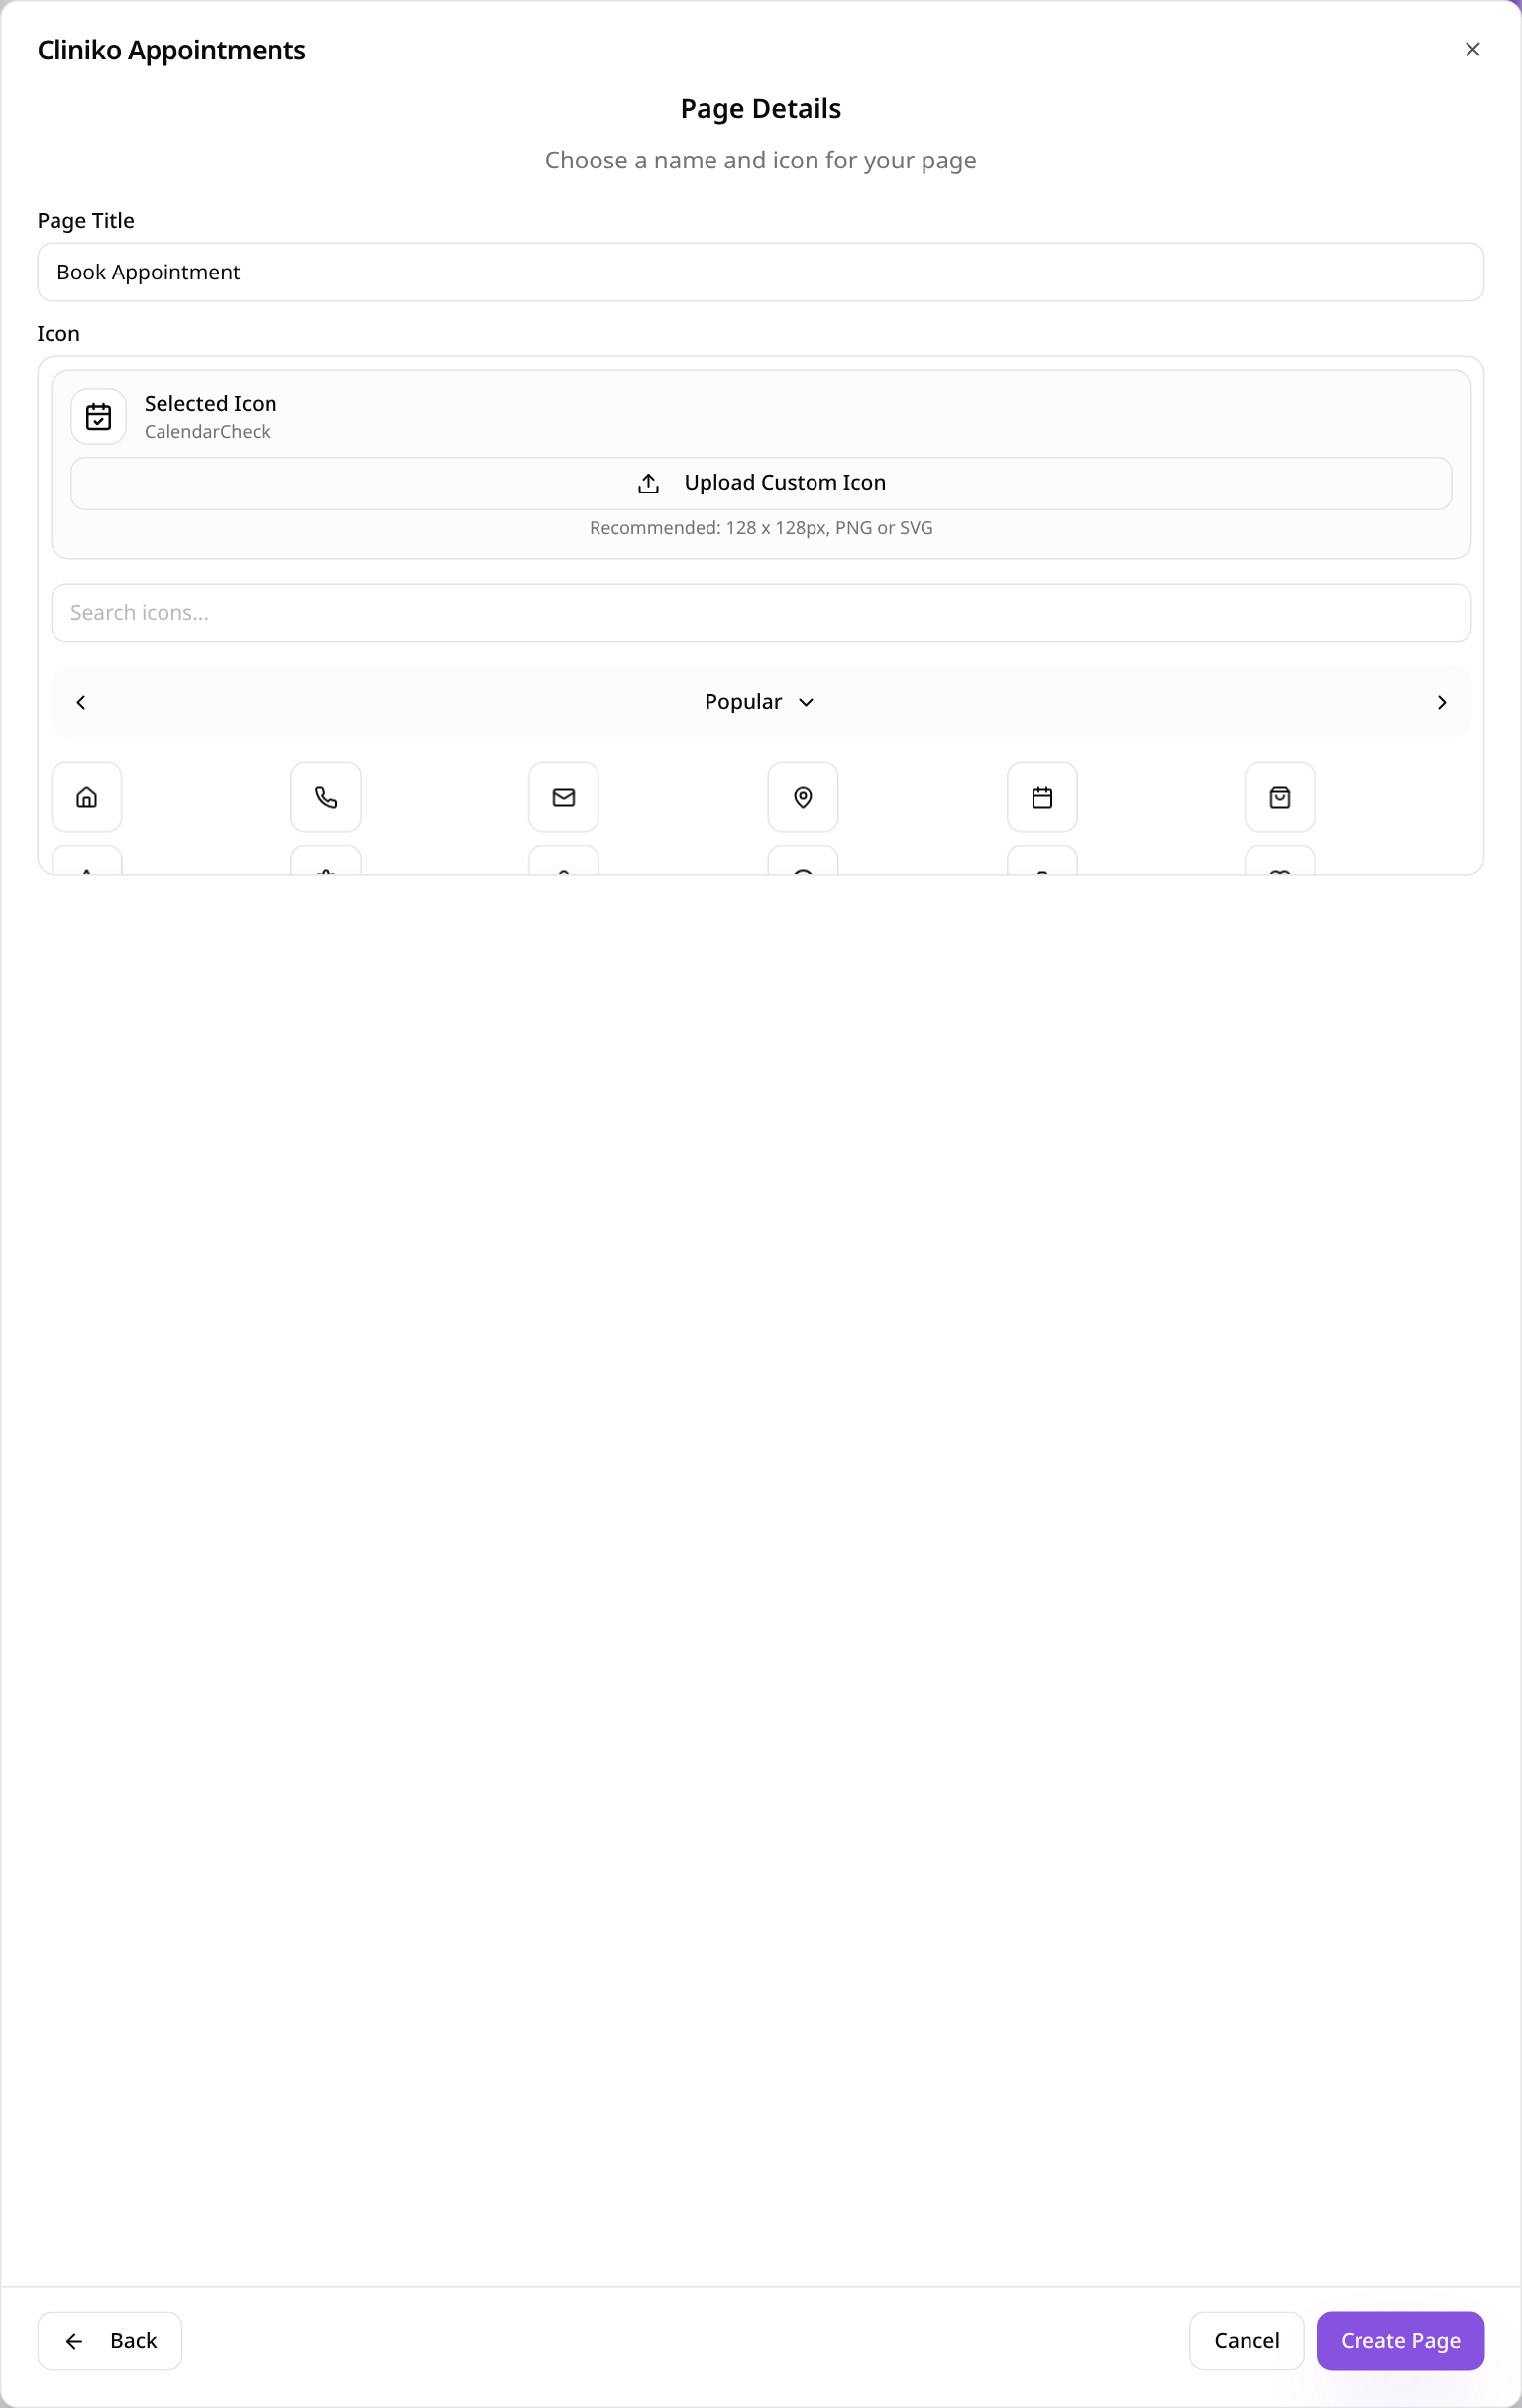
Name the page
After setup, select Next, name the page and choose its icon before Create Page; existing pages can be renamed in Page Settings.
- 7
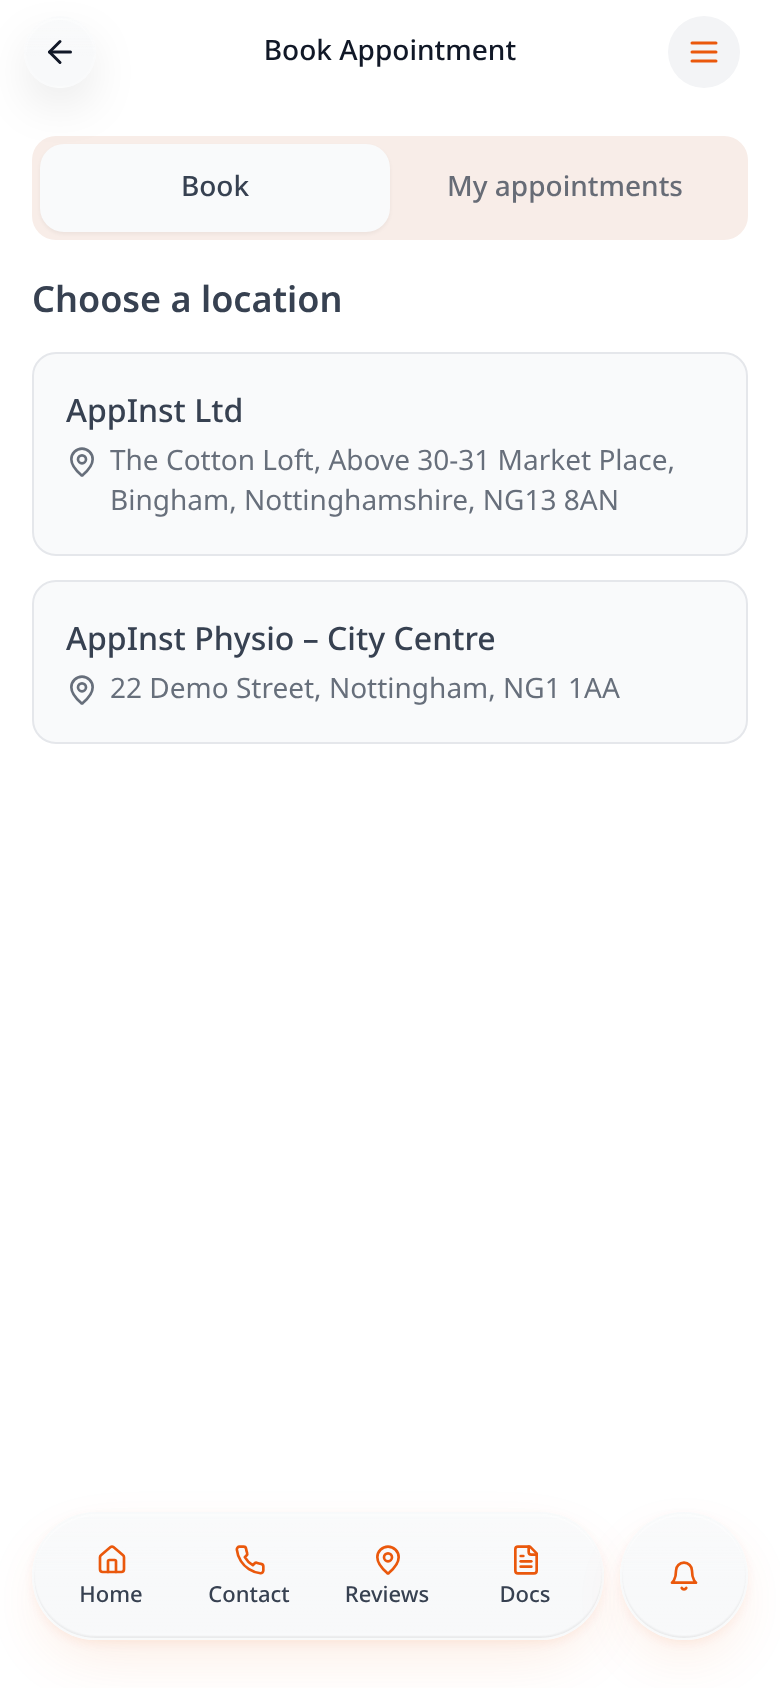
Choose a clinic
Patients open Book Appointment and choose their location.
- 8
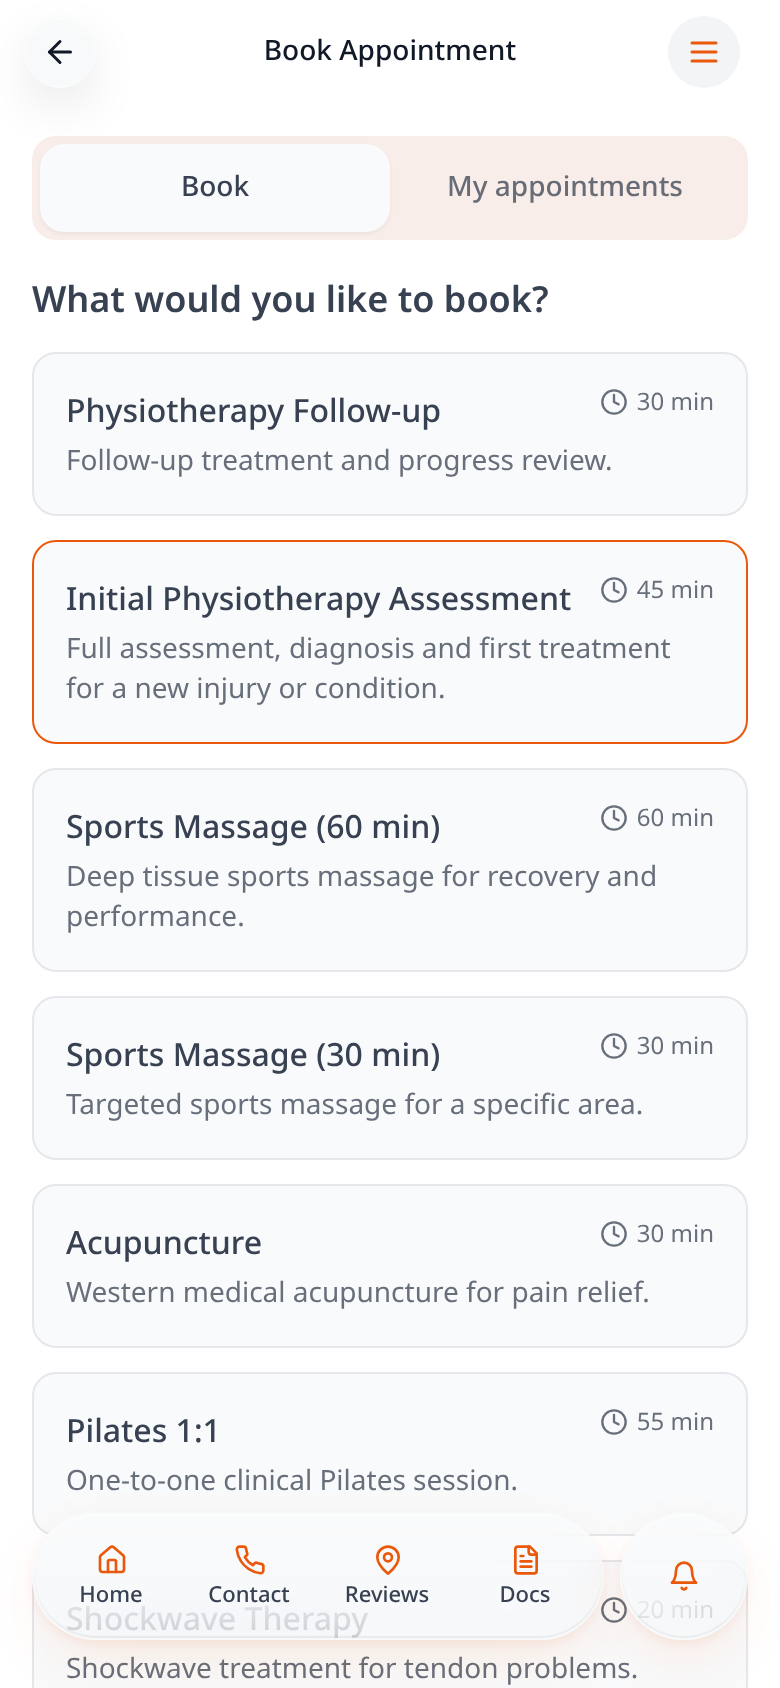
Choose an appointment
Select a service by its name, description and duration; enabled group classes also appear in this list.
- 9
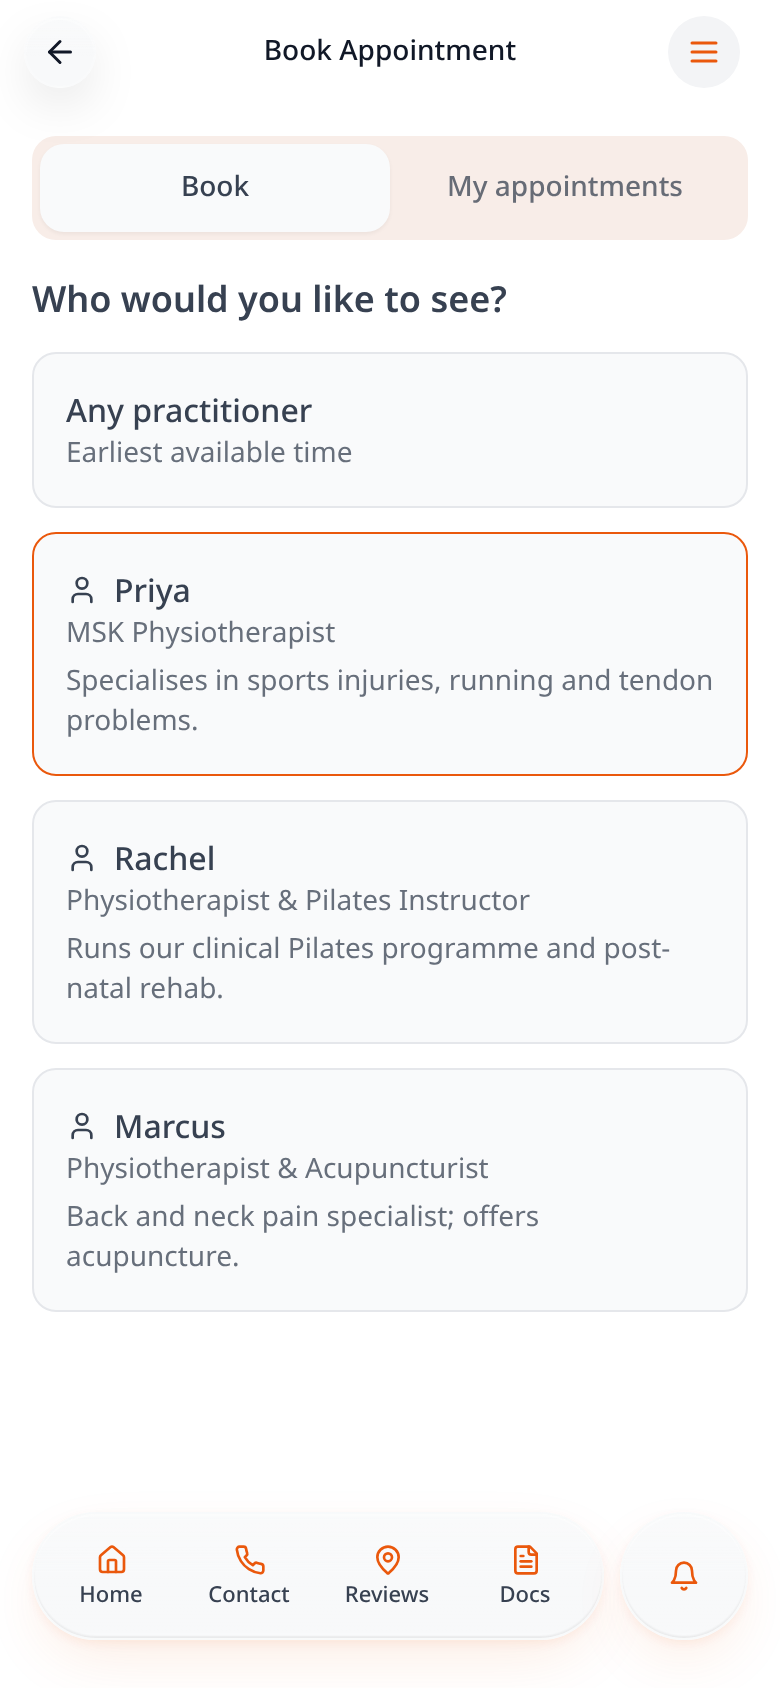
Choose a practitioner
Select a named practitioner or Any practitioner to find the earliest available appointment.
- 10
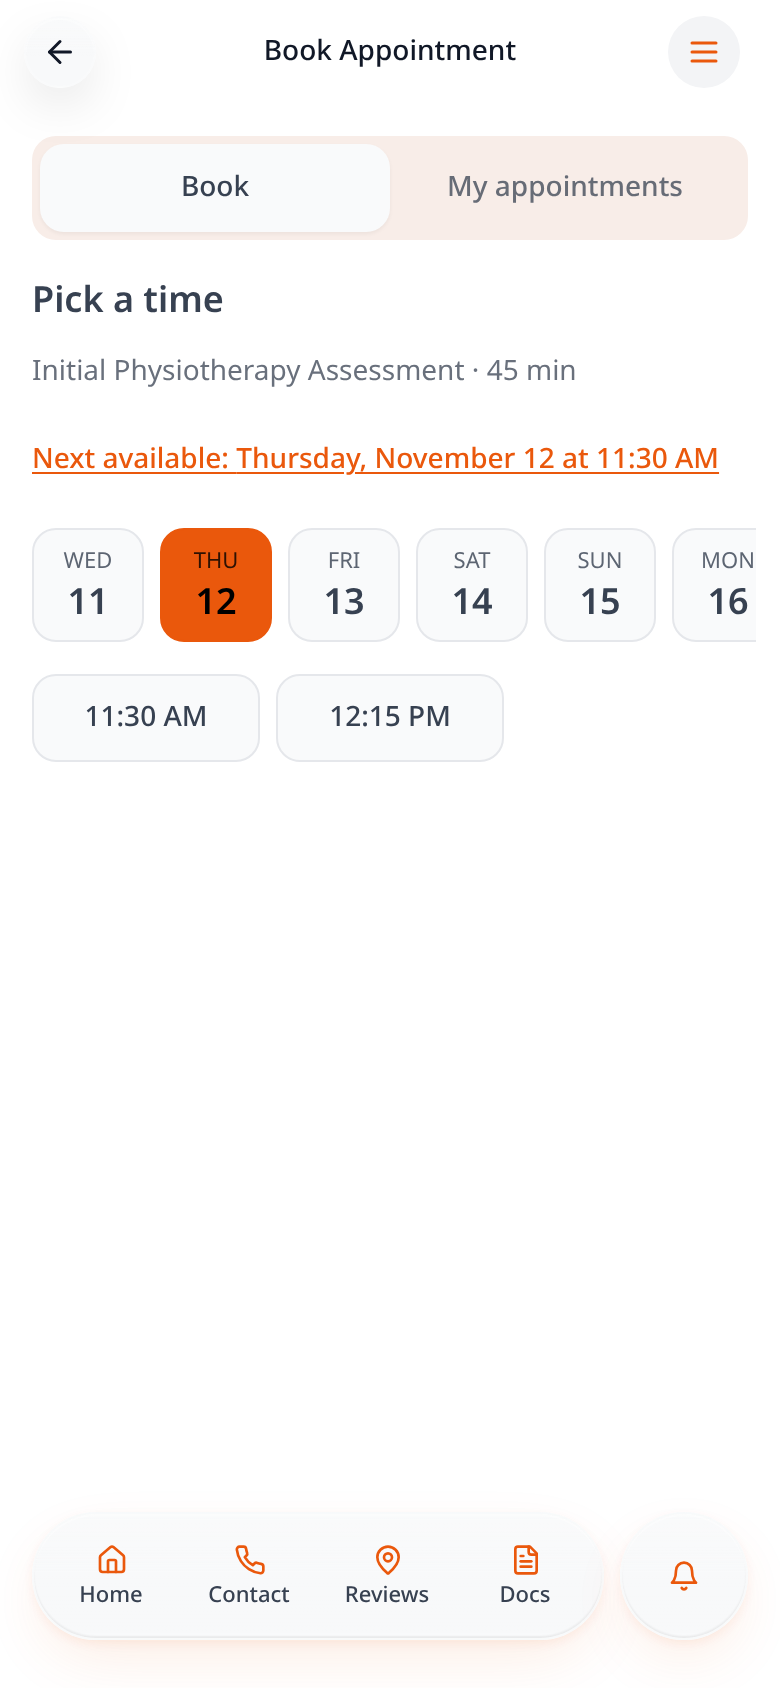
Choose a date and time
Use the day strip or Next available, then select an available time.
- 11
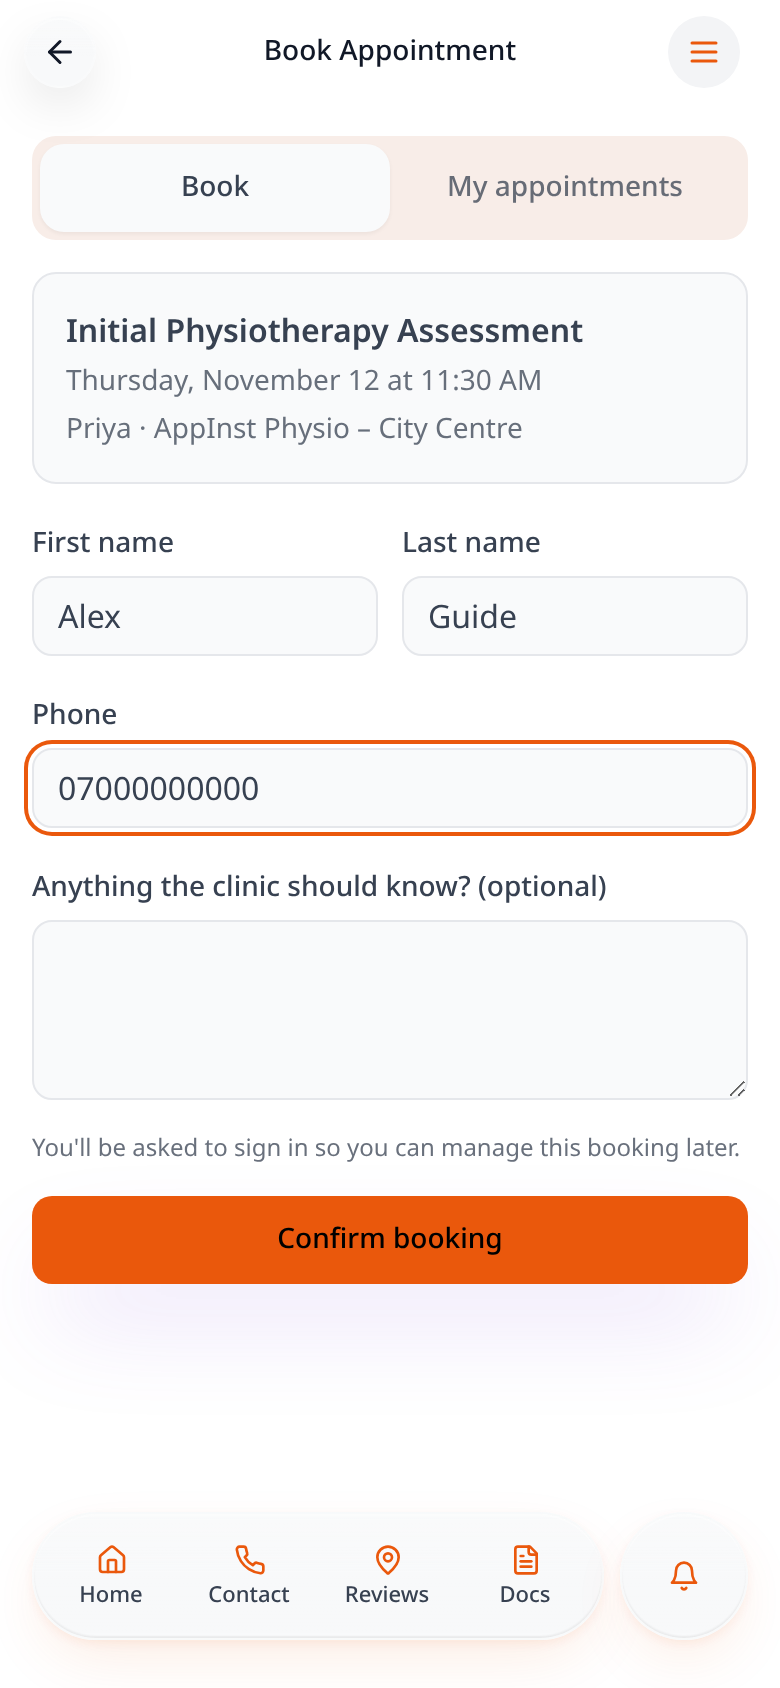
Enter patient details
Enter the patient name and required contact details; notes are optional and do not need to be filled to book.
- 12
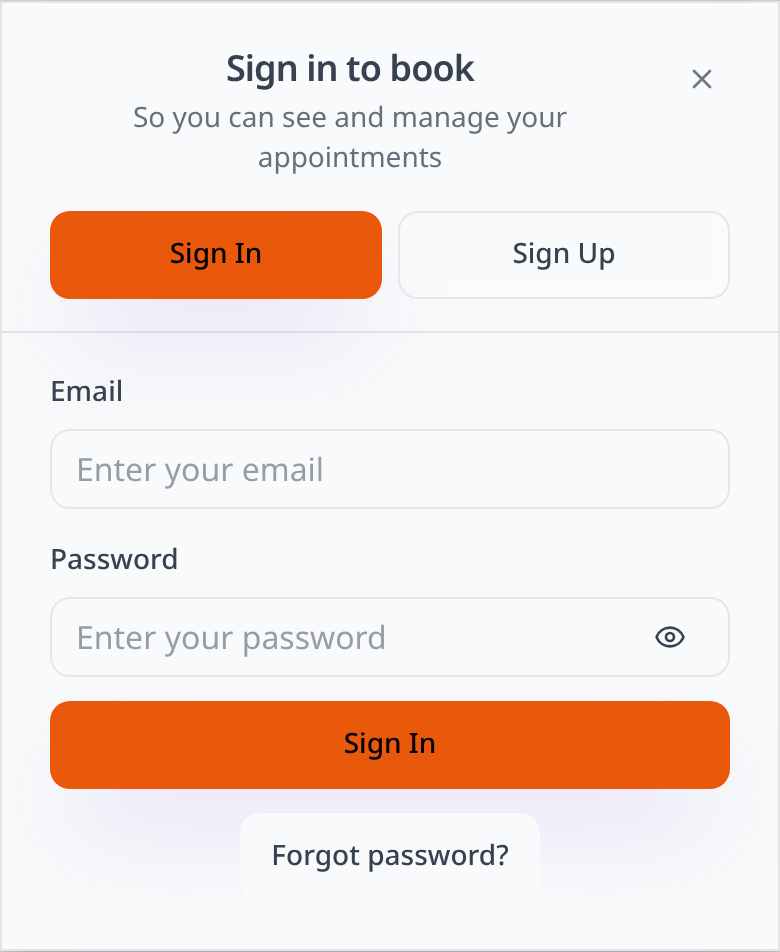
Sign in before confirming
Sign in or create an app account so the patient can view and manage their appointments later.
- 13
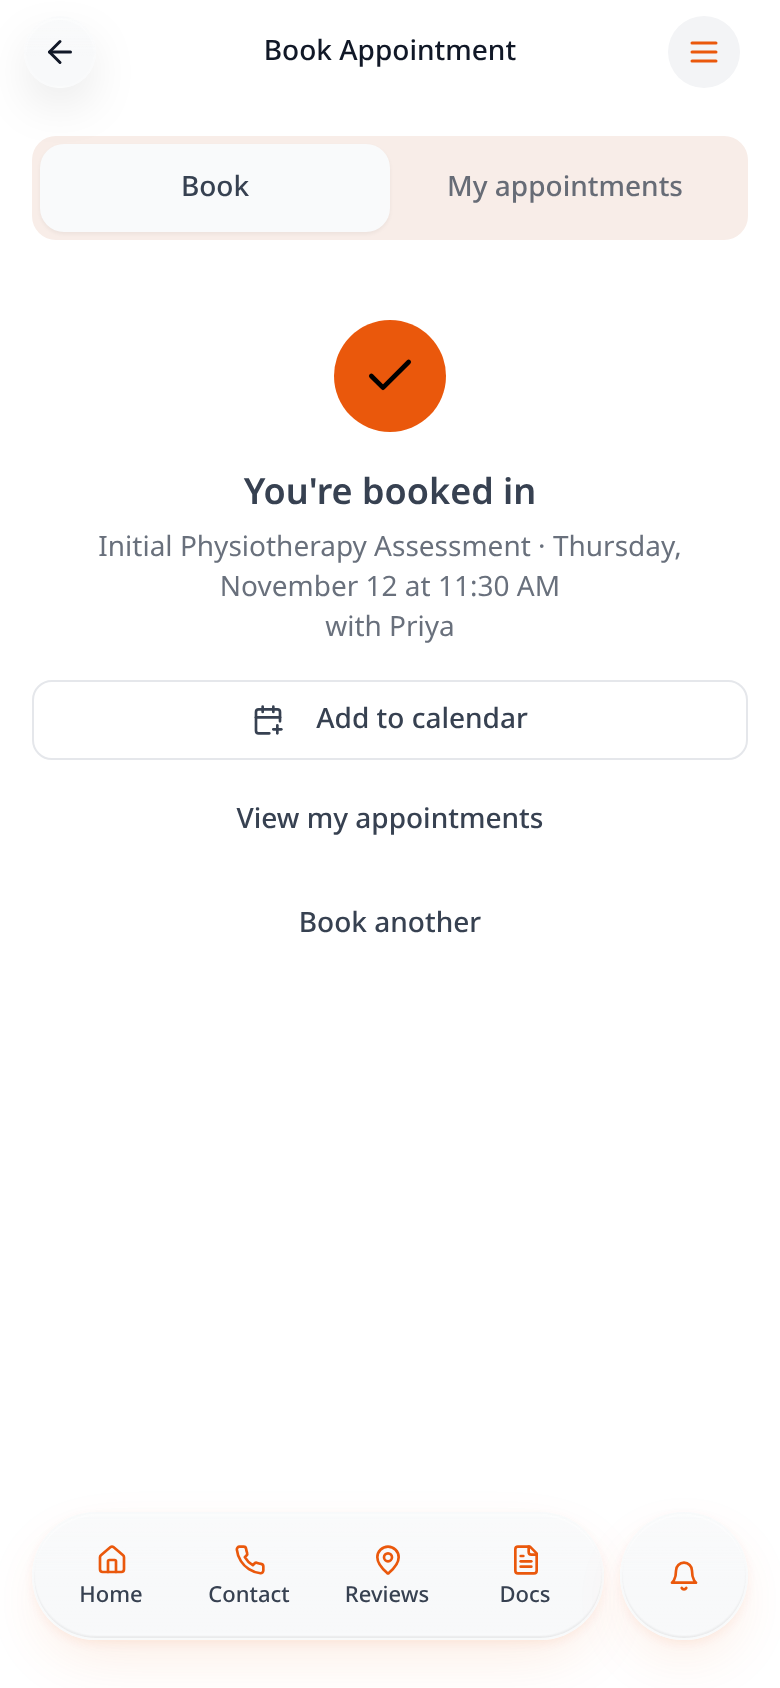
Check the confirmation
A successful booking stays on this confirmation screen; use Add to calendar or View my appointments.
- 14
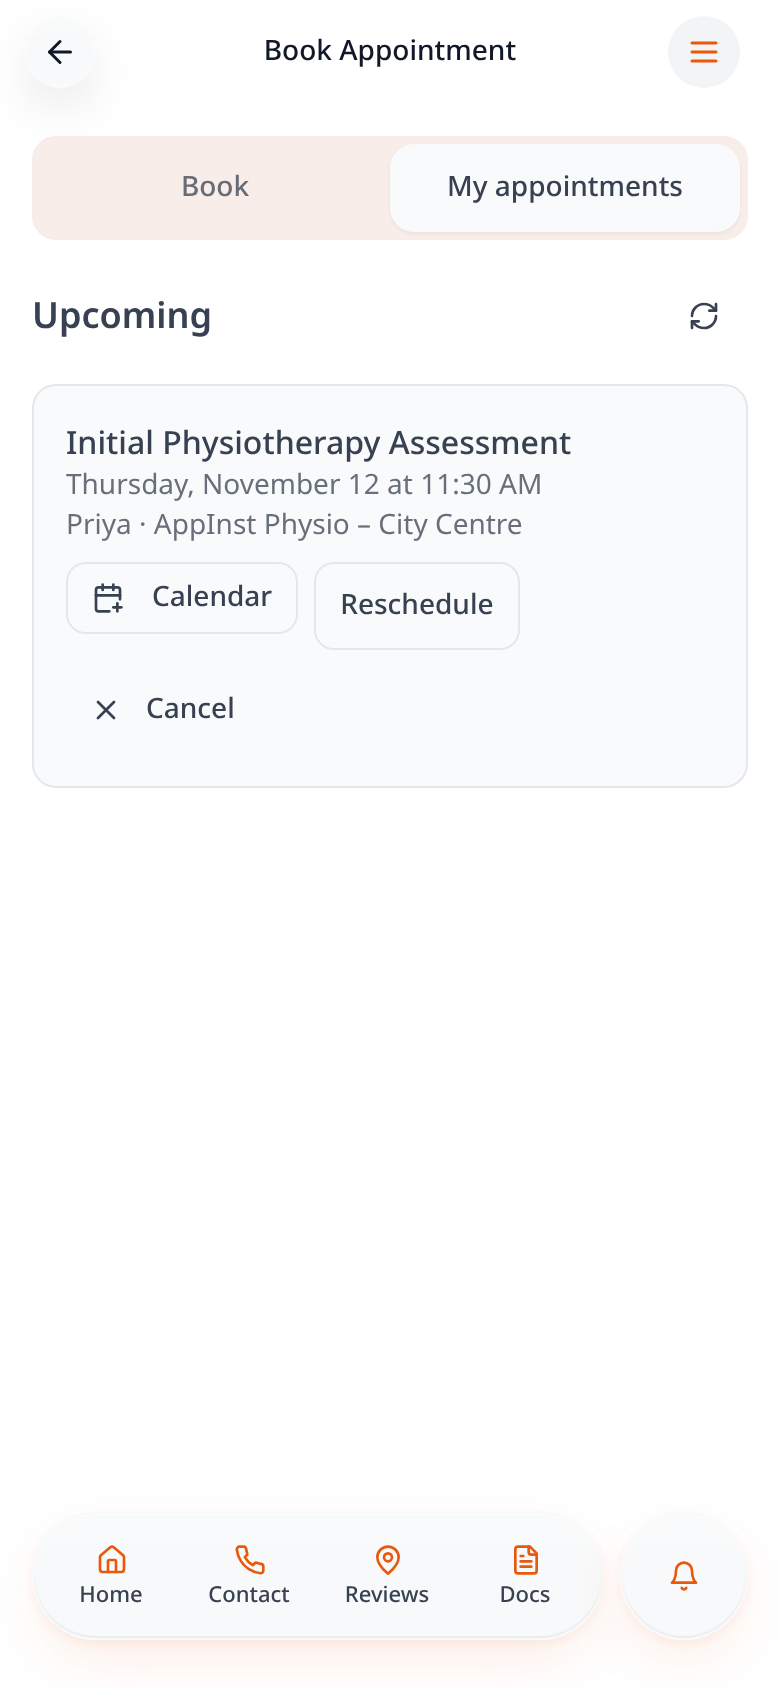
View and change appointments
Open My appointments to see saved bookings; Reschedule opens the date/time picker and Move booking submits the new time, when your change rules permit it.
- 15
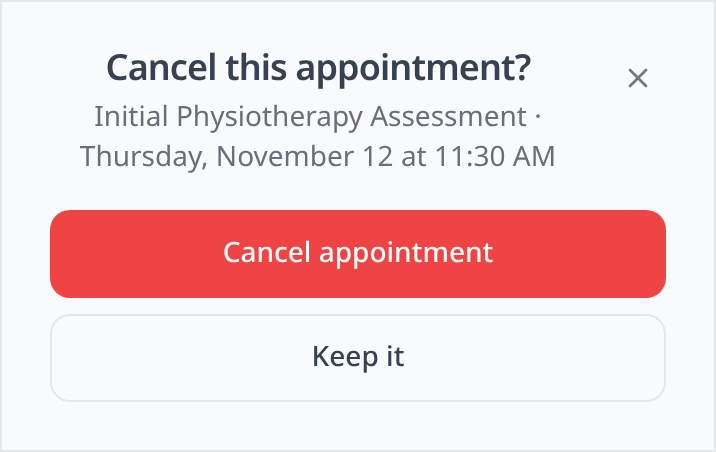
Confirm a cancellation
Select Cancel on the appointment and confirm Cancel appointment; inside the change deadline, contact the clinic instead.
- 16
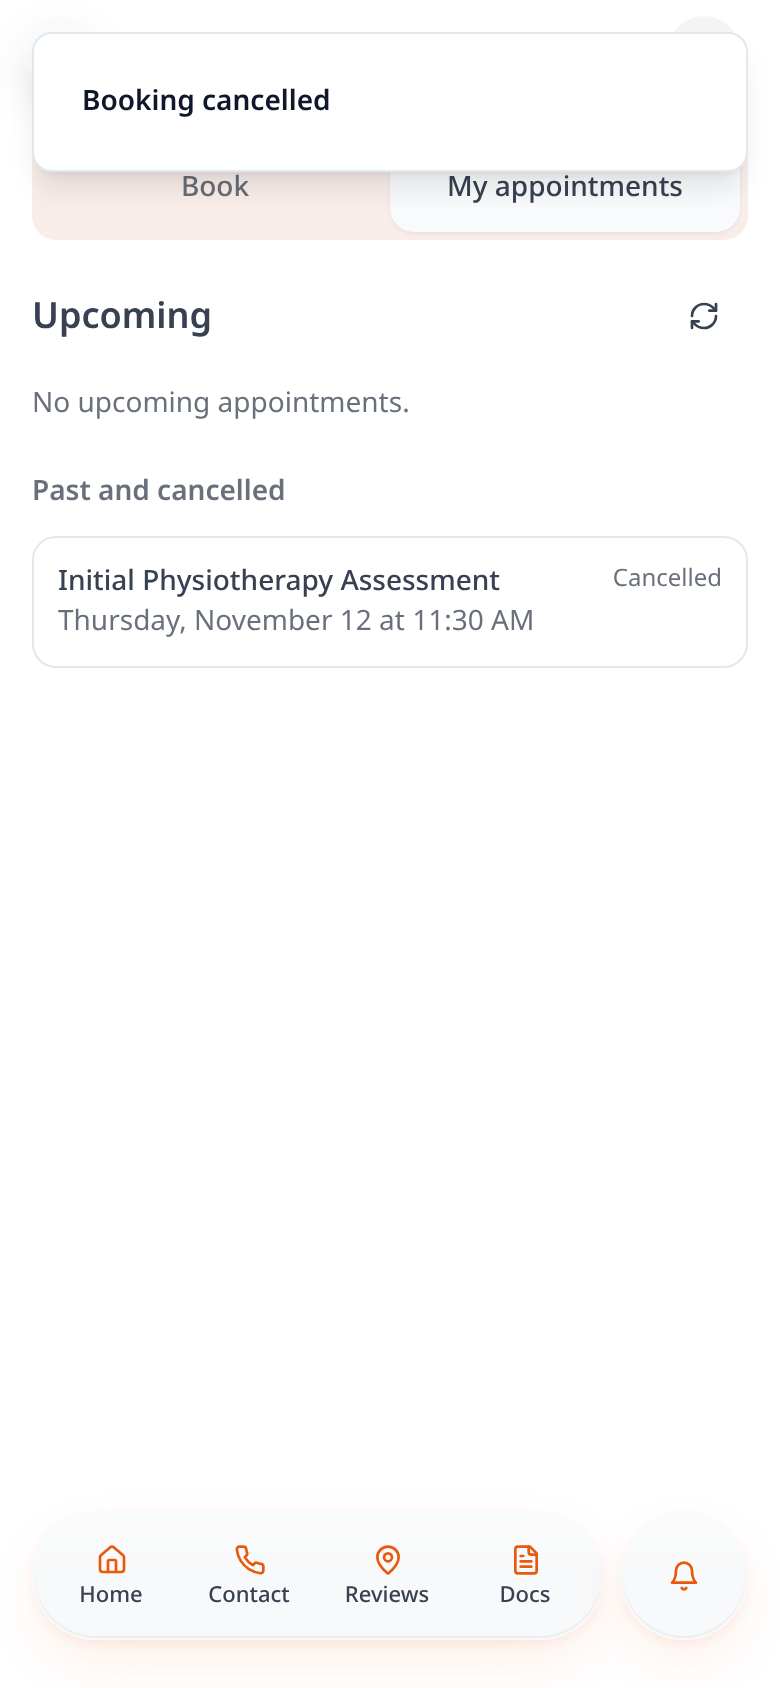
Check cancellation history
The appointment leaves Upcoming and appears under Past and cancelled; this demo booking was really cancelled in Cliniko.
- 17
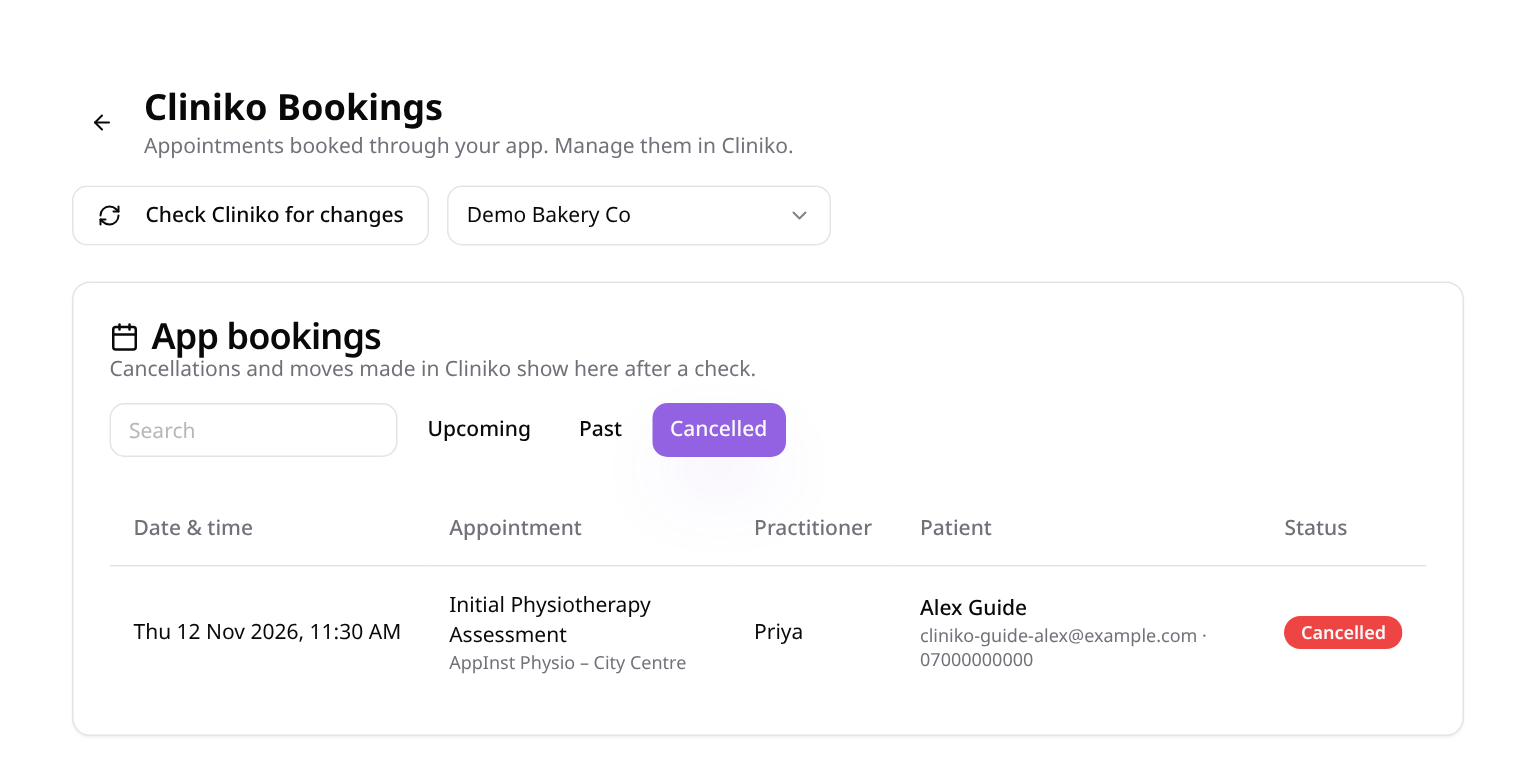
View bookings in Data Manager
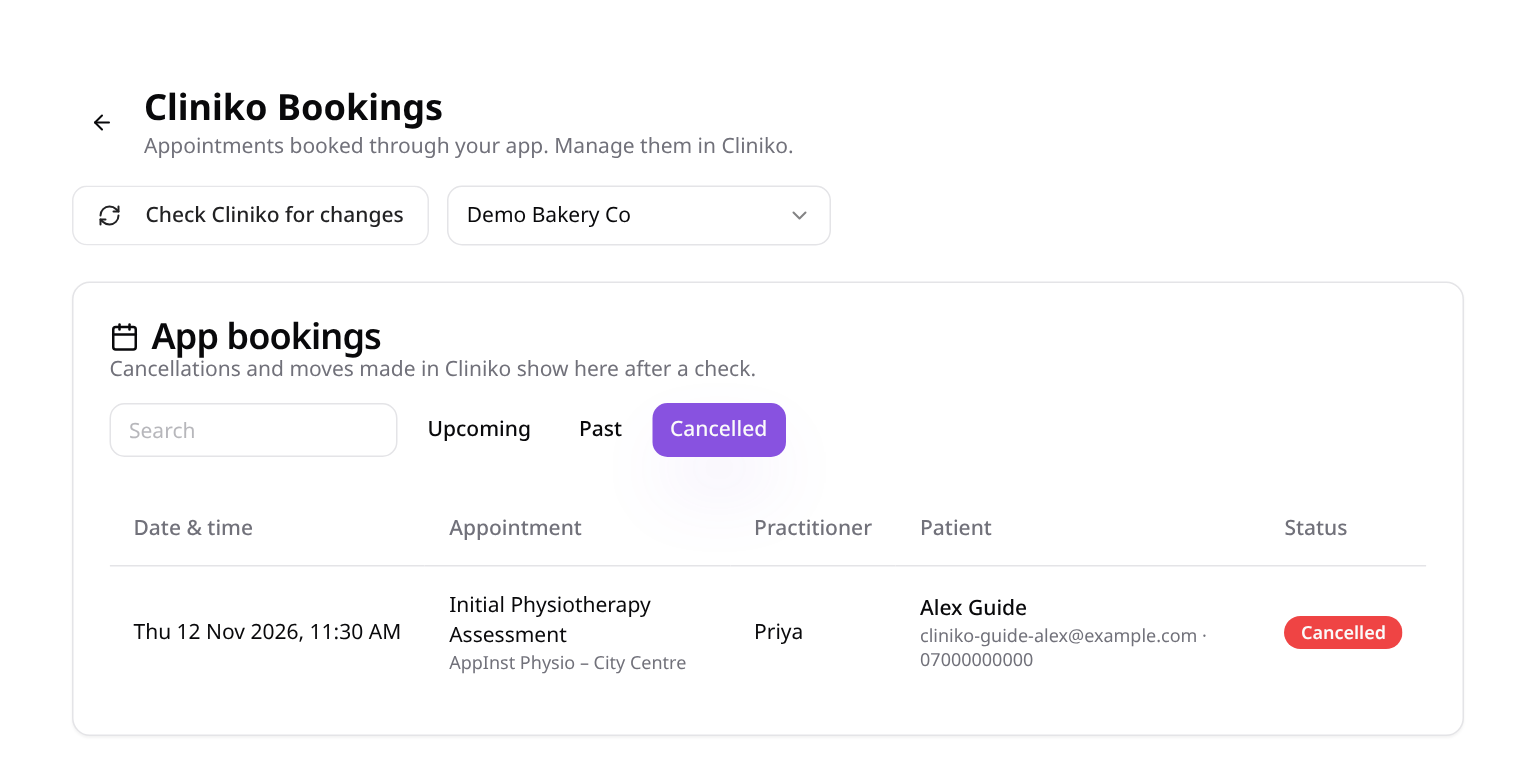
Open Data Manager → Cliniko Bookings, select your app, and use Upcoming, Past, Cancelled or Search to find app-booked appointments.
- 18
Check Cliniko for changes
Select Check Cliniko for changes to refresh upcoming app bookings after clinic-side moves or cancellations; clinical management remains in Cliniko.
Booking and cancellation were verified using a fictional demo patient. Rescheduling instructions describe the available controls, not a completed move. No confirmation-email delivery was verified; check your Cliniko communication settings separately.